
I came up with this idea when I decided to make a very special certificate for everyone who pre-ordered my Izannah Walker Reproduction Doll Making Class in 2009. I really enjoy making these paper dolls. They are based in part on a set of early 1900’s Dennison paper dolls that I own.


The next time you would like a quick doll-making project, gather up your paper, scissors, and glue-pot and make a flat Izzy. Mine carries a certificate in her “book’, but yours could hold and invitation to tea, a thank you note , or simply be a lady of fashion who enjoys playing “dress up”.
Following are instructions.
Instructions:
1. I took a photograph of one of my original Izannahs, sized the photo to fit on an 8- 1/2 x 11 inch sheet of card stock and printed it in high quality. If you don’t have an antique Izannah, a newly-made Izannah inspired doll would work just as well. You could also use pencils or watercolors to draw or paint an Izzy.
2. Use rubber cement to adhere a second piece of cardstock to the back side of your printed image. Weight down with a heavy book until dry.
3. Draw a pattern for the base of your paper doll. I used two shapes that resemble half circles, one slightly larger than the other. Cut out your pattern pieces.
4. Trace the larger pattern piece onto the bottom of your printed Izzy. Do not draw a line over the doll’s legs. Trace the smaller pattern piece onto an empty area of your background card stock.
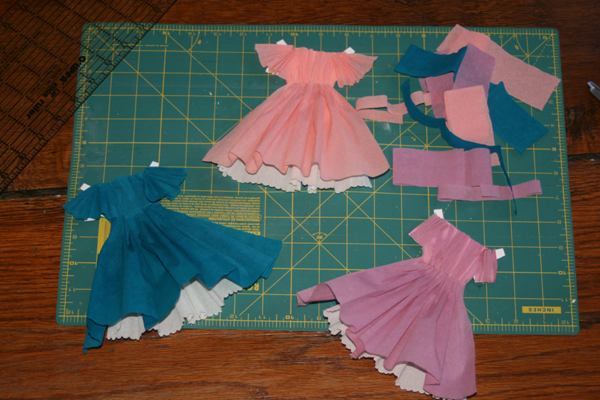
5. Using scissors and an X-ACTO knife, carefully cut out the paper doll and stand. If you do not want to use an X-ACTO knife, you can trace both of the pattern pieces for the stand onto background cardstock, cut out the paper doll and stand entirely with scissors and then glue the doll to the larger stand piece with rubber cement.
(click on each photo to see it full size)


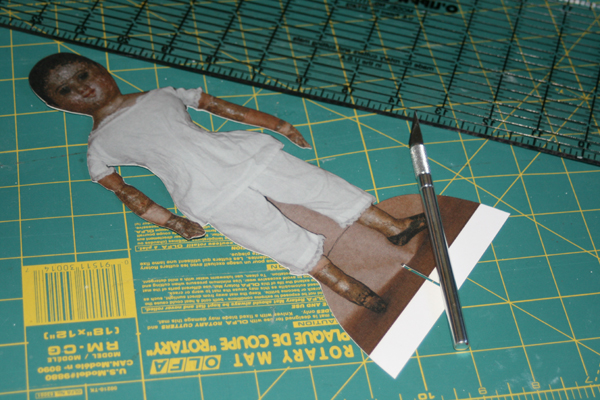


6. Cut slits into both parts of the stand so that the pieces fit together and the doll can stand up.
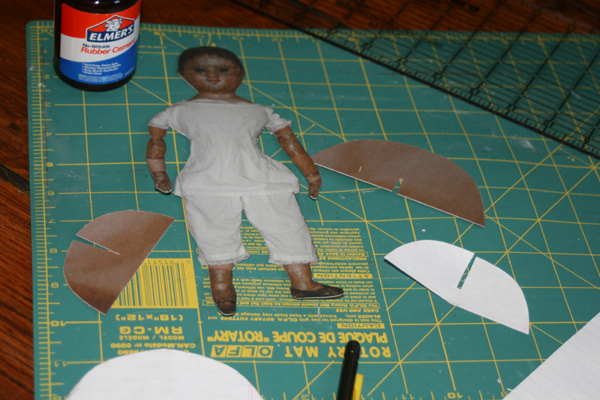
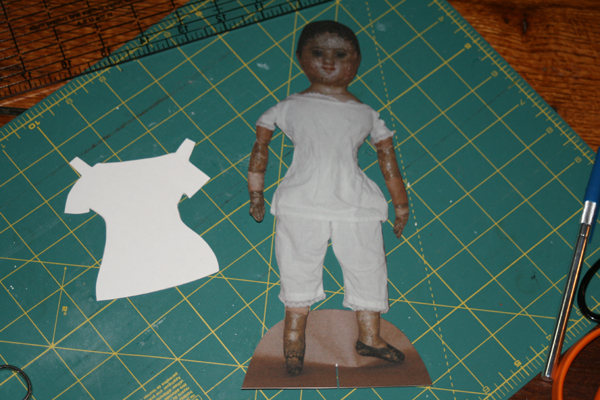
7. Trace a pattern for the doll’s chemise, add shoulder tabs. Cut out pattern. Then trace pattern onto white card stock. Cut out.
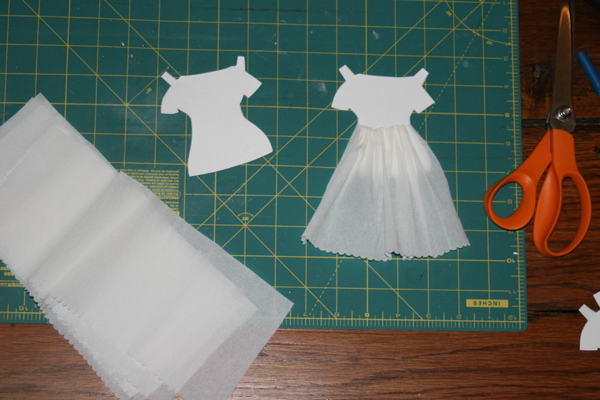
8. The card stock chemise is a base for making a crepe paper dress. Using your imagination, crepe paper, ribbons and buttons, fashion a dress by cutting out a skirt, bodice and sleeves, then glue them directly onto the card stock. Tip: Pinking shears or scissors with scallop blades make a nice finish for the bottom of crepe paper petticoats and skirts. *In Early American Life magazine, Christmas issue 2005, on page 34 there is an inspiring photograph that shows a bevy of paper dolls dressed in their finest crepe paper frocks.
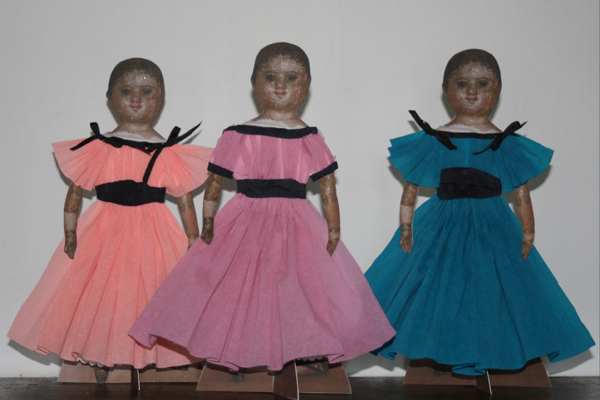
9. Sign and date your paper Izannah.
10. Fold down shoulder tabs. Place dress on your paper doll.
11. Sit back and admire your accomplishment! Smile! Enjoy!
There is still time to pre-order my Izannah class, and it remains on sale, 10% off, through January 1. All pre-orders come with a paper doll just like the ones pictured here and a vintage Izannah Walker post card (while supplies last). Class information here.

Hello Paula,
I know that this is an older posting, but I just recently discovered it. What a fabulous way to “use” your antique dolls while still preserving them! I sooo want to try this idea with some of my antique chinas. Thank you for sharing this easy and lovely bit of creativity.
Jennifer,
You are quite welcome. They were fun to make. I hope you enjoy making some of your own. China doll paper dolls should be fabulous. You are going to have such fun dressing them!
Paula