Antique Doll Furniture · antique dolls · Antique Izannah Walker Dolls · Celebrations · Doll Accessories · Izannah Walker birthday · Izannah Walker Project Ideas · Recipes

A Peek Behind the Scenes at What Goes On Before each Annual Birthday Party

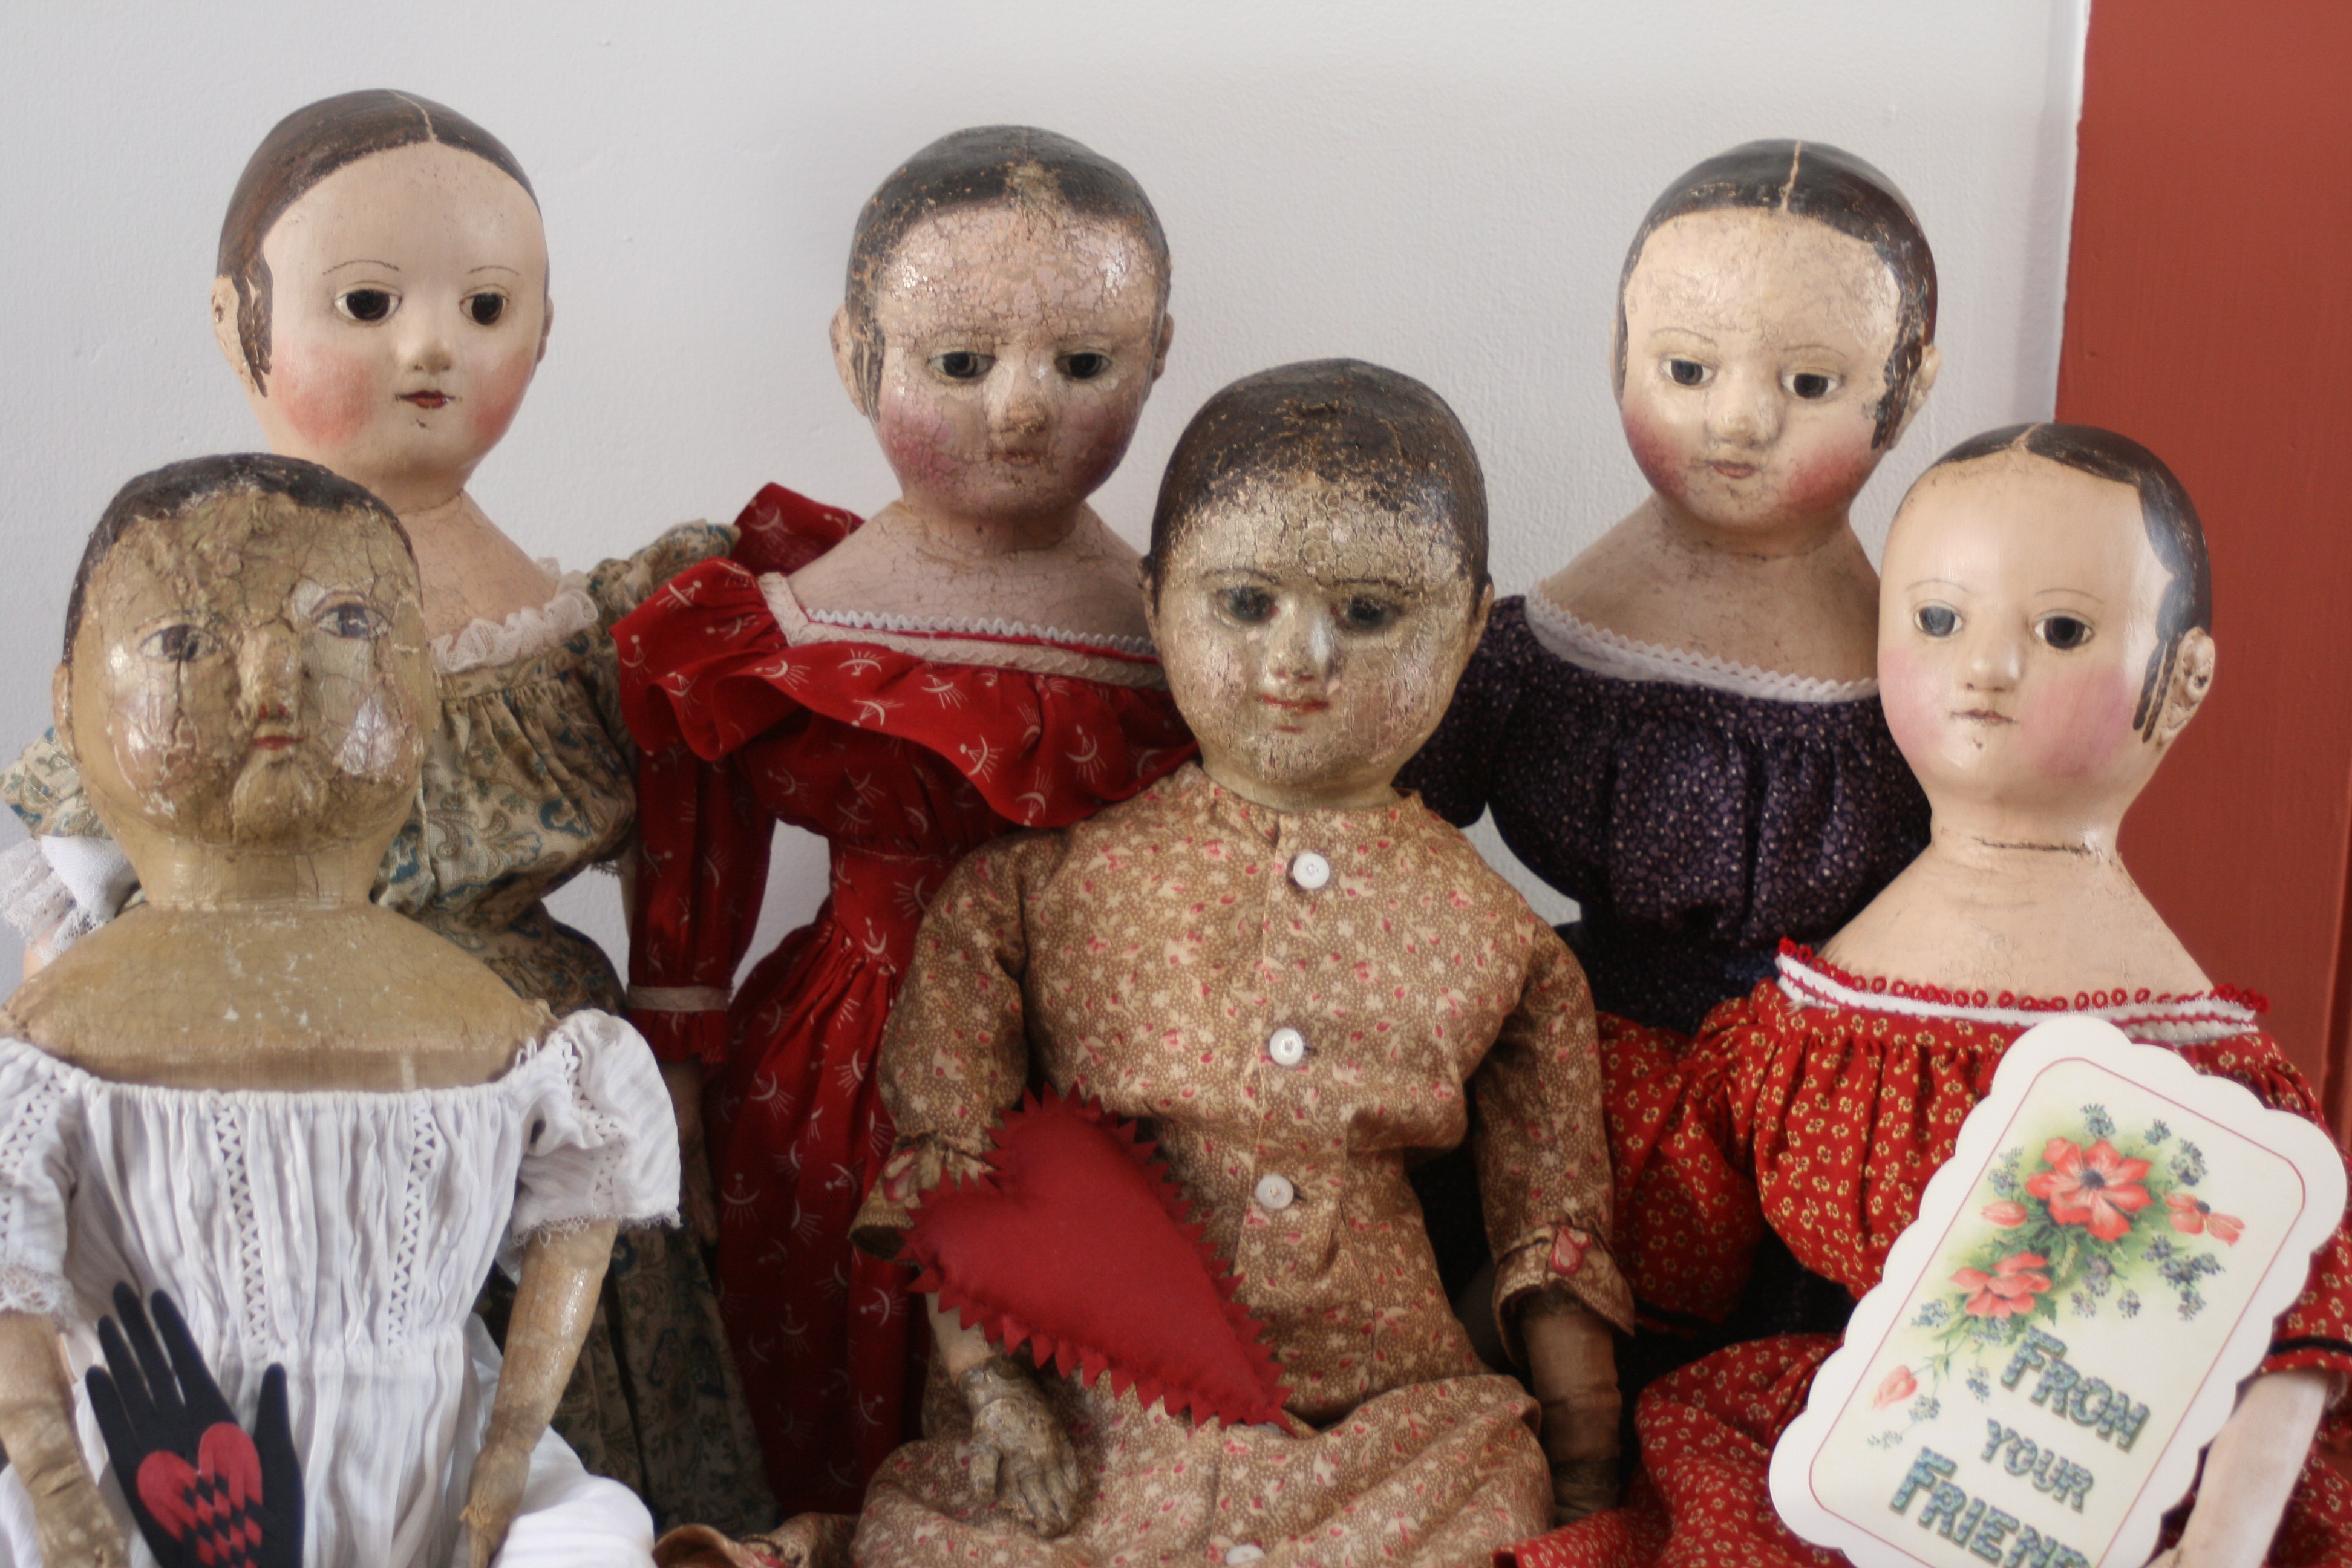
I had fully intended to write “this look behind the scenes” post yesterday, but when I sat down to write I actually fell asleep sitting up! LOL It’s been such a busy week that apparently my body decided I really needed a nap. The thought that it would undoubtedly be a much more coherent post if I waited to write it until today kept me from feeling too guilty. I hope this inspires you to play with your dolls! You’re never too old to enjoy the magic of dolls…

Even Cleaning Is Much More Fun When It’s Doll Sized

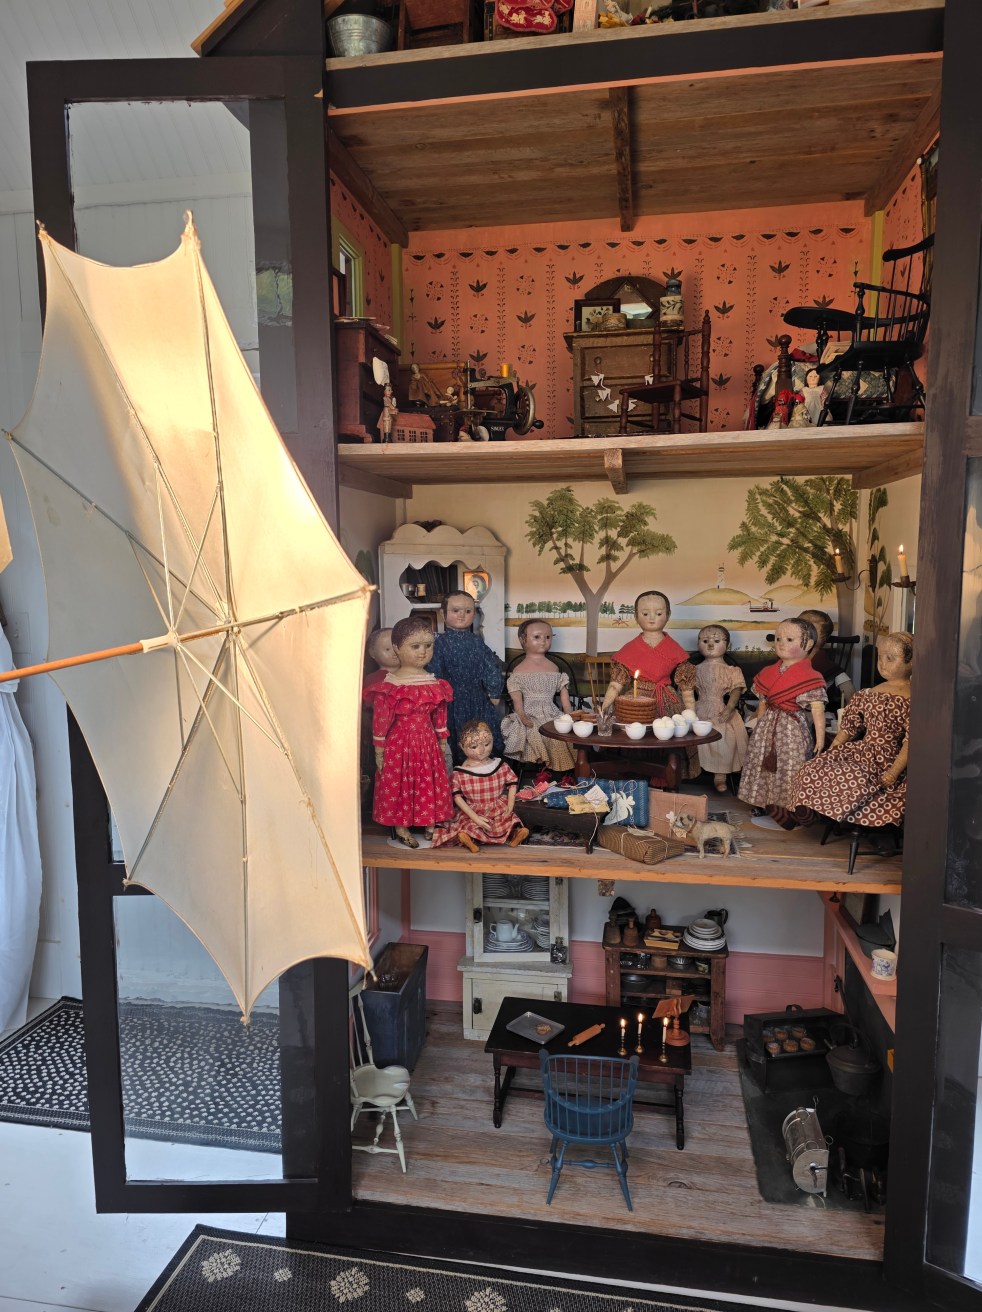
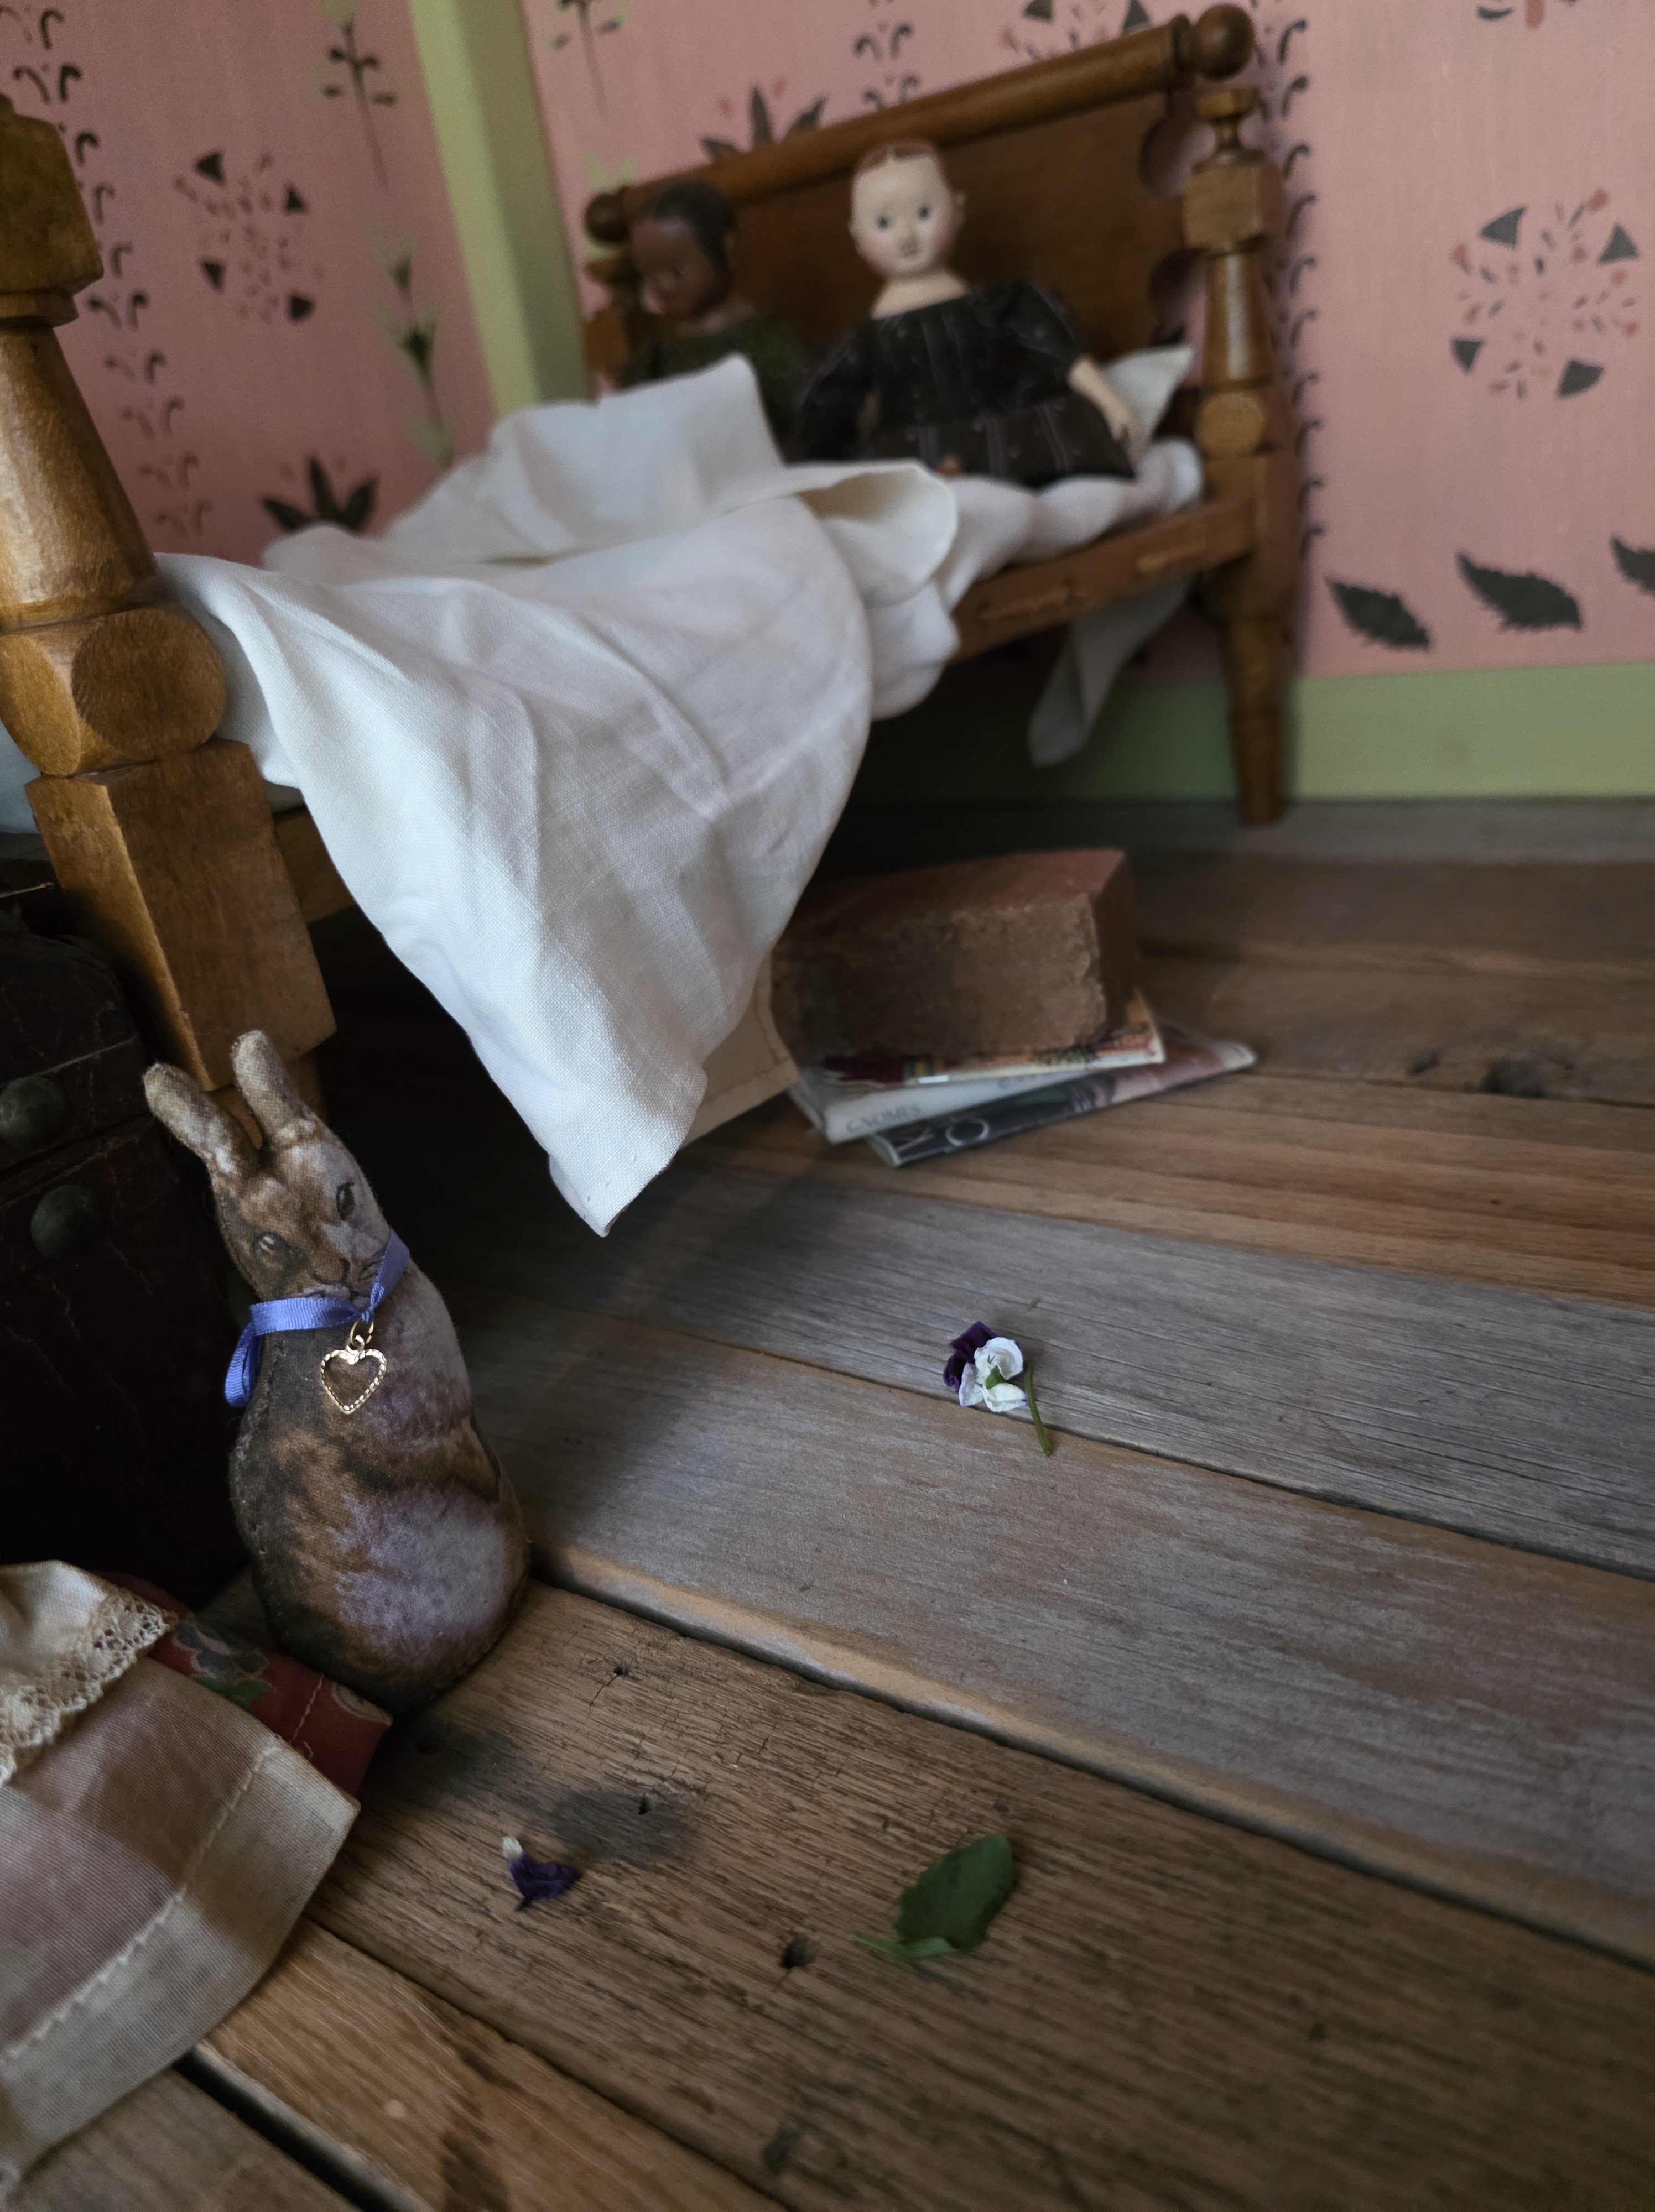
Just like in real life, the first thing on the list of party preparations is cleaning! I started cleaning the doll’s house about two weeks prior to the party. I basically dusted, swept, tidied, washed dishes, and cleaned windows. The antique library steps that you see in some of the photos are what I use to reach the bedroom and the attic.

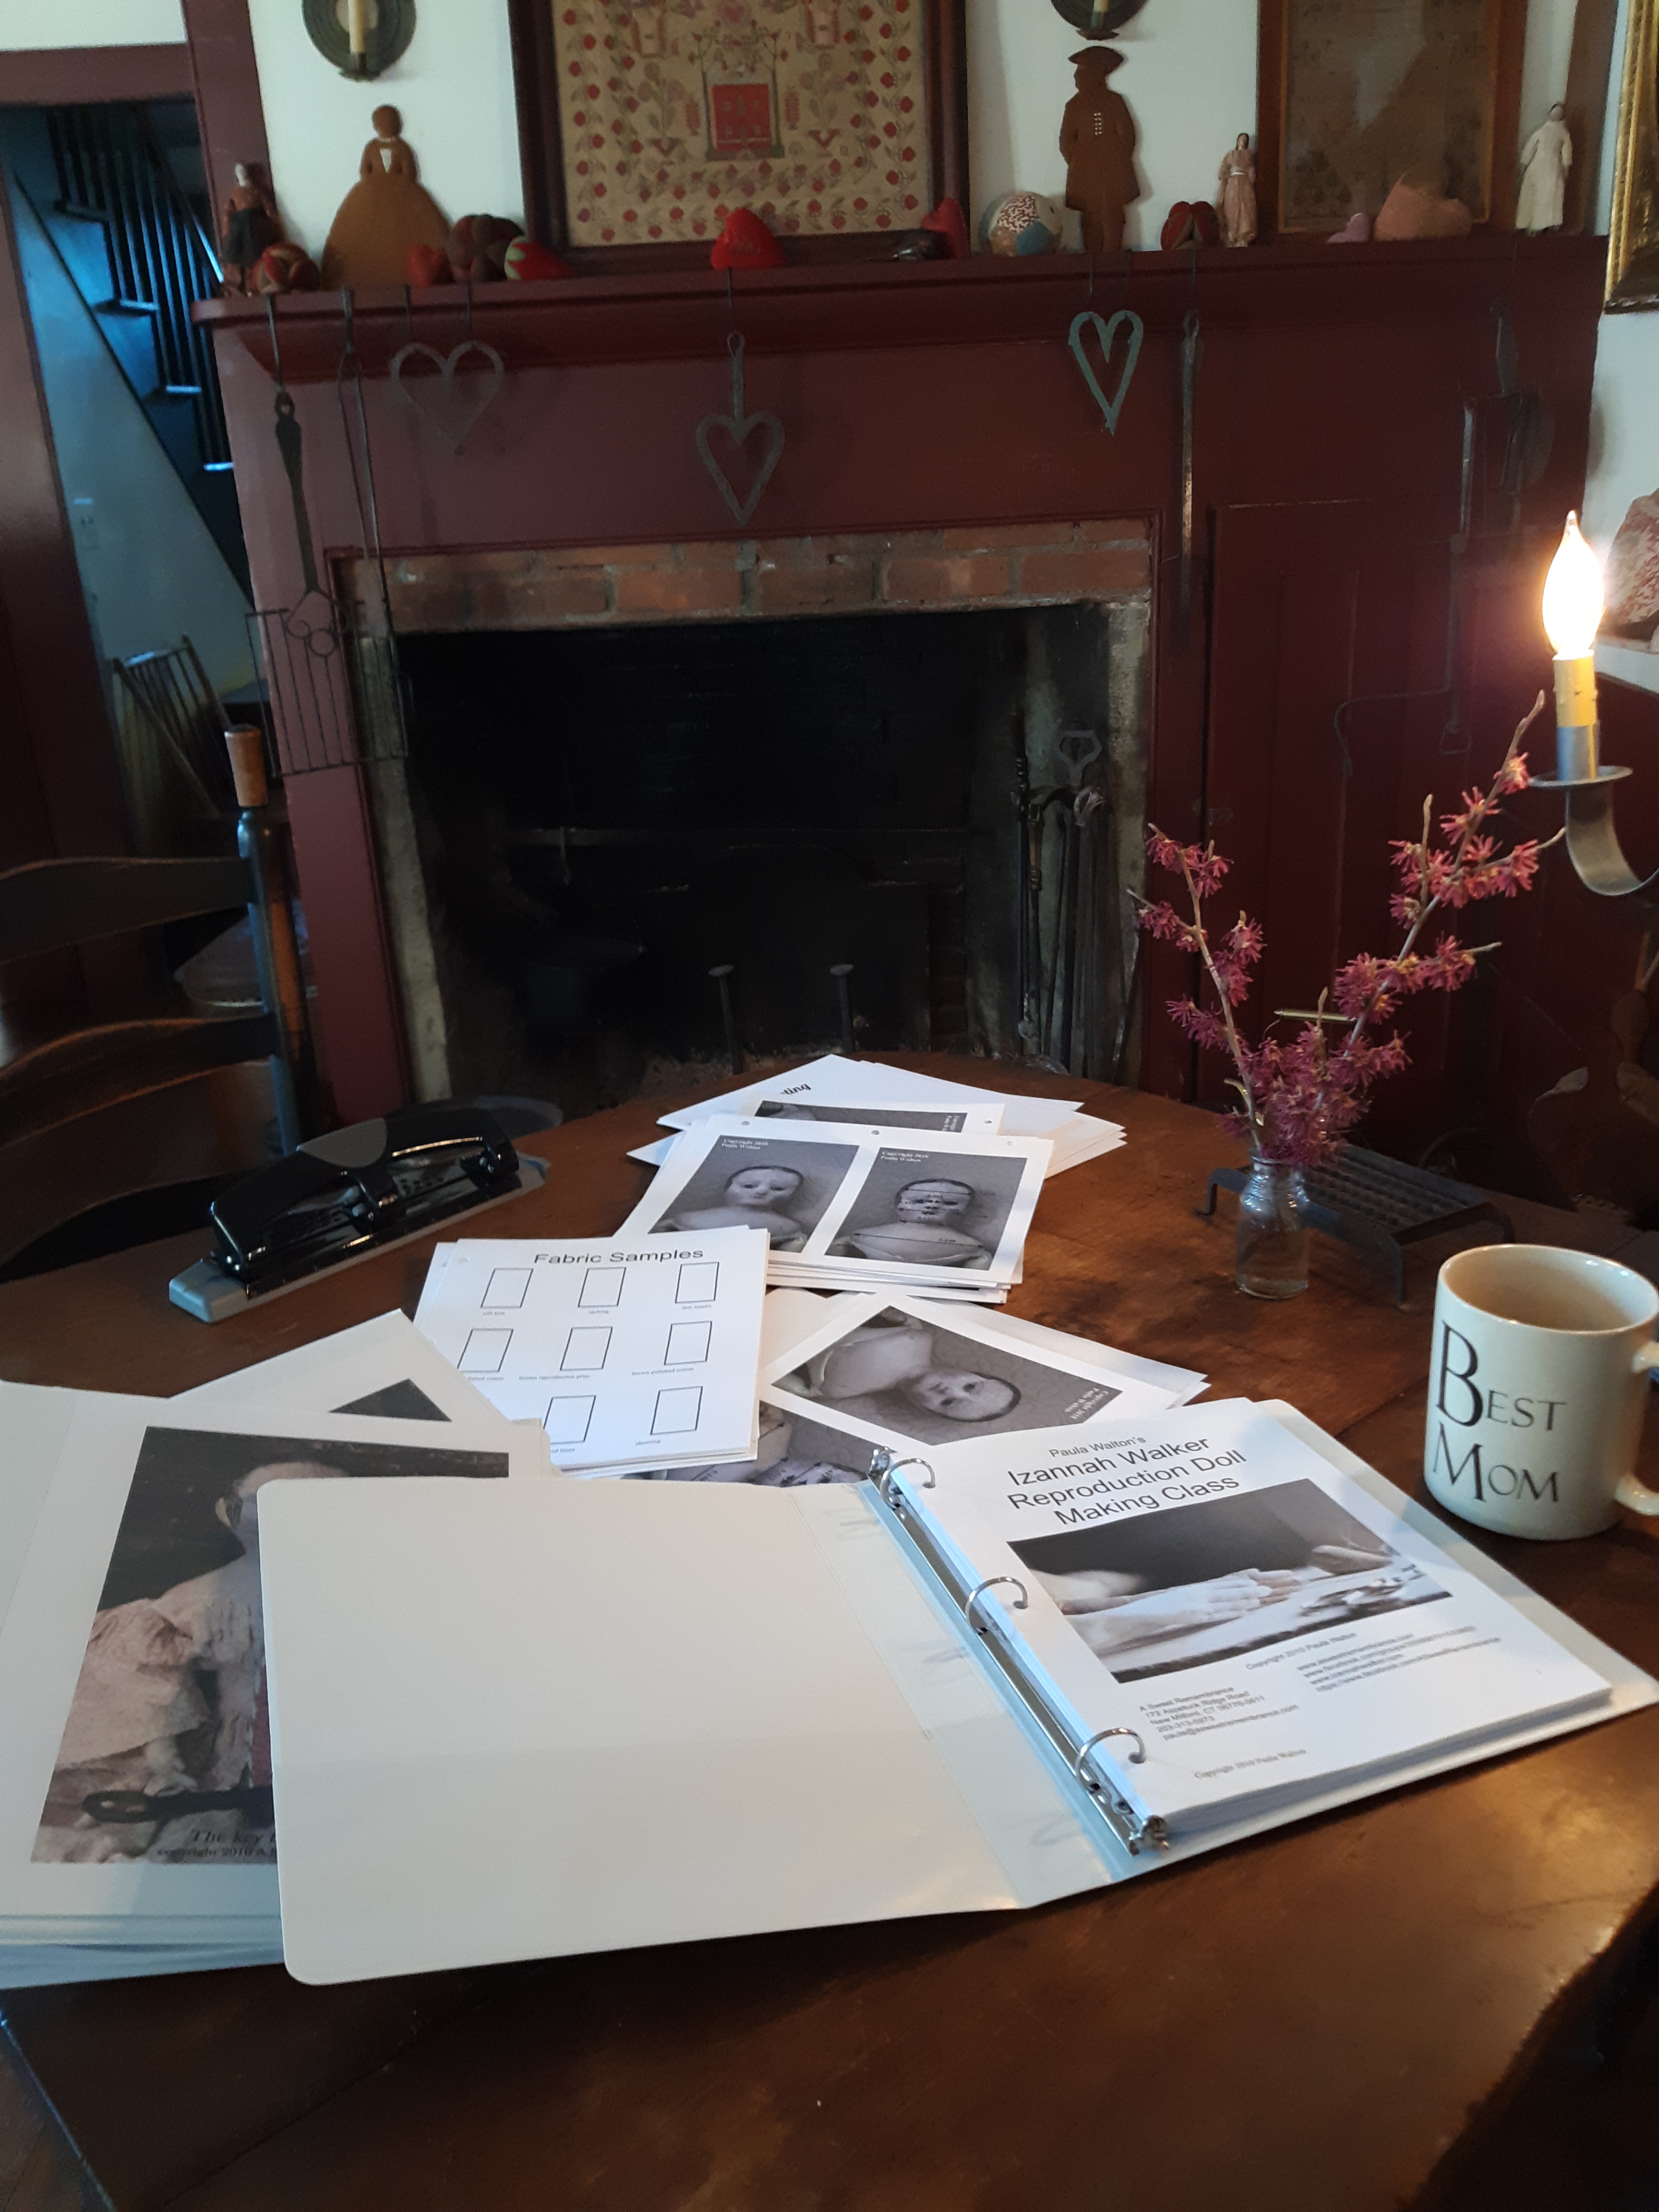
I love my painting studio! It’s filled with windows and generally has wonderful light all day long. When the week prior to the party started to have weather forecasts that were filled with dark clouds and rainy days I knew that I might run into difficulties trying to photograph the doll’s celebration and all of the little details in their house. My solution was to pull the umbrella photo light stands, that I bought over 20 years ago from local artist and dollmaker Rainie Crawford, out of the top floor of my tack barn. At the time that I bought the lights my youngest son was getting ready to apply to several art schools. I knew that I was going to have to photograph his portfolio and thought they would also be great when photographing my own work. The lights were far from new when I acquired them, as Rainie had used them for years to photograph her own dolls and bears for the ads she ran offering her patterns for sale in the back pages of popular women’s magazines.

Getting the light stands out of the barn and cleaned up was a chore! The whole time I was cleaning them I was keeping my fingers crossed that in the end they would actually work. Thankfully they still work perfectly and they made such a huge difference! You can’t even tell from the photo images that it was a dark stormy day outside.

P.S. The lights were excellent for photographing portfolios too! He was accepted at both Pratt and University of the Arts, and chose to attend Pratt. He graduated with a degree in illustration which he has used throughout his very diverse career.

Minature Baking Is More Fun Too!

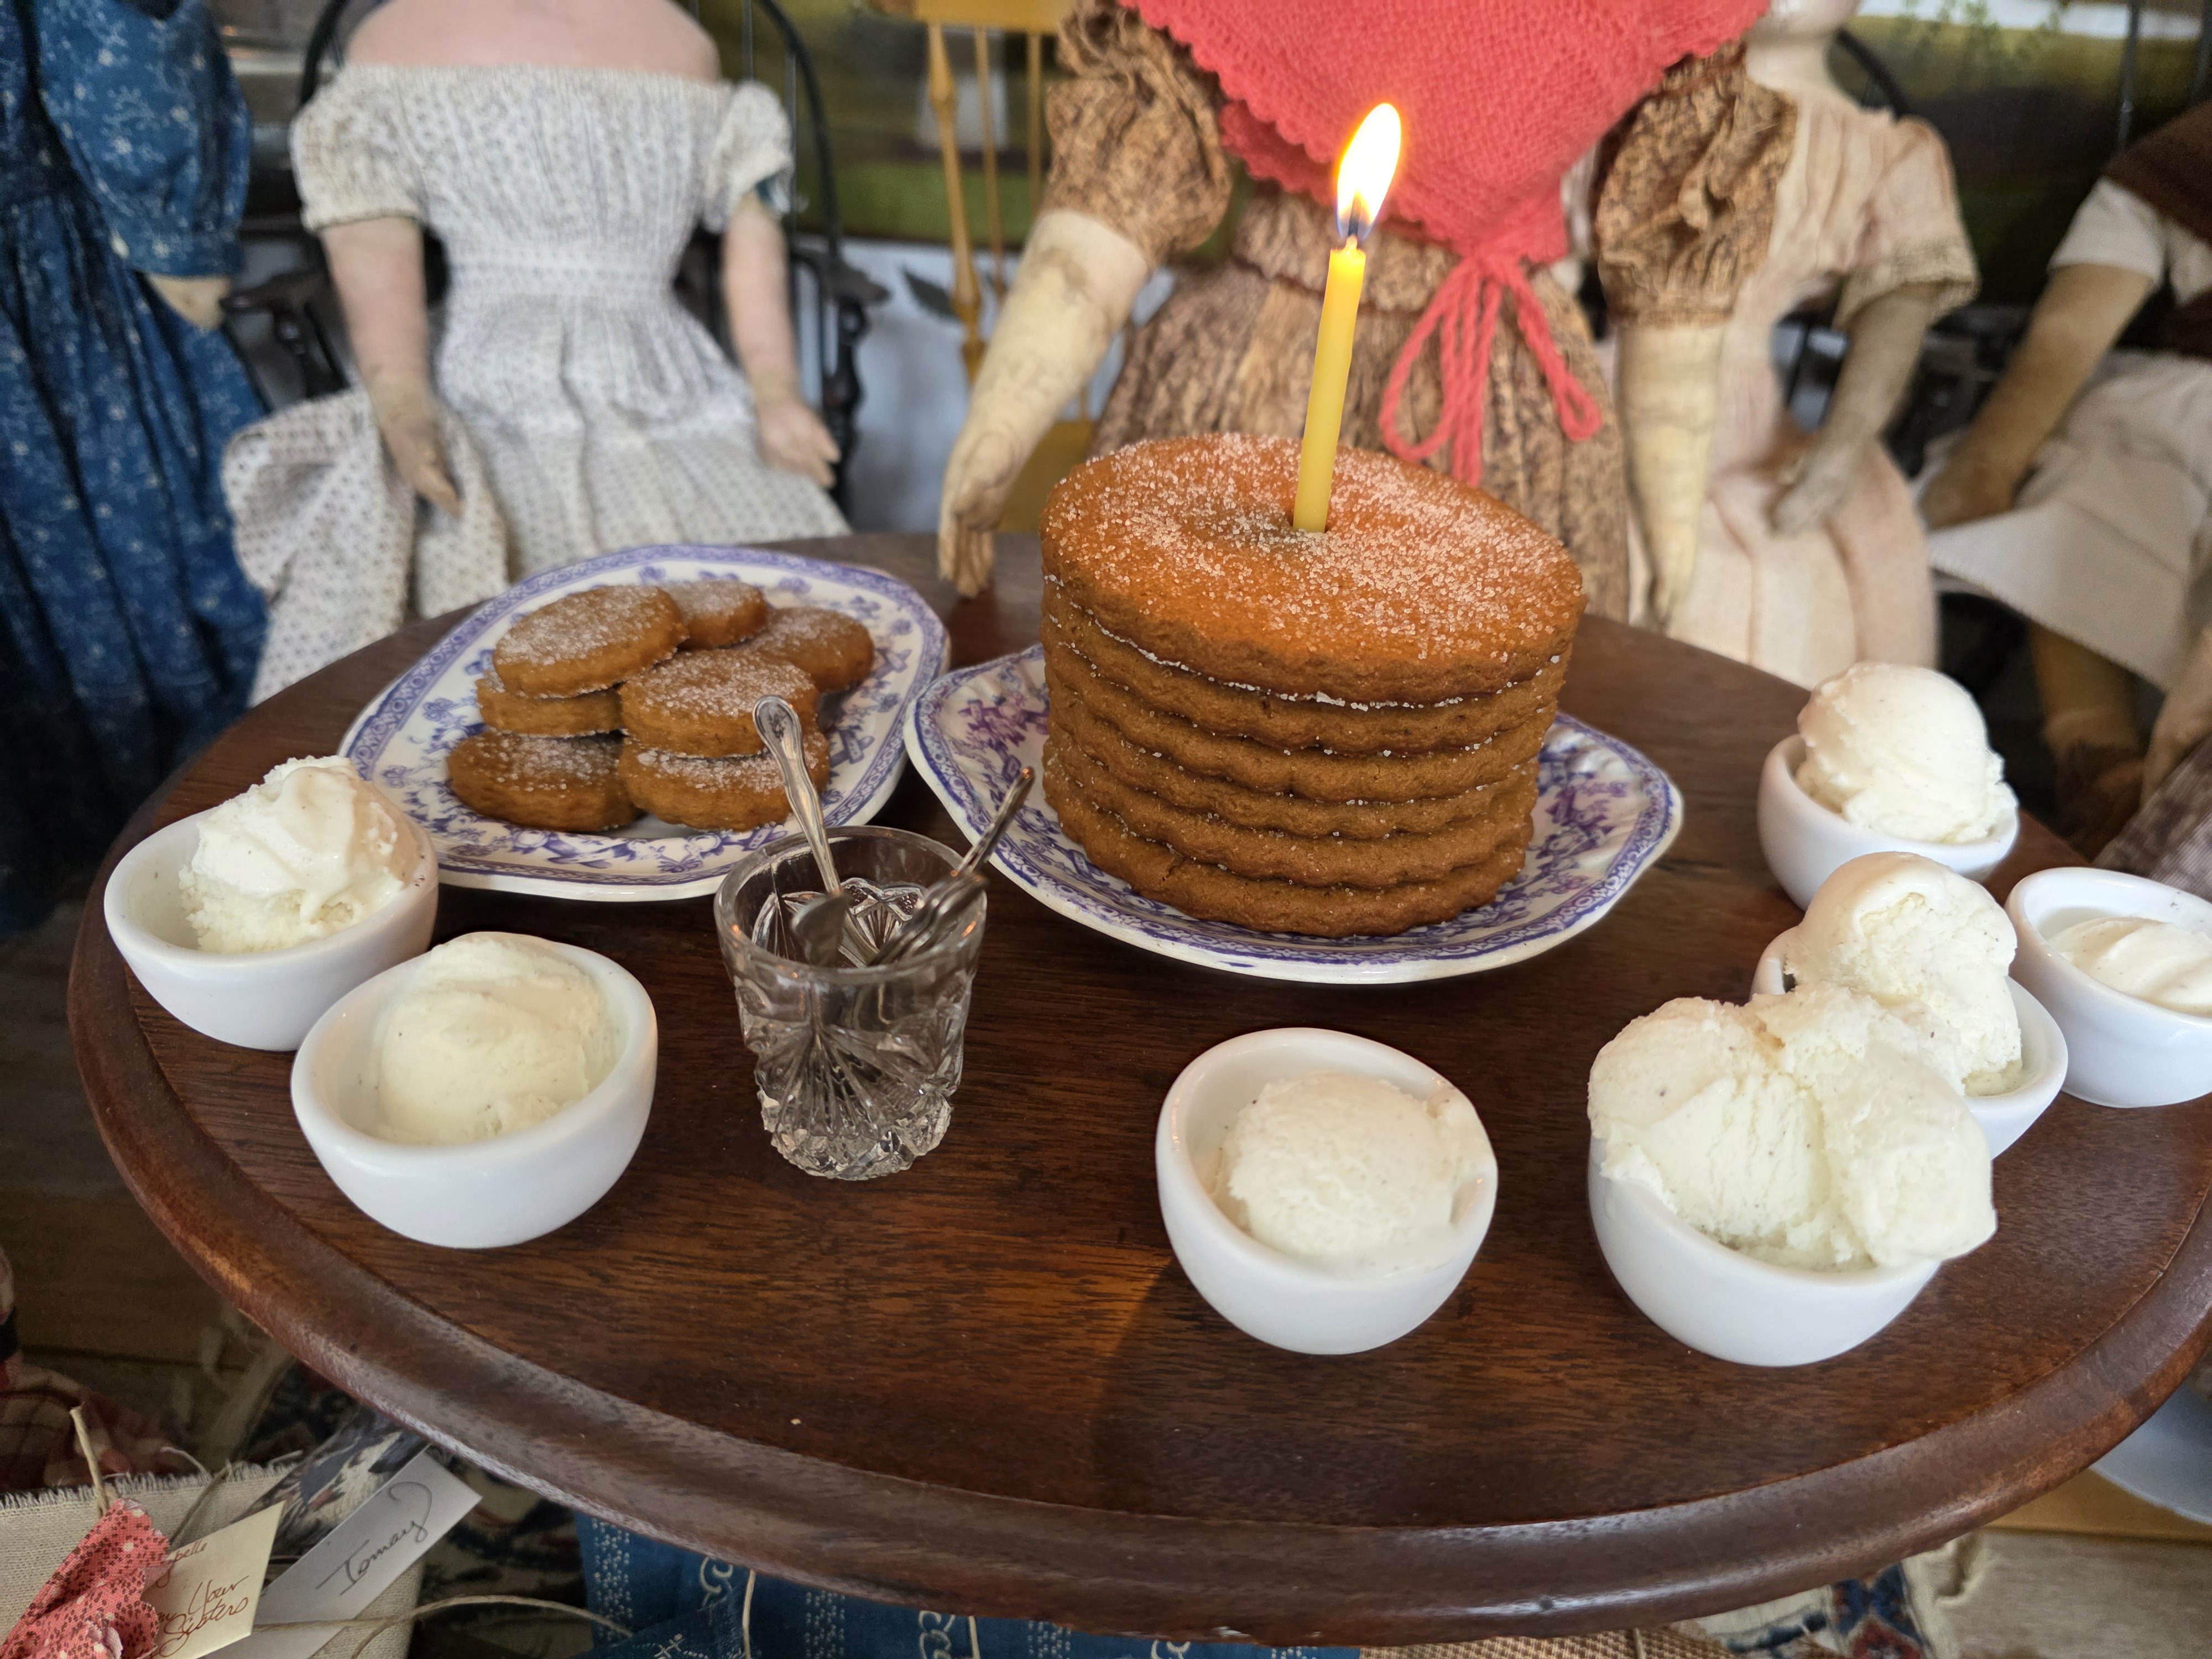
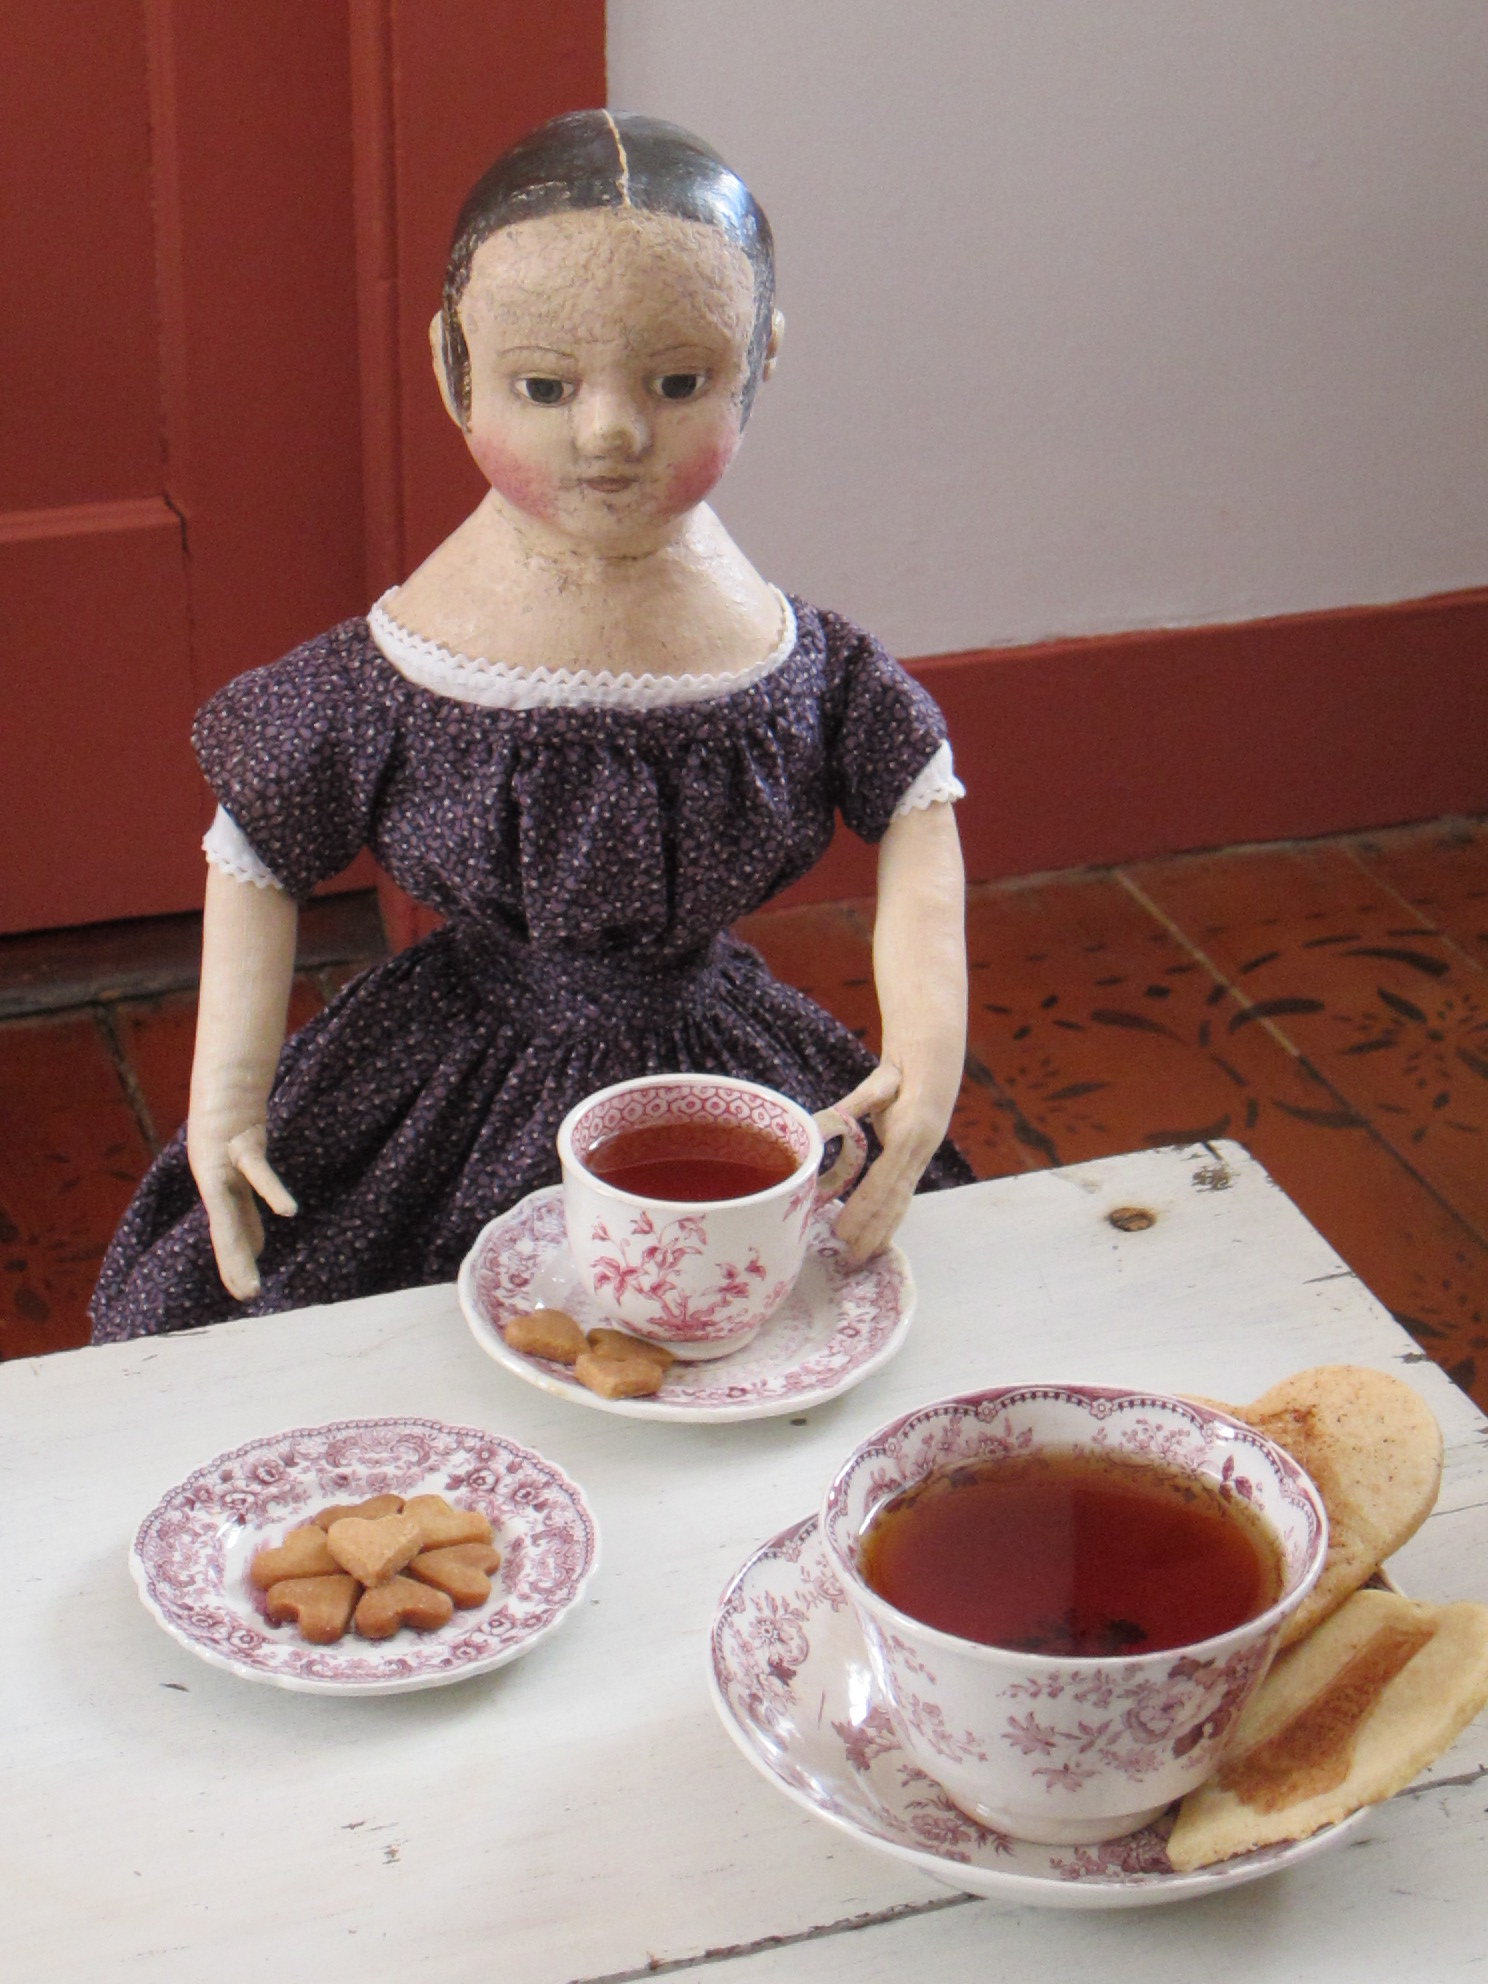
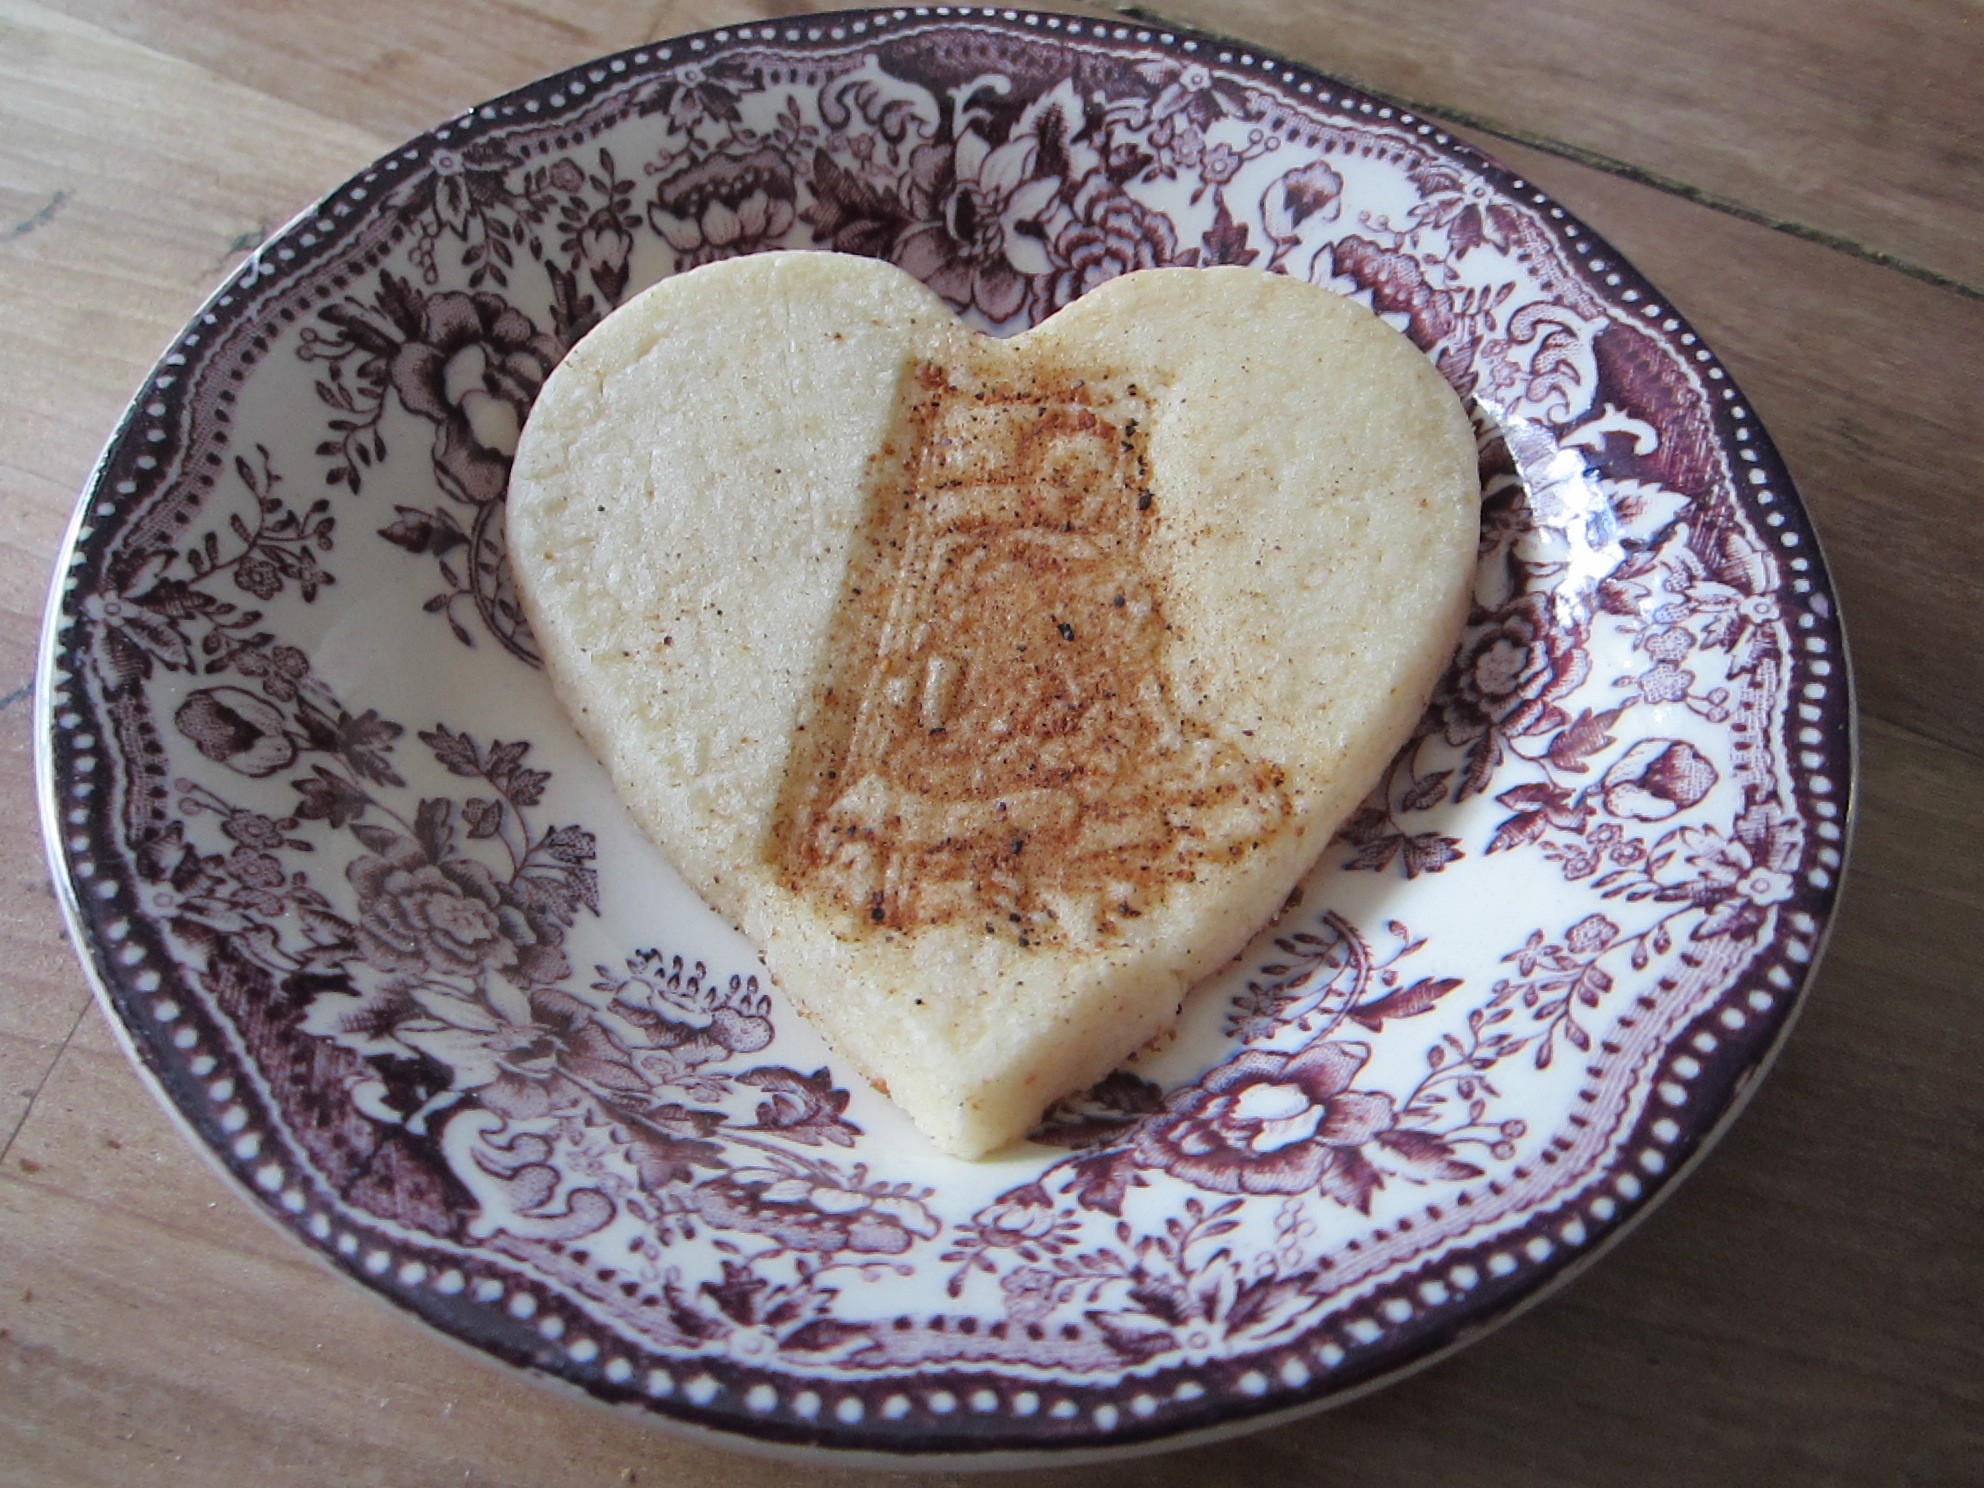
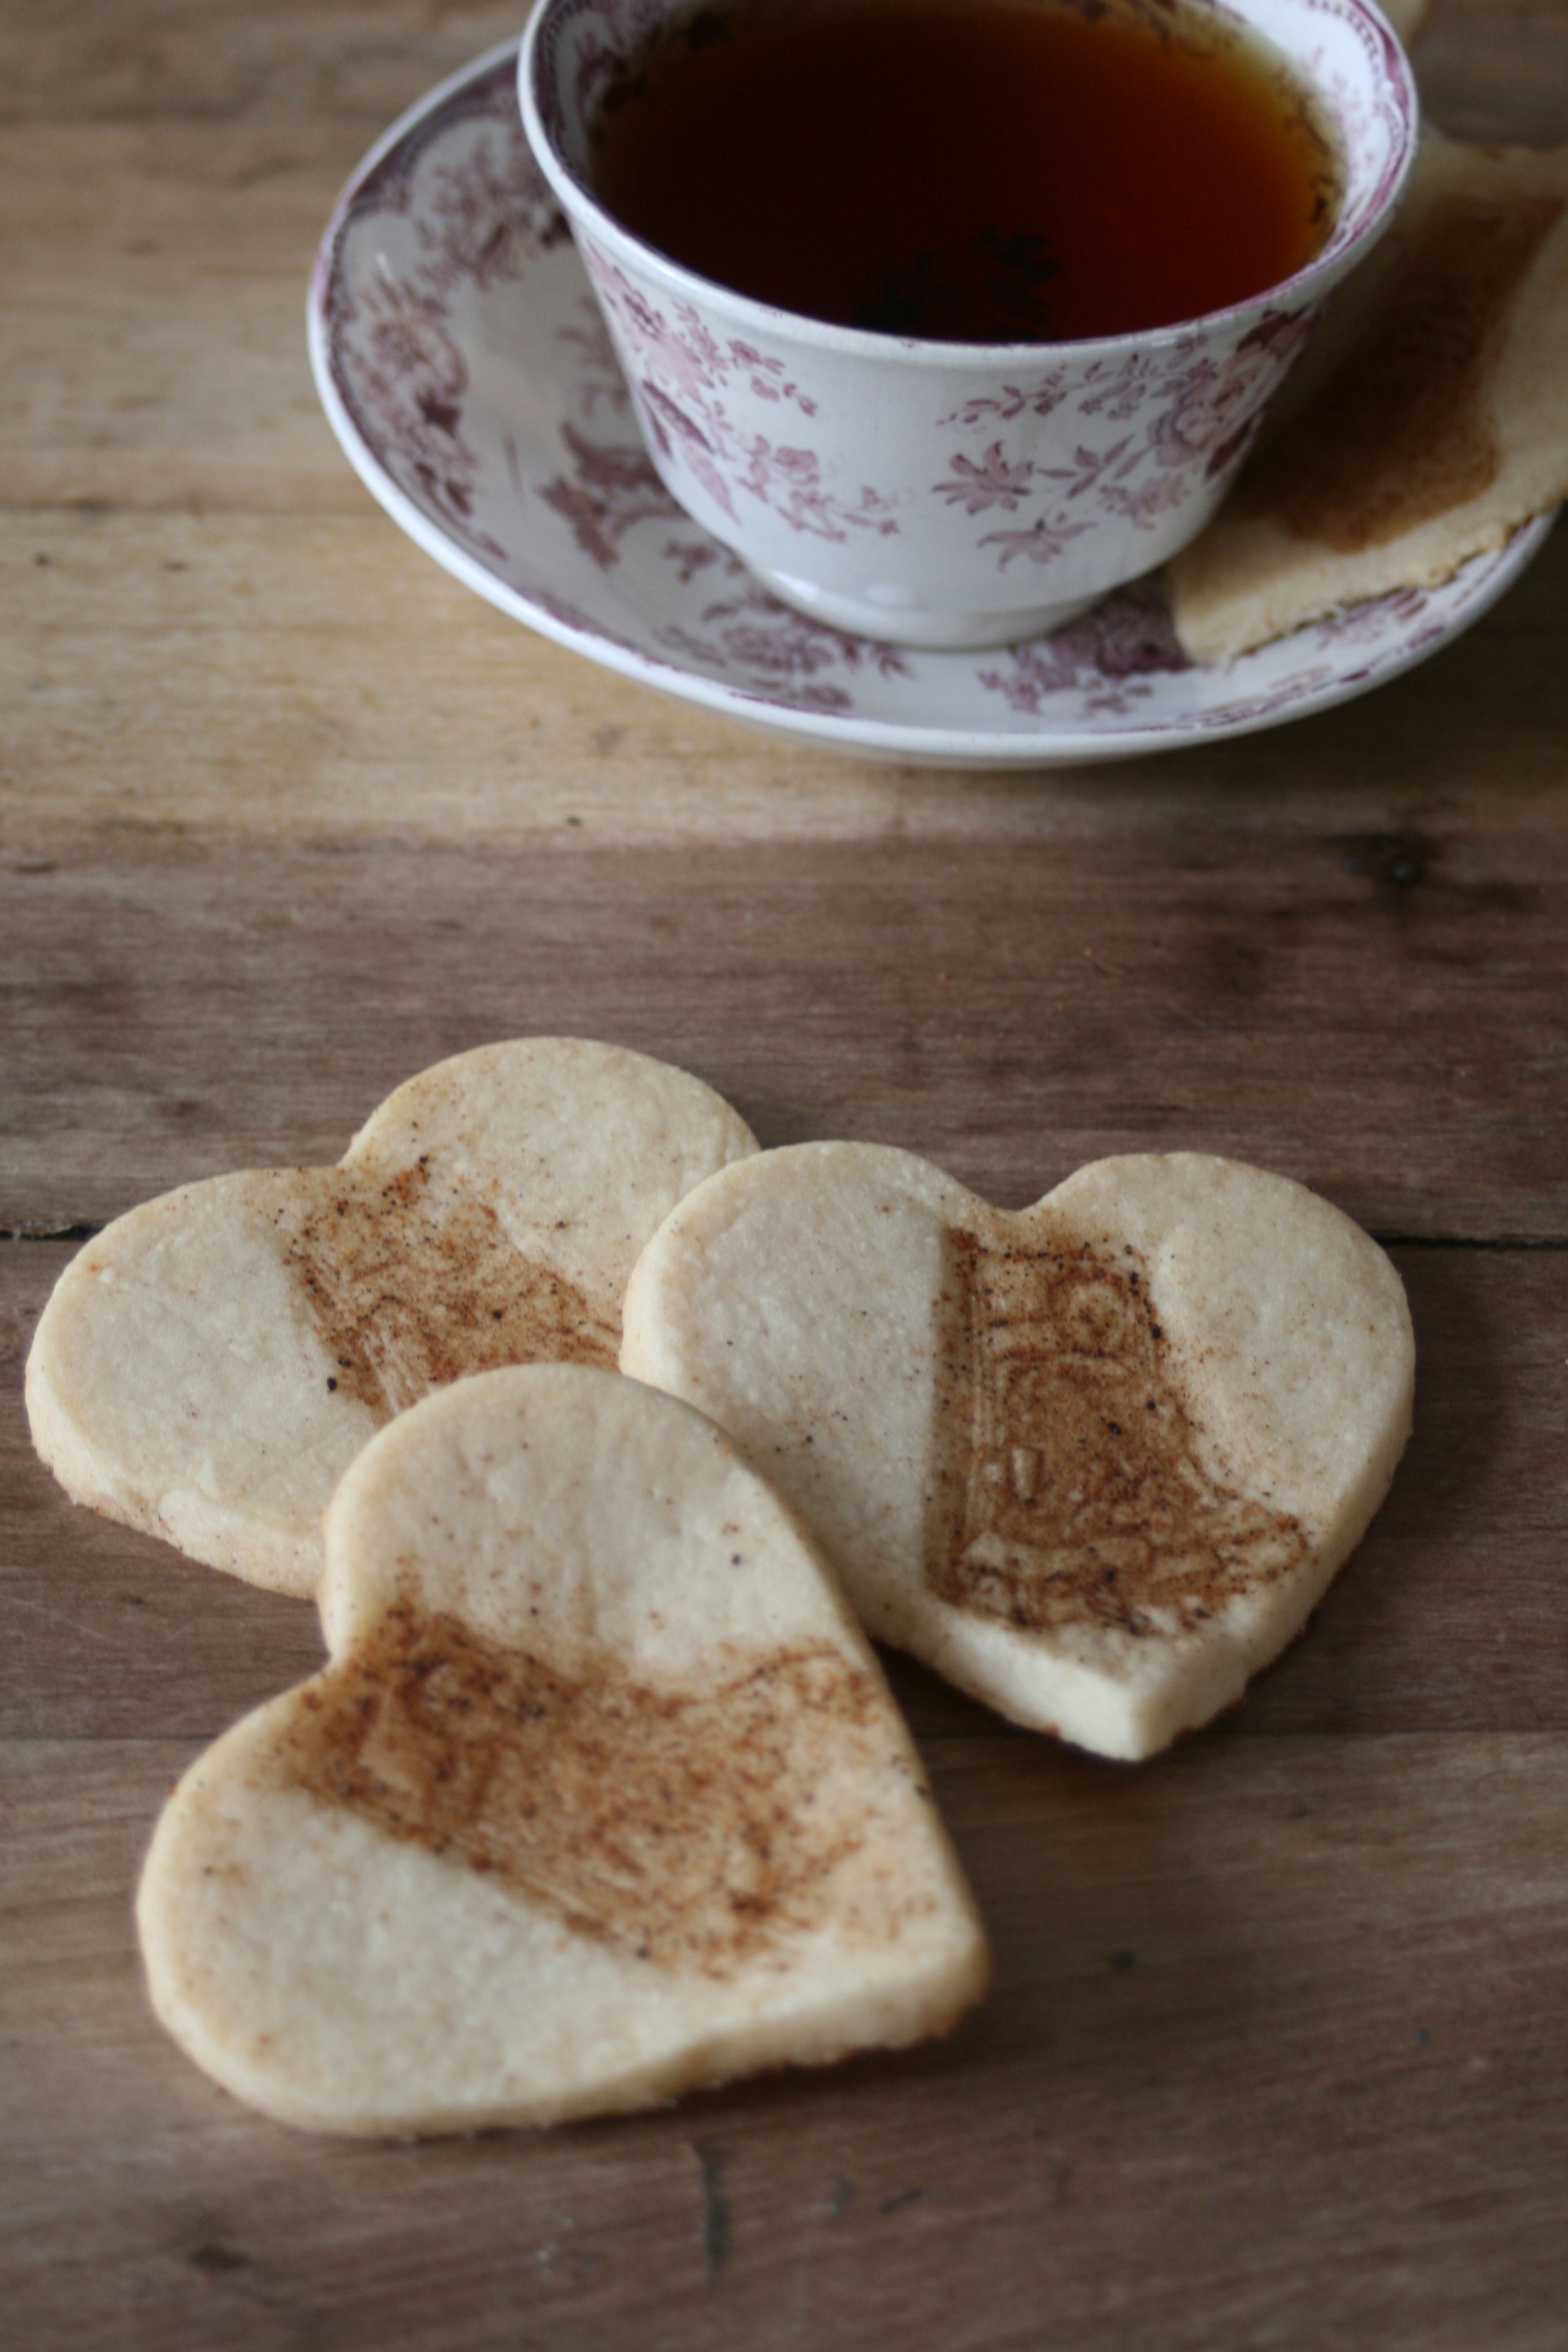
An important part of every good party is food! This year I baked Joe Frogger cookies, which are a great favorite of both the dolls and mine. The recipe that I use comes from my very worn and tattered 1982 copy of Better Homes & Gardens Classic American Recipes. One of the things I’ve always loved about this cookbook is the little bits of history that accompanies each recipe. “Uncle Joe was an old man who made molasses cookies in Marblehead, Massachusetts. They were called Joe Froggers because they were as big and dark as the frogs in Joe’s pond. Fishermen found that they kept well at sea and traded them for rum, one of Joe’s secret ingredients.

Joe Froggers

4 cups all-purpose flour

1 1/2 tsp ground ginger

1 teaspoon baking soda

1/2 teaspoon ground cloves

1/2 teaspoon ground nutmeg

1/8 teaspoon ground allspice

3/4 cup butter

1 cup sugar

1 cup dark molasses

2 tablespoons water

2 tablespoons rum

Beat butter with an electric mixer for 30 seconds, add sugar and continue to beat until fluffy. Stir in molasses, water and rum. Stir dry ingredients together separately then add to the butter and sugar mixture. Beat until well blended. Cover and chill several hours or overnight. (I don’t always do this. Sometimes I bake them immediately, especially when I am just using plain circle cutters.)

On a well floured surface roll dough to 1/4 inch. Cut with a 4 inch round cutter. Place on greased cookie sheet. (baking parchment paper or silpat mats will also work) Bake at 375 degrees for 10 to 12 minutes. Let cool about 60 seconds before removing to a wire rack. Makes 18 – 22 cookies. I often sprinkle my cookies with plain sugar before baking for just a little bit of sparkle.

The dolls also requested ice cream for their party, which turned into a bit of a challenge. Even though it was a dark rainy day the outside temperature was a steamy 79 degrees. Inside the studio the photo lights, which create a LOT of heat, made things even warmer. In order to keep the ice cream from melting too quickly on it’s trip out to the studio I took it out of the freezer then immediately placed it in a well insulated cooler with multiple ice packs. Once the lights were in place and the entire vignette inside the dollhouse was ready to be photographed I scooped the ice cream into the little bowls using a very small scoop, like you would use to scoop batter into a mini muffin pan.

If you’d like to follow Zanna’s example and make homemade ice cream, this is the one she and I always use.

My Favorite Homemade Ice Cream
This is my favorite recipe of all the ones that my mother used for Vanilla Ice Cream.  It wasn’t her favorite though, she was known to cut down on the sugar as she thought it was too sweet.  I think that it is just about right the way it is listed in the recipe.  Use very good quality vanilla.  I like ground vanilla beans or vanilla bean paste because of their added depth of flavor.

Ingredients:
1 can Eagle Brand Milk
3 eggs
1/2 cup sugar
1 pint half & half
1/2 pint light cream
1 tsp. vanilla
1 quart milk

Directions:
Heat Eagle Brand, eggs, and sugar in top of a double boiler stirring constantly.   While continuing to stir add half & half, cream and vanilla. remove from heat, transfer to a large bowl and add one quart of milk.   Cool in refrigerator.   Freeze in ice cream freezer.

Ice Cream Magic!

The combination of the very cold ice cream, the extremely hot photo lights, and high humidity, caused the ice cream in the bowls to start smoking like dry ice! It would have been so nice to share such a fun magical moment with you, but try as I might the effect didn’t show up in the photos.

Did you guess that the tiny ice cream spoons in the photos are antique silver salt spoons? The doll’s routinely take turns polishing them to keep them bright and shiny.

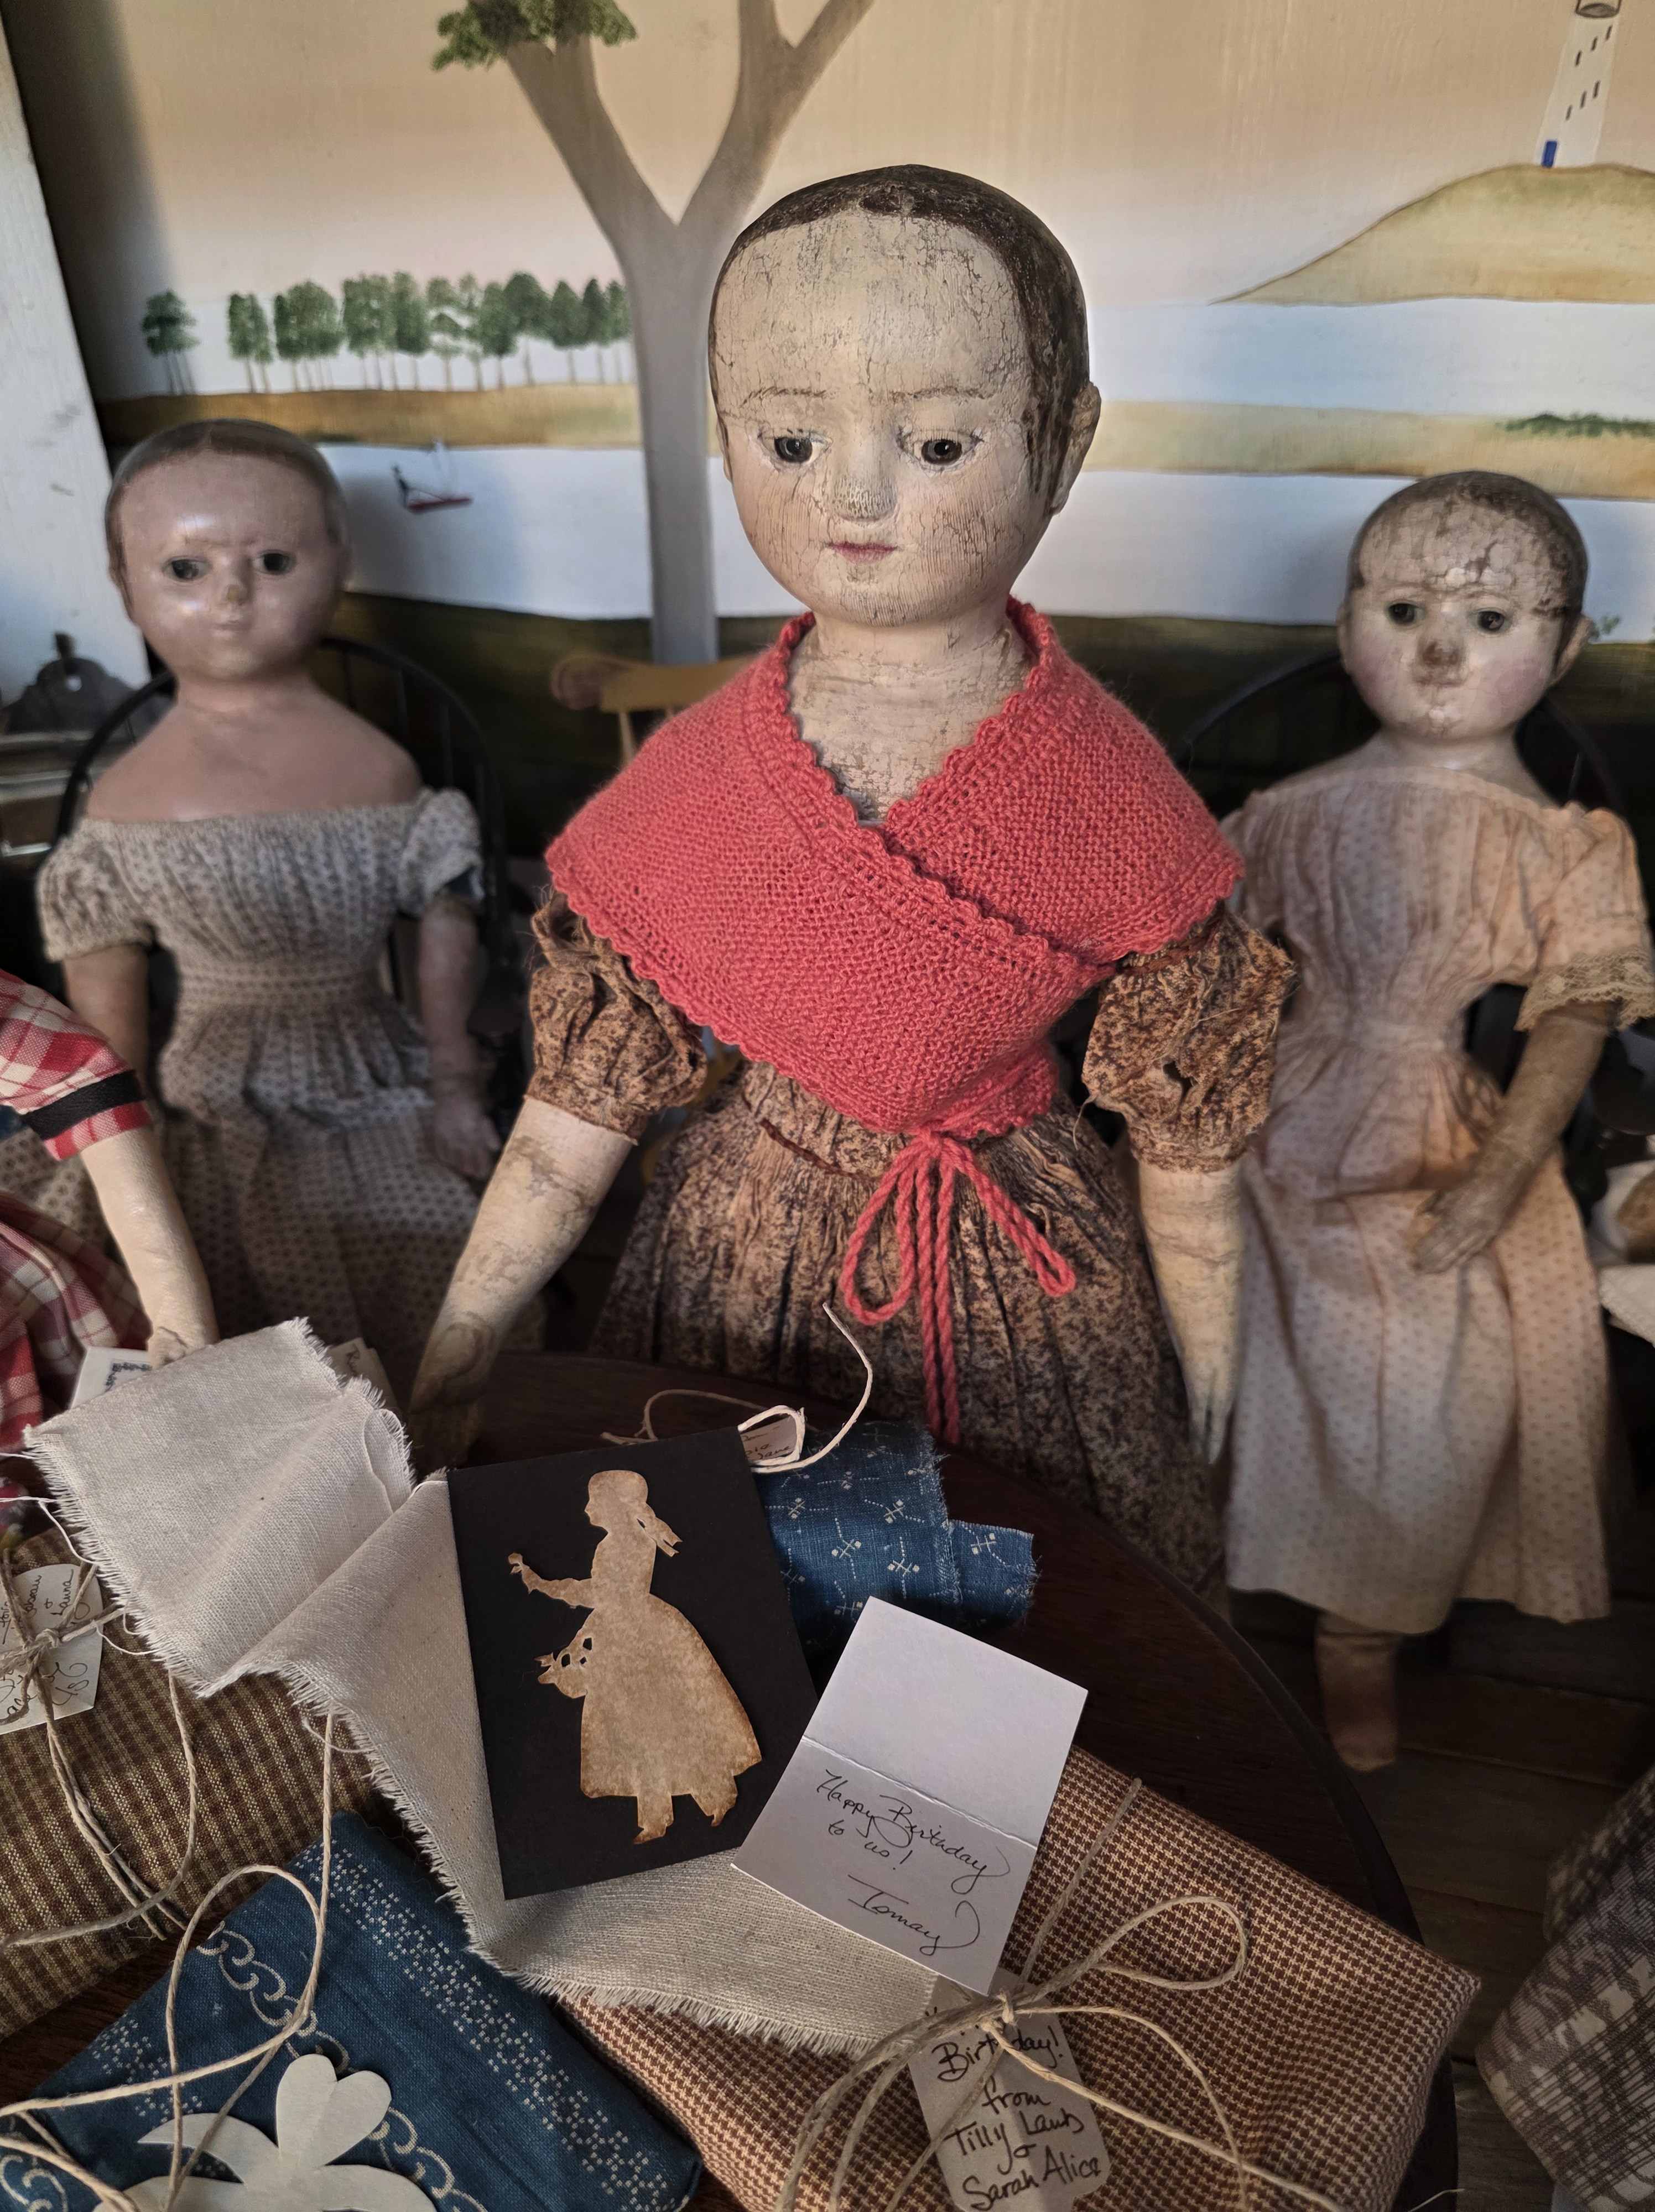
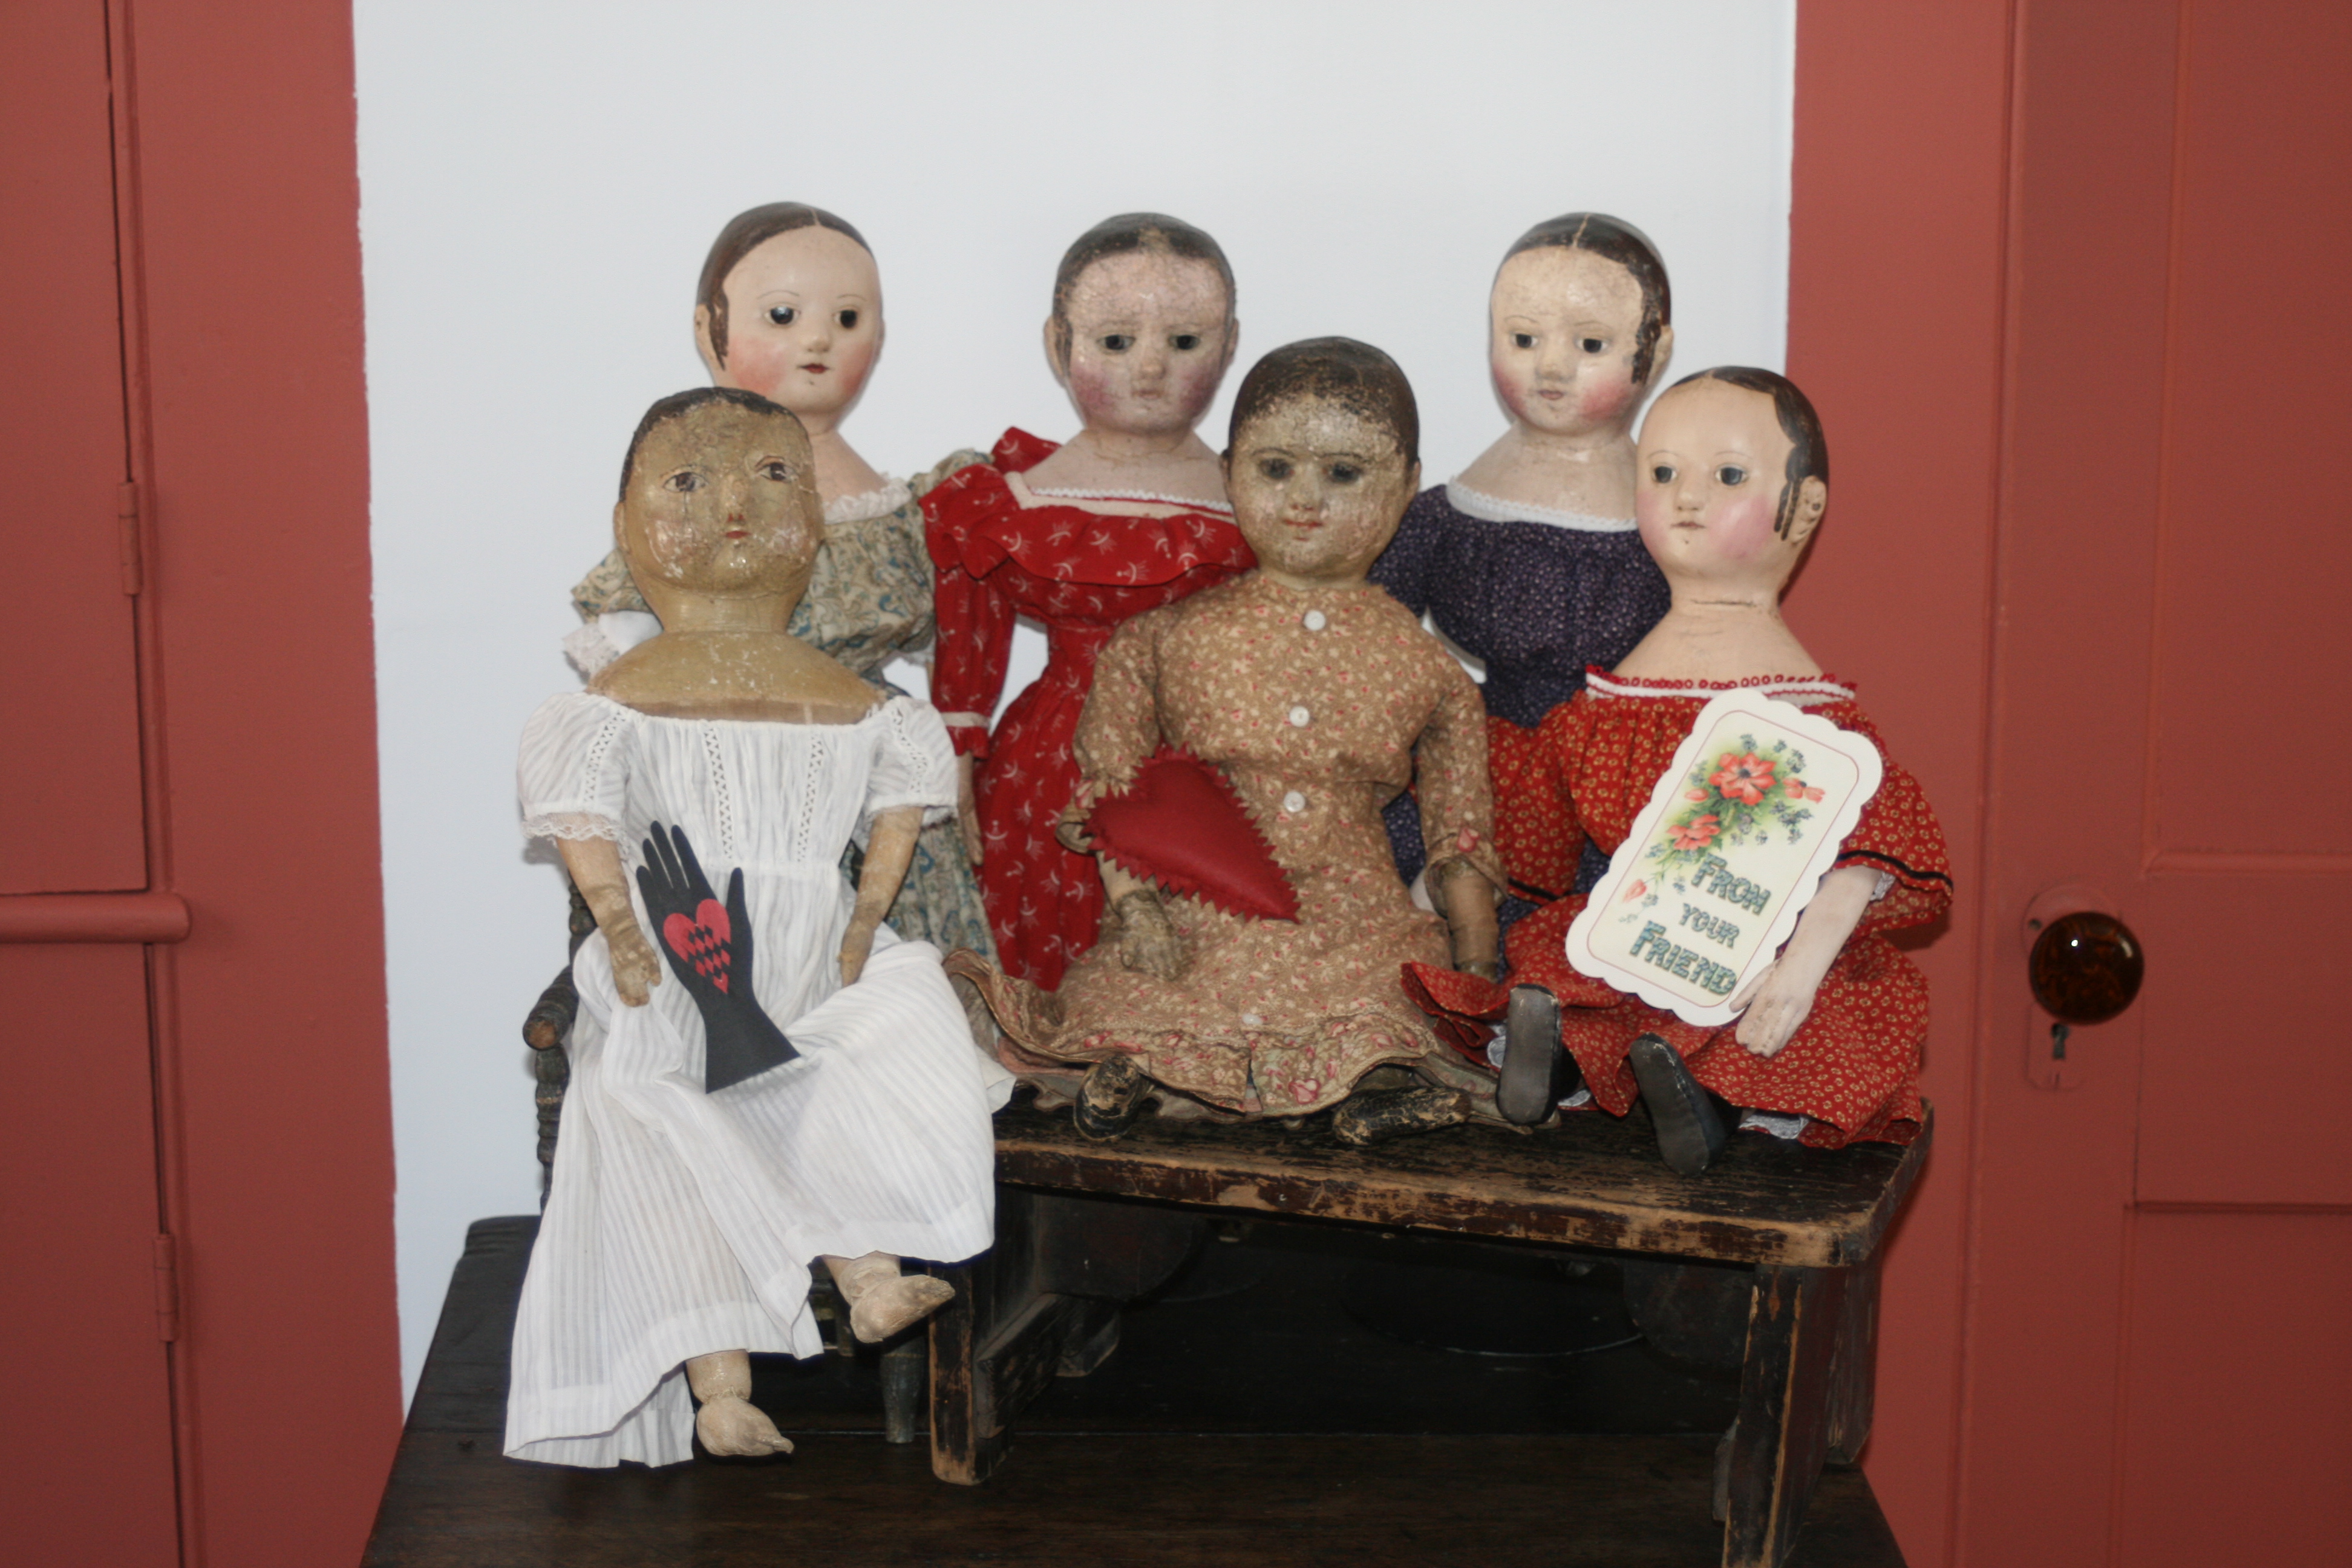
And then it was time for presents!

As I’m sure you’ve guessed by now, all of the odd occurrences and secret meetings leading up to Thursday’s party were because the dolls were busy creating presents for each other this year.

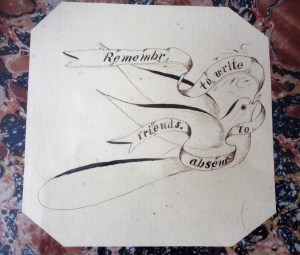
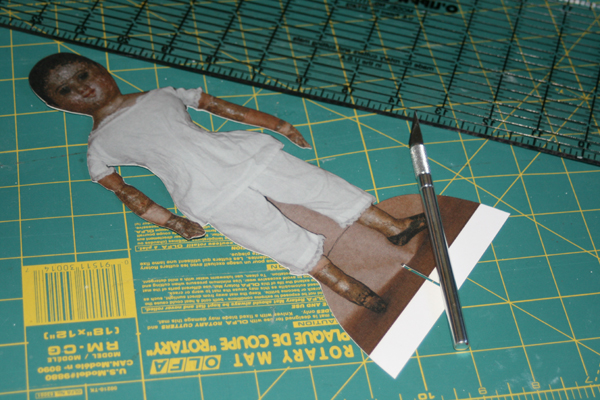
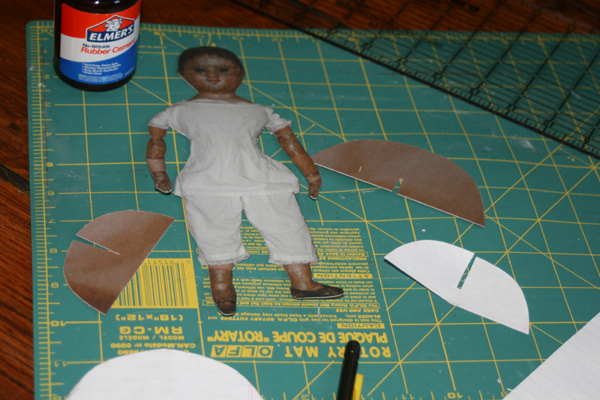
The Paper Silhouette from Ismay ~ In reality this is a silhouette that I cut from parchment paper, using an x-acto knife, aged with tea in the oven, then mounted on black cardstock.

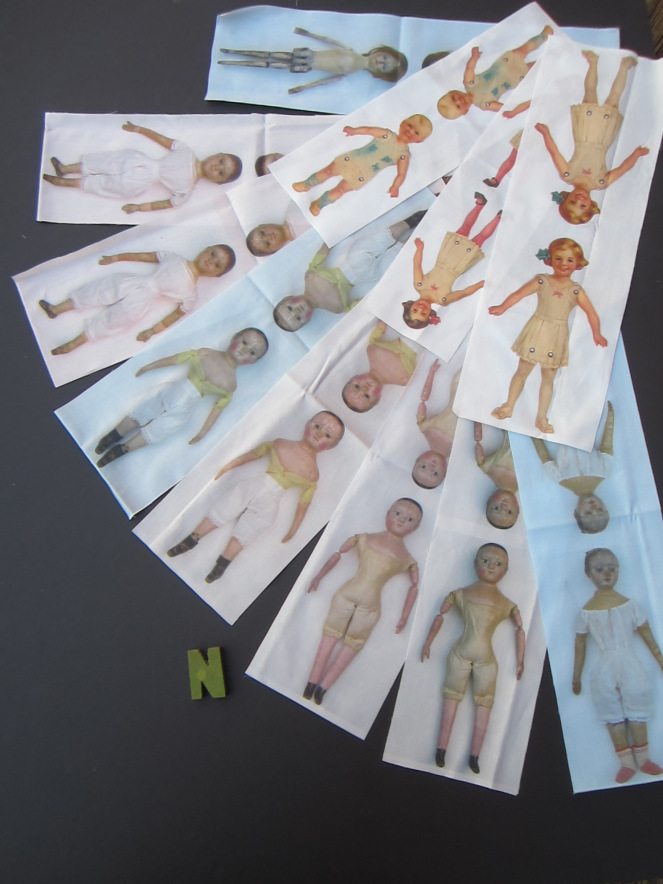
The tiny printed and stuffed kitten & hen that the sisters made for Izzybelle ~ These miniature marvels were actually made by the extremely talented Lolly Yokum of Laurel Leaf dolls. She also makes a variety of miniature cloth dolls that include amazing tiny Izannah Walker dolls https://laurelleaf.com/toys.htm

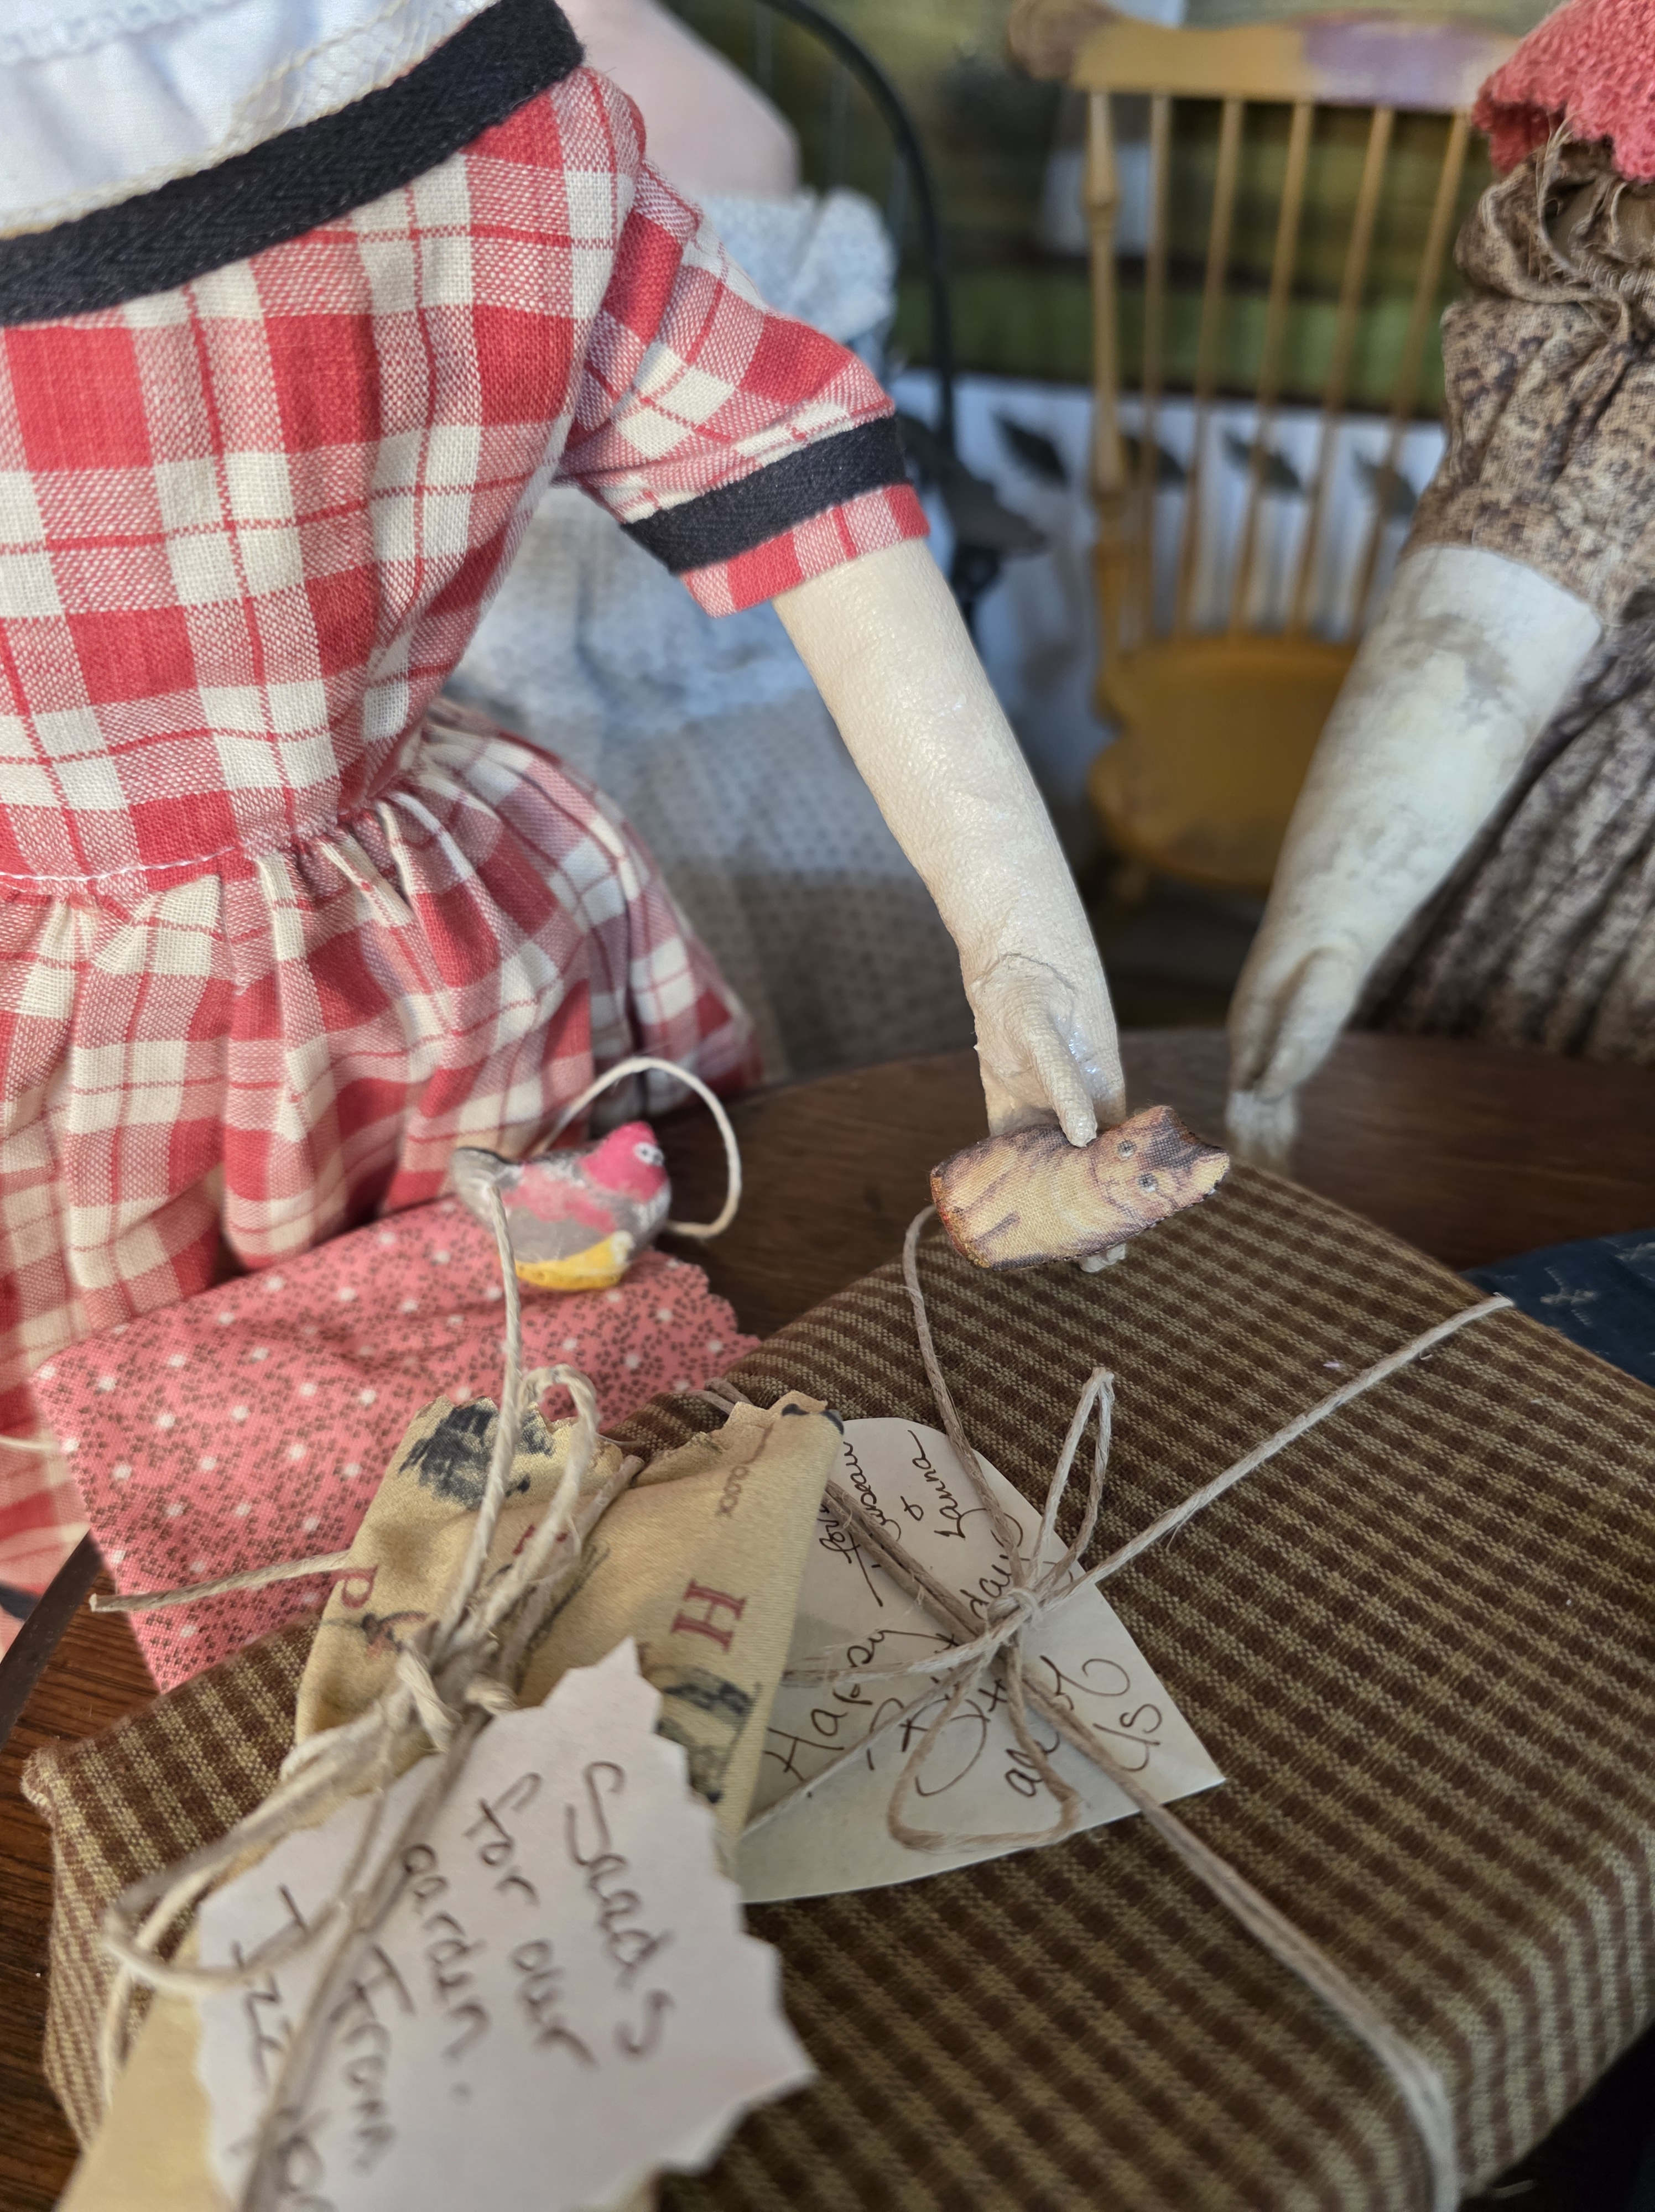
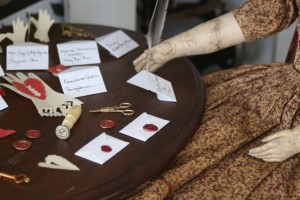
Izzybelle’s Seed Envelopes ~ The little seed envelopes were inspired by an amazing gift I received from one of my very dear friends, Sandy Conners, another very talented artist who’s original art graces her beautifully hand carved wood blocks and letterpress prints. I love these perfect little seeds packets and glassine envelopes so much that I haven’t yet been able to decide what seeds are special enough to put in them ❤ So for the time being I keep them with my favorite antique gardening implements and admire them frequently. When Izzybelle caught me daydreaming over these tiny works of art she begged me to let her have them for the seeds she’s been saving. Instead we compromised and I agreed to help her craft her own using the sweet little printed sheet of all the packet illustrations that came in Sandy’s gift. To create a template for Izzybelle’s seed envelope I carefully took apart a commercial seed envelope and reduced the outline using my office copier (I couldn’t bear to do that to one of Sandy’s). Izzybelle’s seed envelopes have red wax seals on their back flaps to hold them closed.

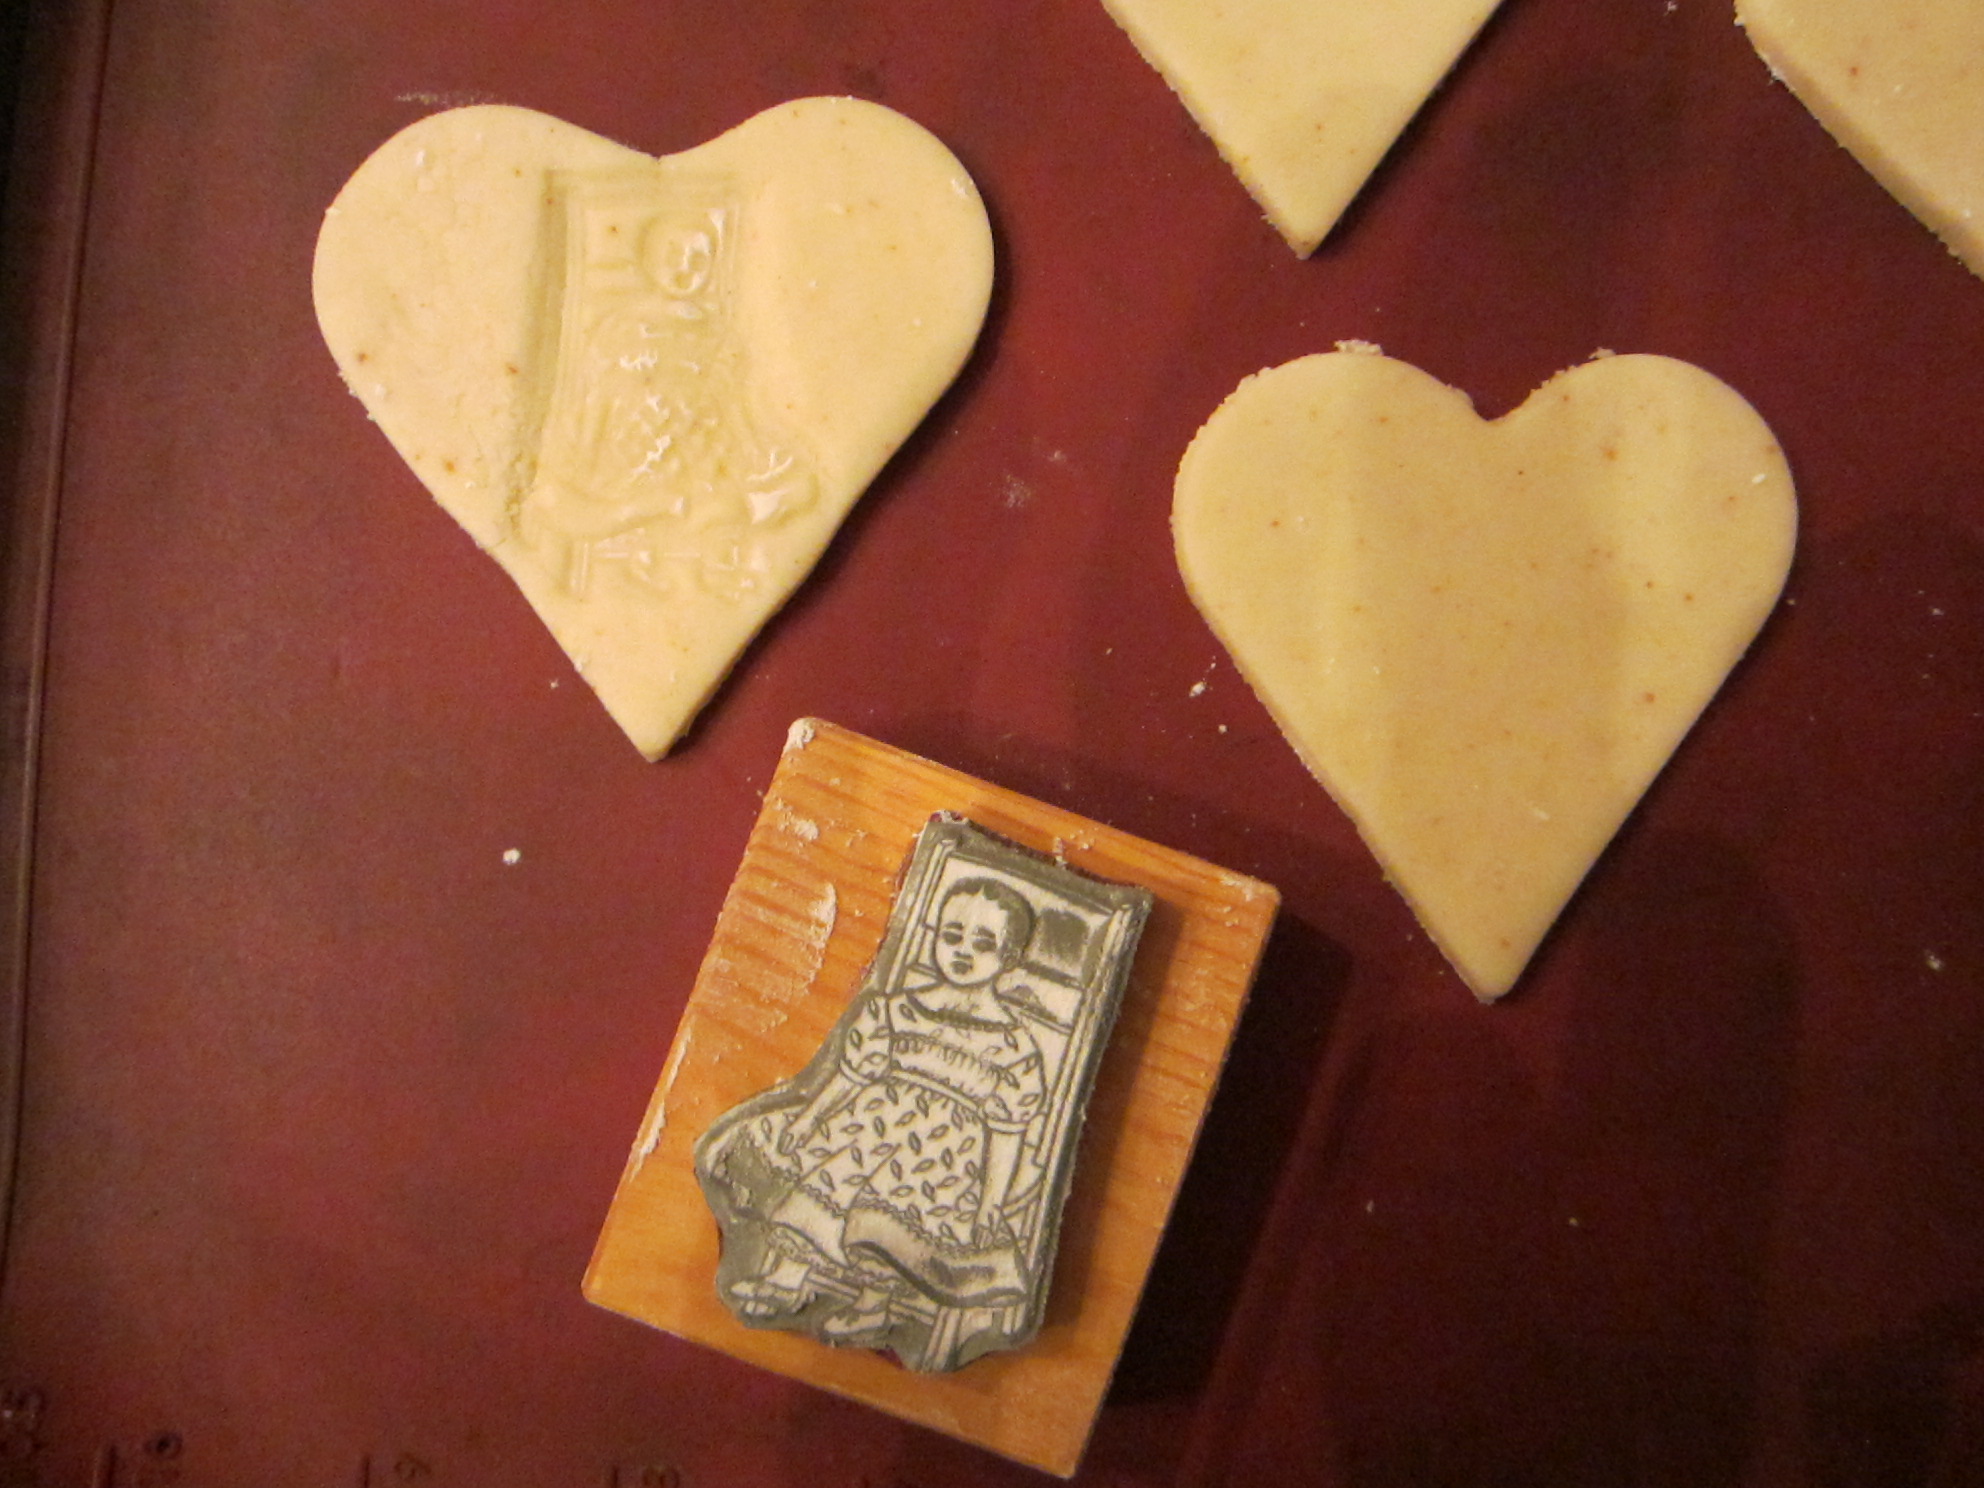
Charlcie and Eliza Jane’s Packets of Tea ~ The smaller one cup packets are actually tiny parchment paper envelopes that I cut with a scrapbooking die cutter. The larger packets are simply a folded rectangle of parchment paper (the actual real paper kind and not what you bake with). Both packets are sealed with red wax that I stamped with the sister’s very small antique ivory handled stamp. Inside the packets contain either dried peppermint, apple mint, or lemon balm. All three herbs were cut from the herb garden outside of my kitchen door. Normally Charlcie, Eliza Jane, and I lay the freshly washed herbs on clean dry towels in a shaded room to dry. If we are in a hurry, we lay a single layer of clean herbs on a clean paper towel and microwave them in 15 second intervals just until they begin to feel slightly dry. then place them on a counter or table to cool down. They should finish drying as they cool, if they aren’t completely dry they can go back in the microwave for 15 additional seconds. Do not microwave too long, as the herbs can burn.

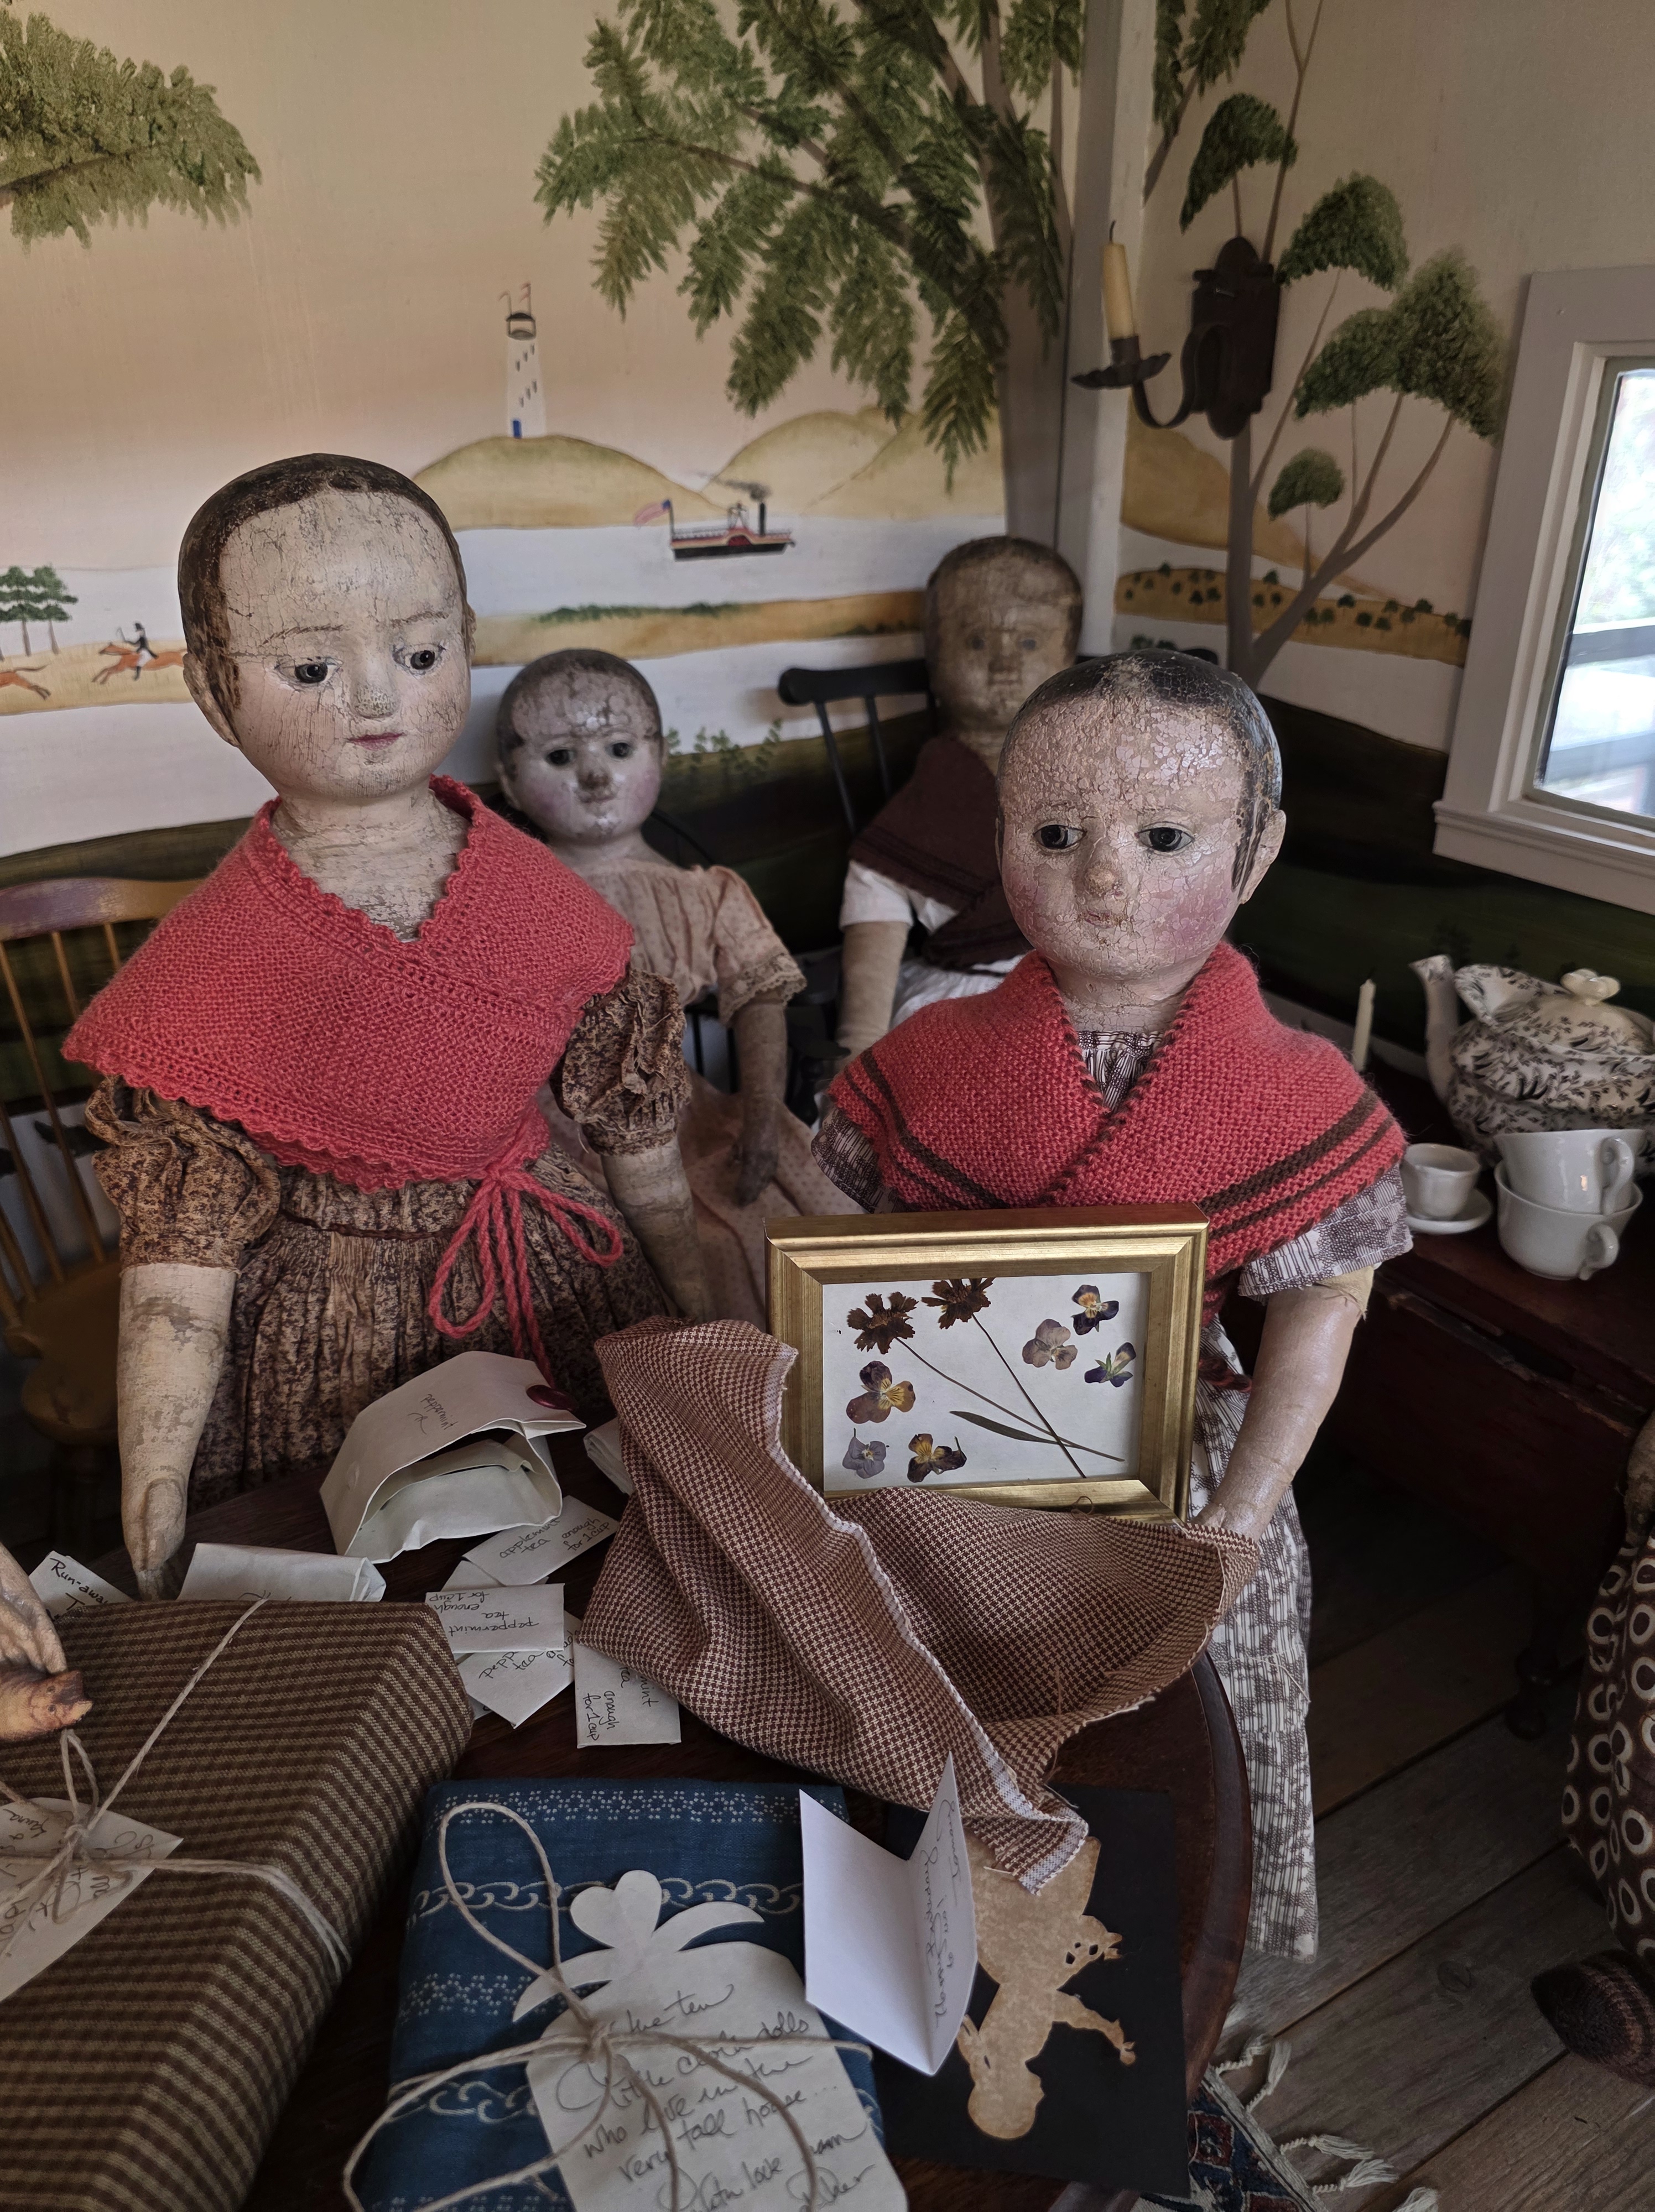
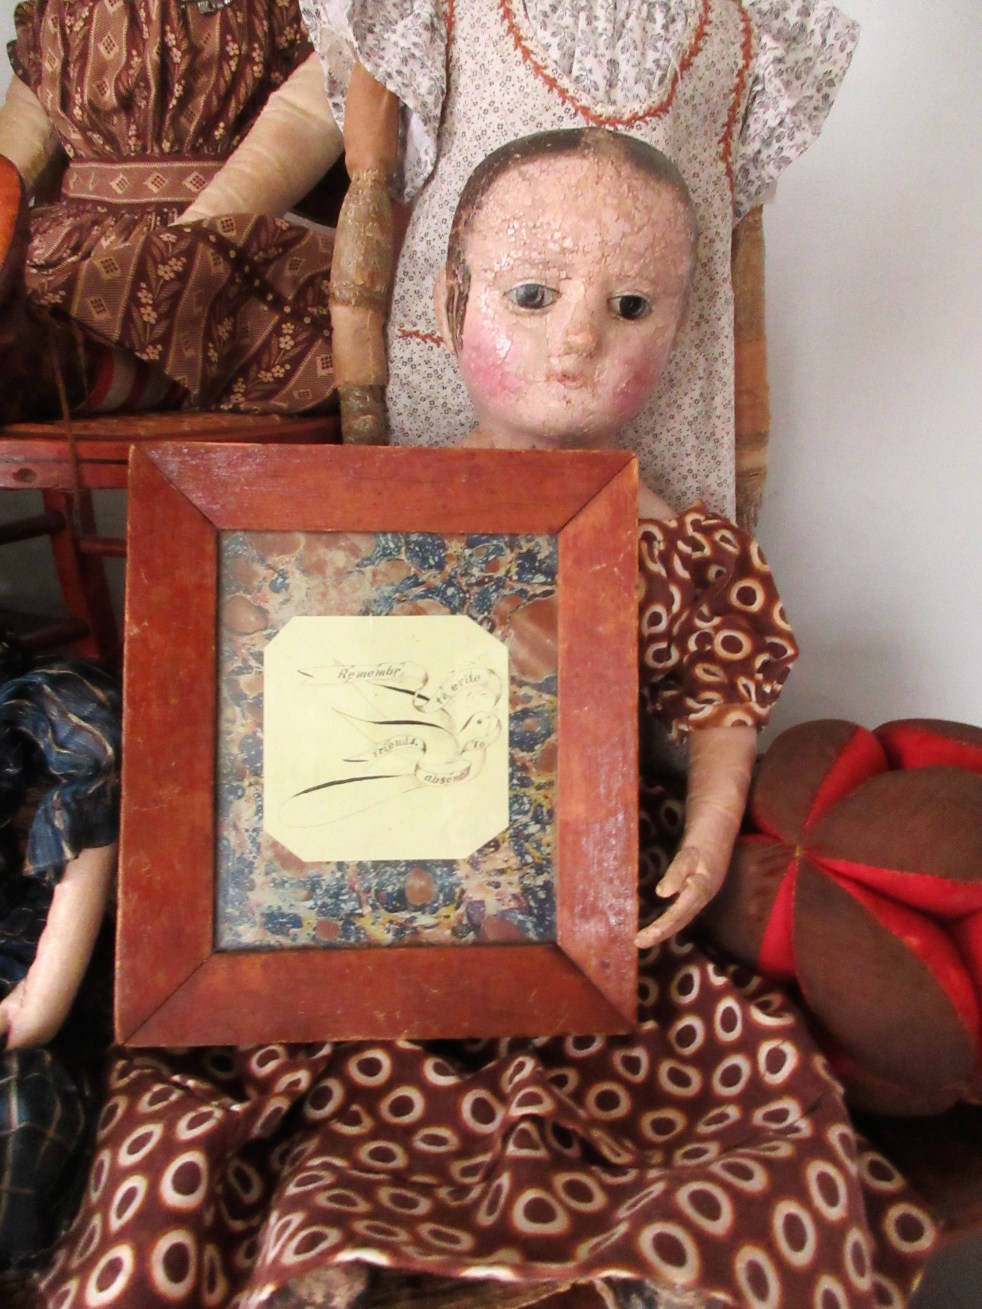
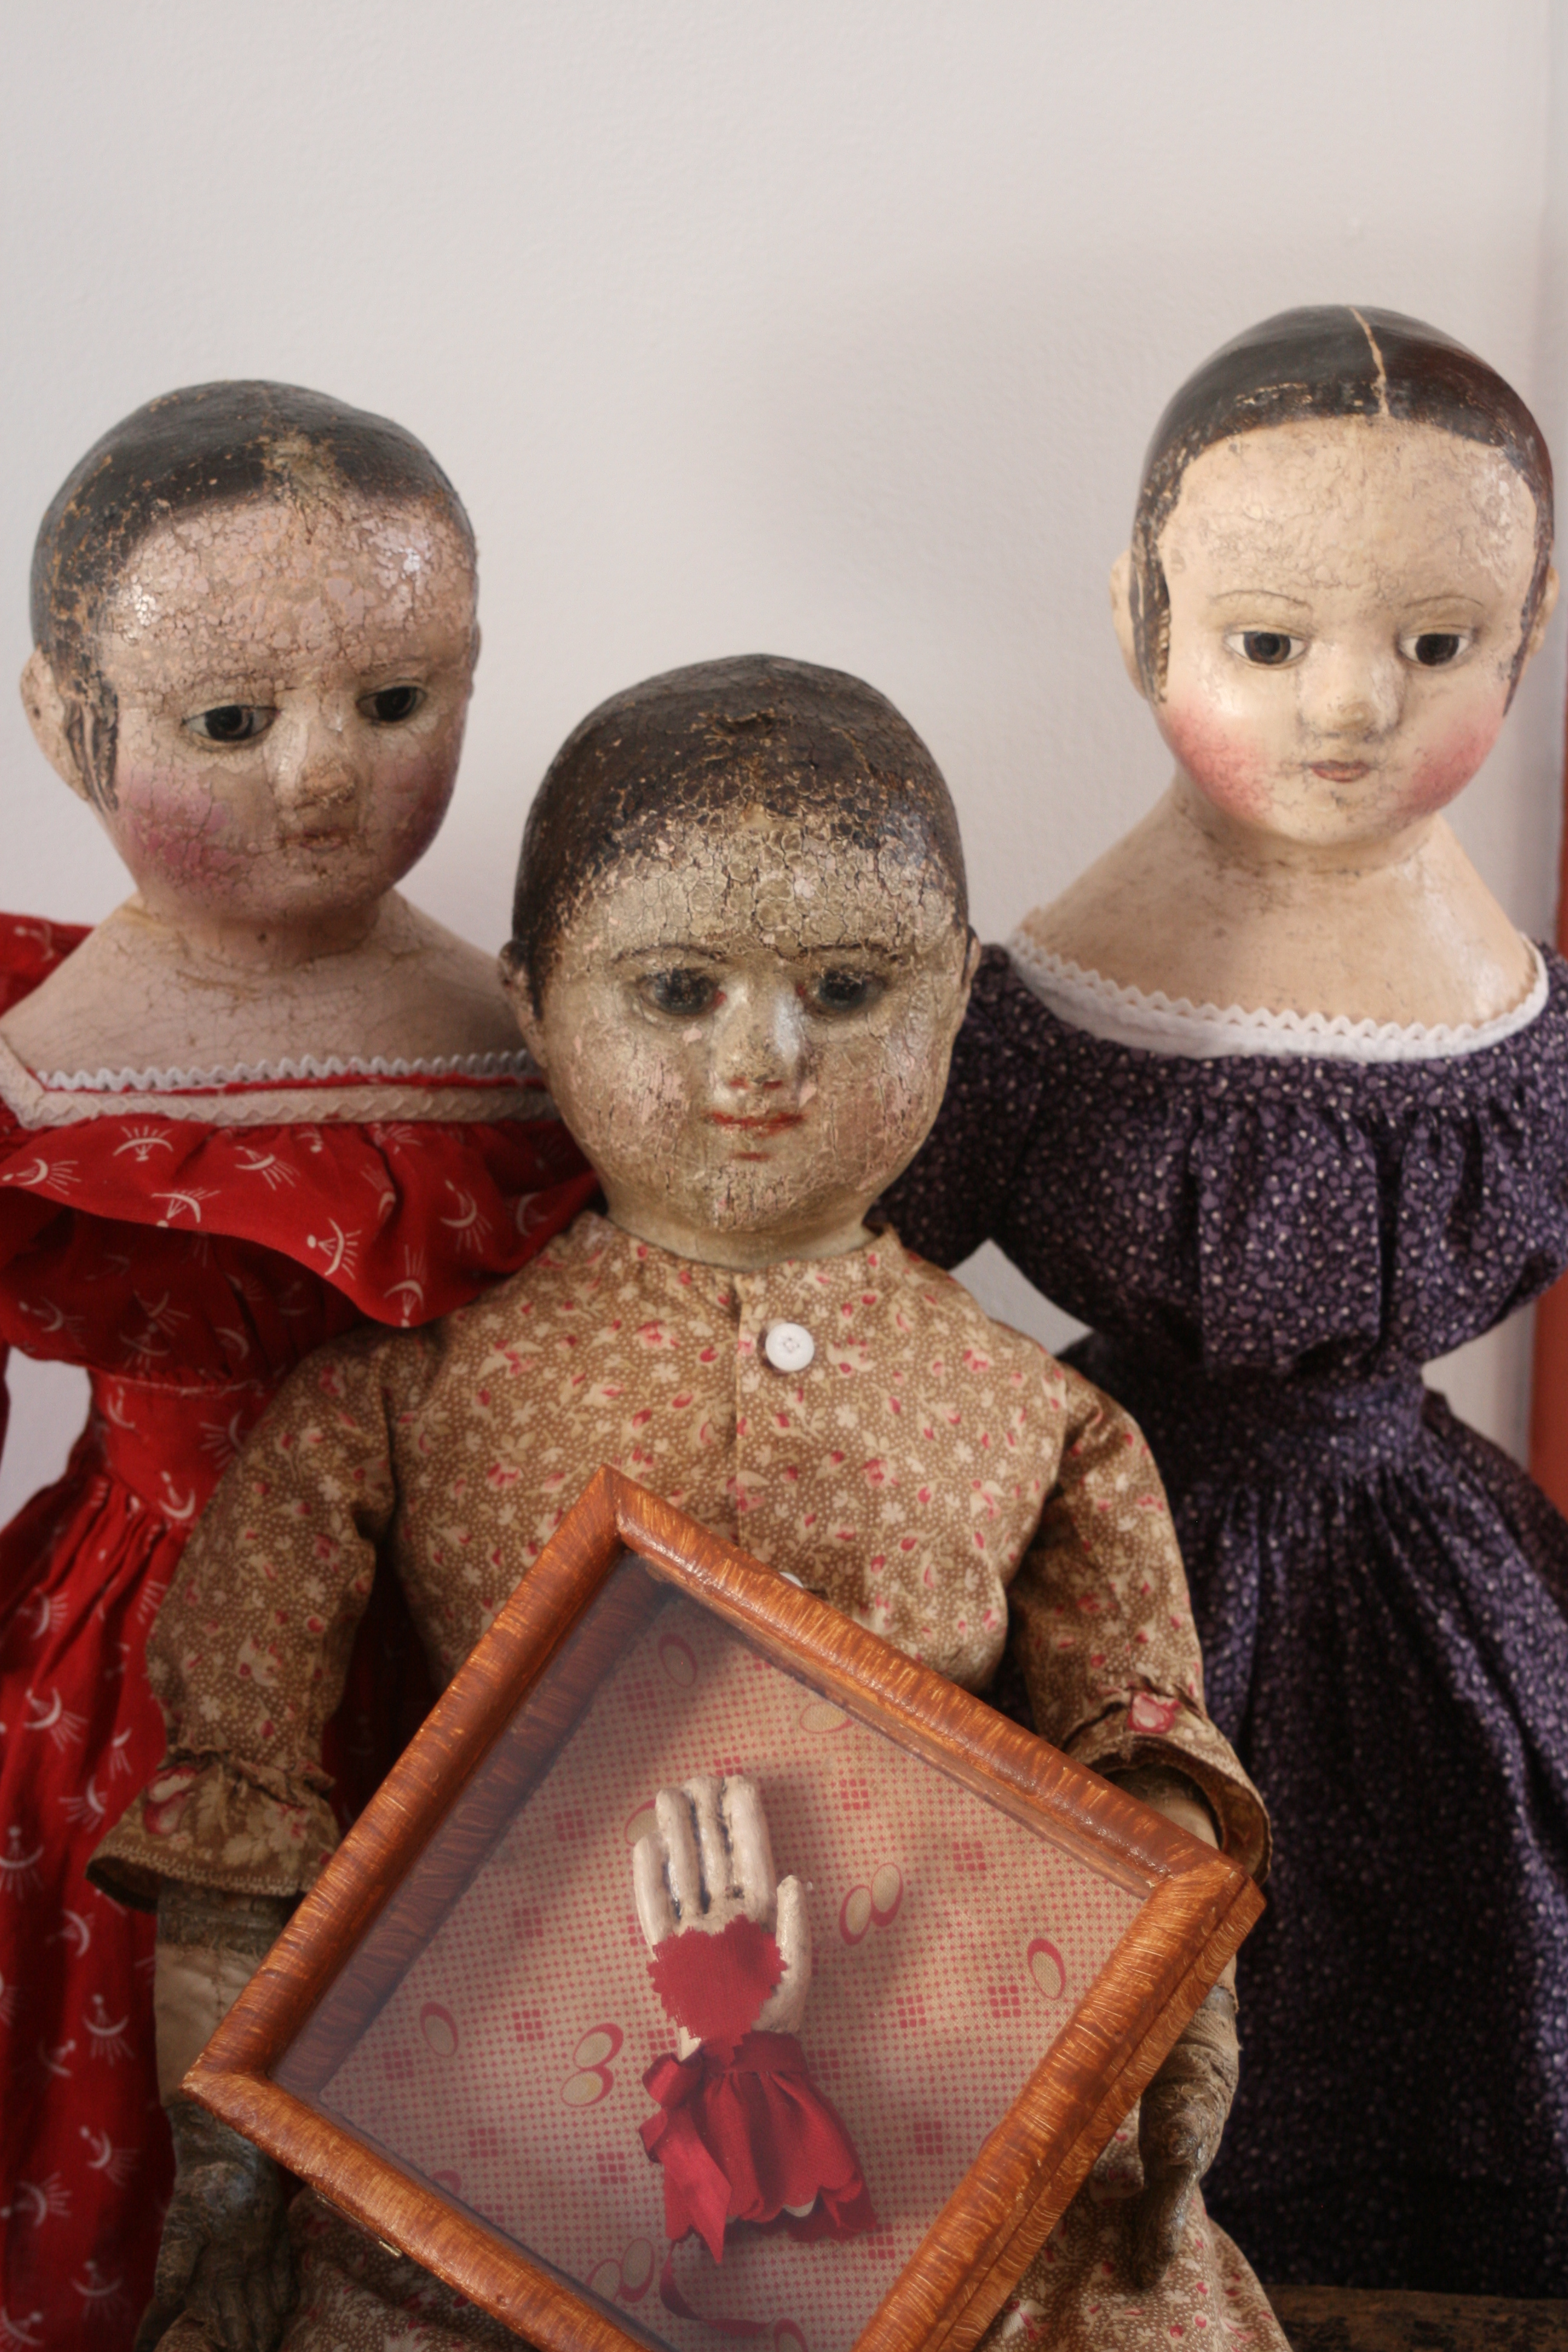
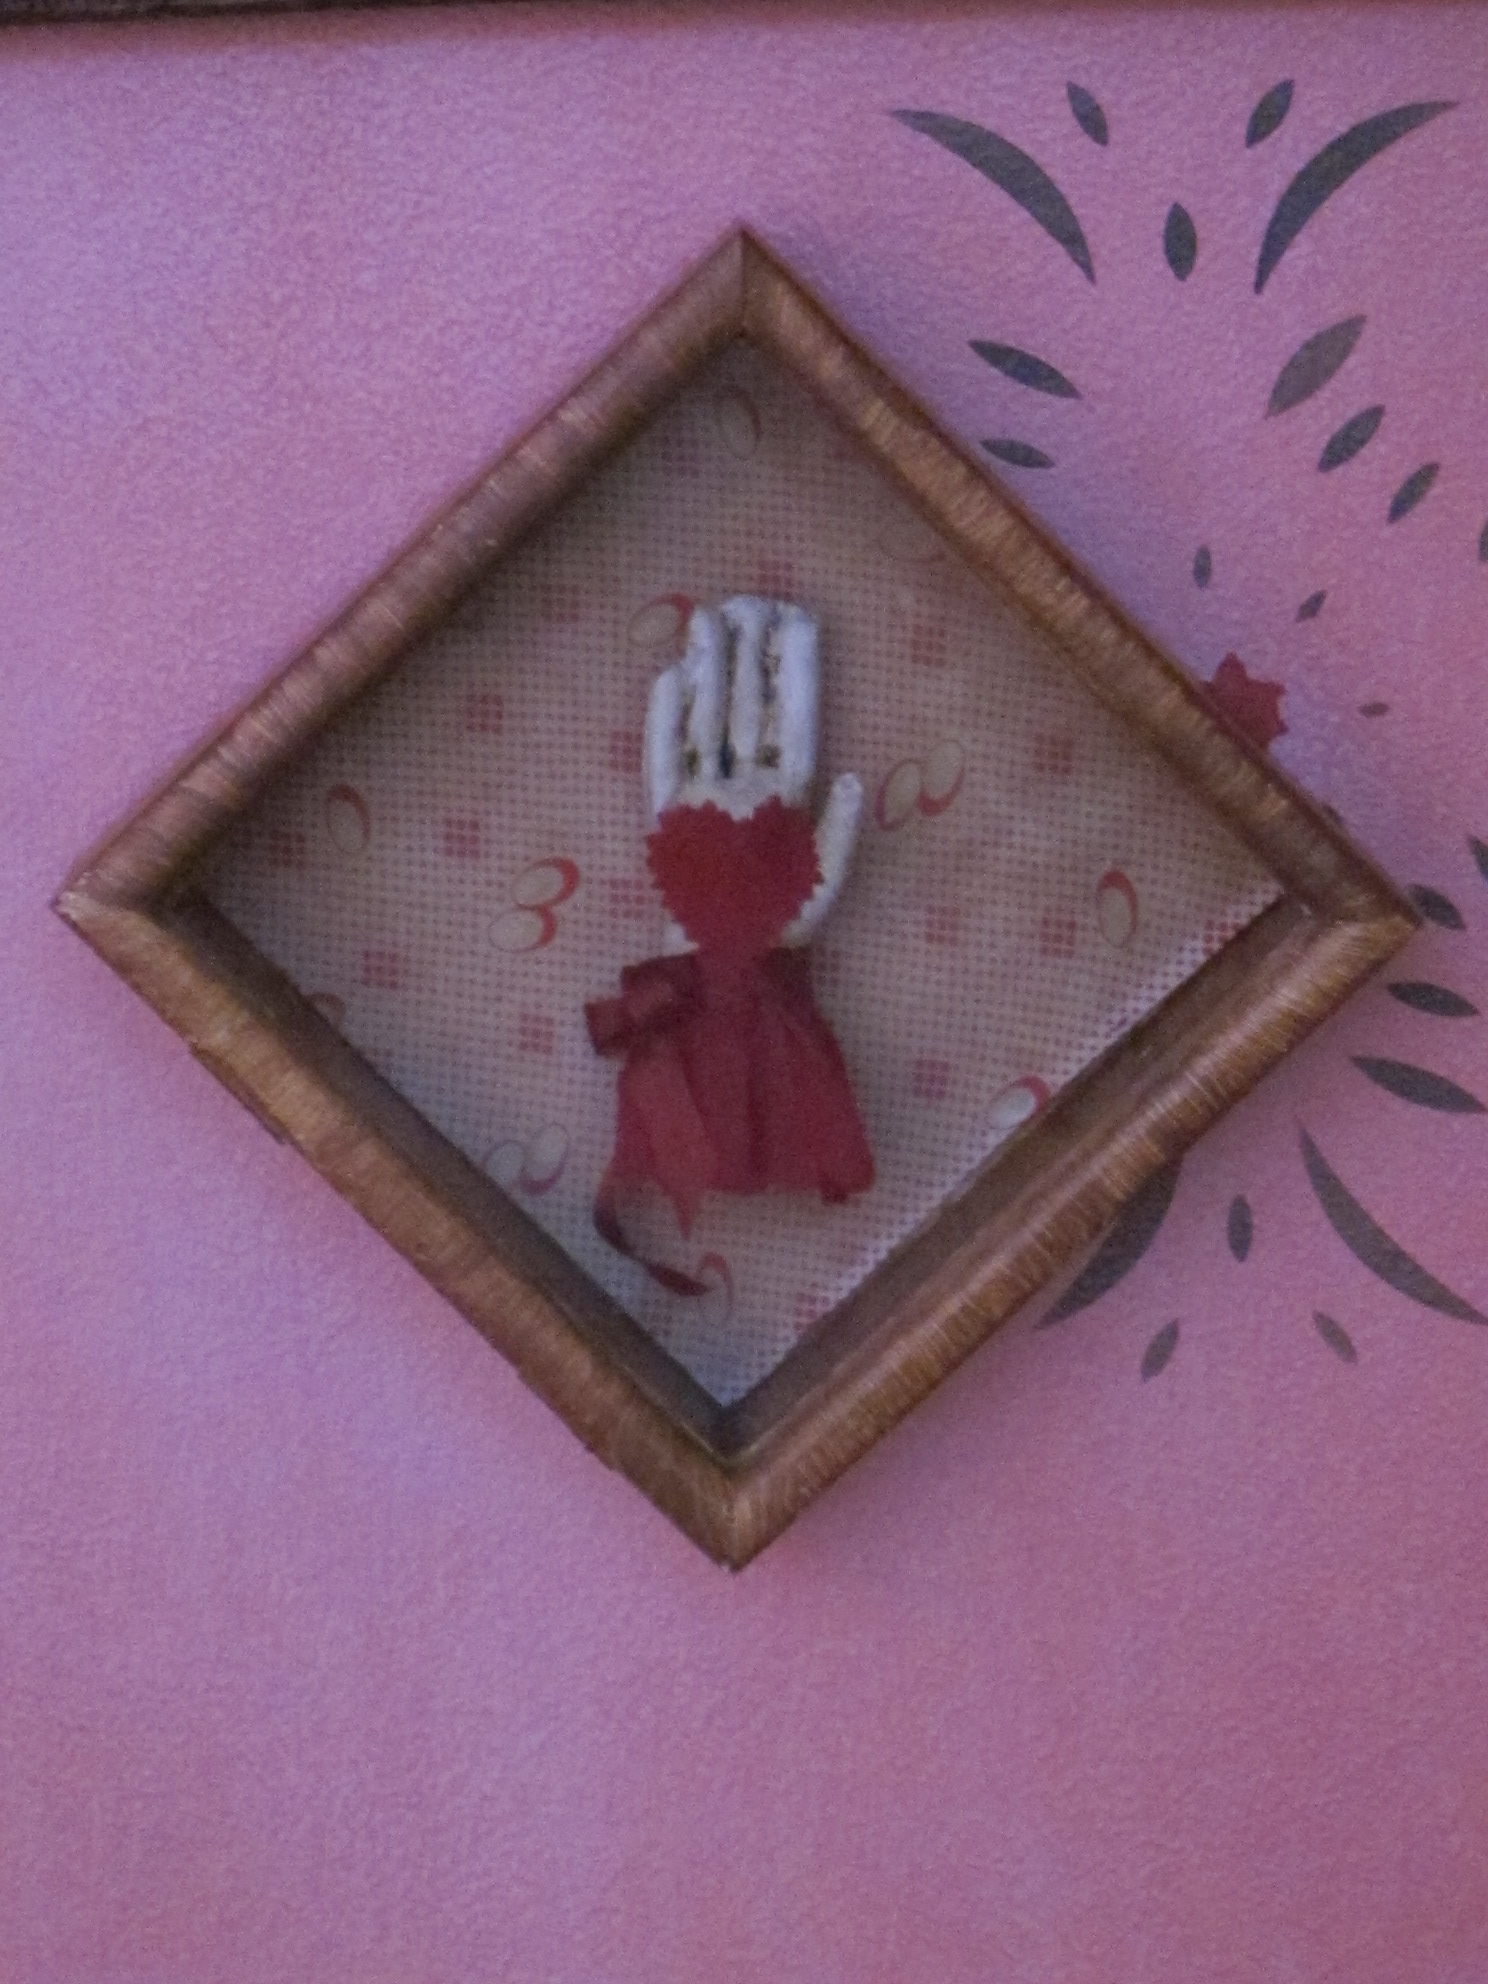
Tilly Lamb & Sarah Alice’s Gift of Dried Pressed Flowers in a Gold Frame ~ This gift was really quite straight forward. It is made from flowers cut straight out of my flower beds, pressed between two sheets of white of paper, weighted down with bricks! Of course you could also use a flower press, which would undoubtedly be easier. After the flowers had completely dried I carefully used a dab of glue to attach them to yet another piece of parchment paper cut to fit the inside of a small gold painted wooden frame.

Isabeau and Zanna’s gift of a Sewing Sampler Book for all of the sisters to share and contribute to. ~ I will be writing an in-depth look at girl’s 19th century sewing sampler books in the near future as the little cloth girls begin working on theirs in earnest. We would love you to follow along, and perhaps be tempted to make one for yourself or your dolls.

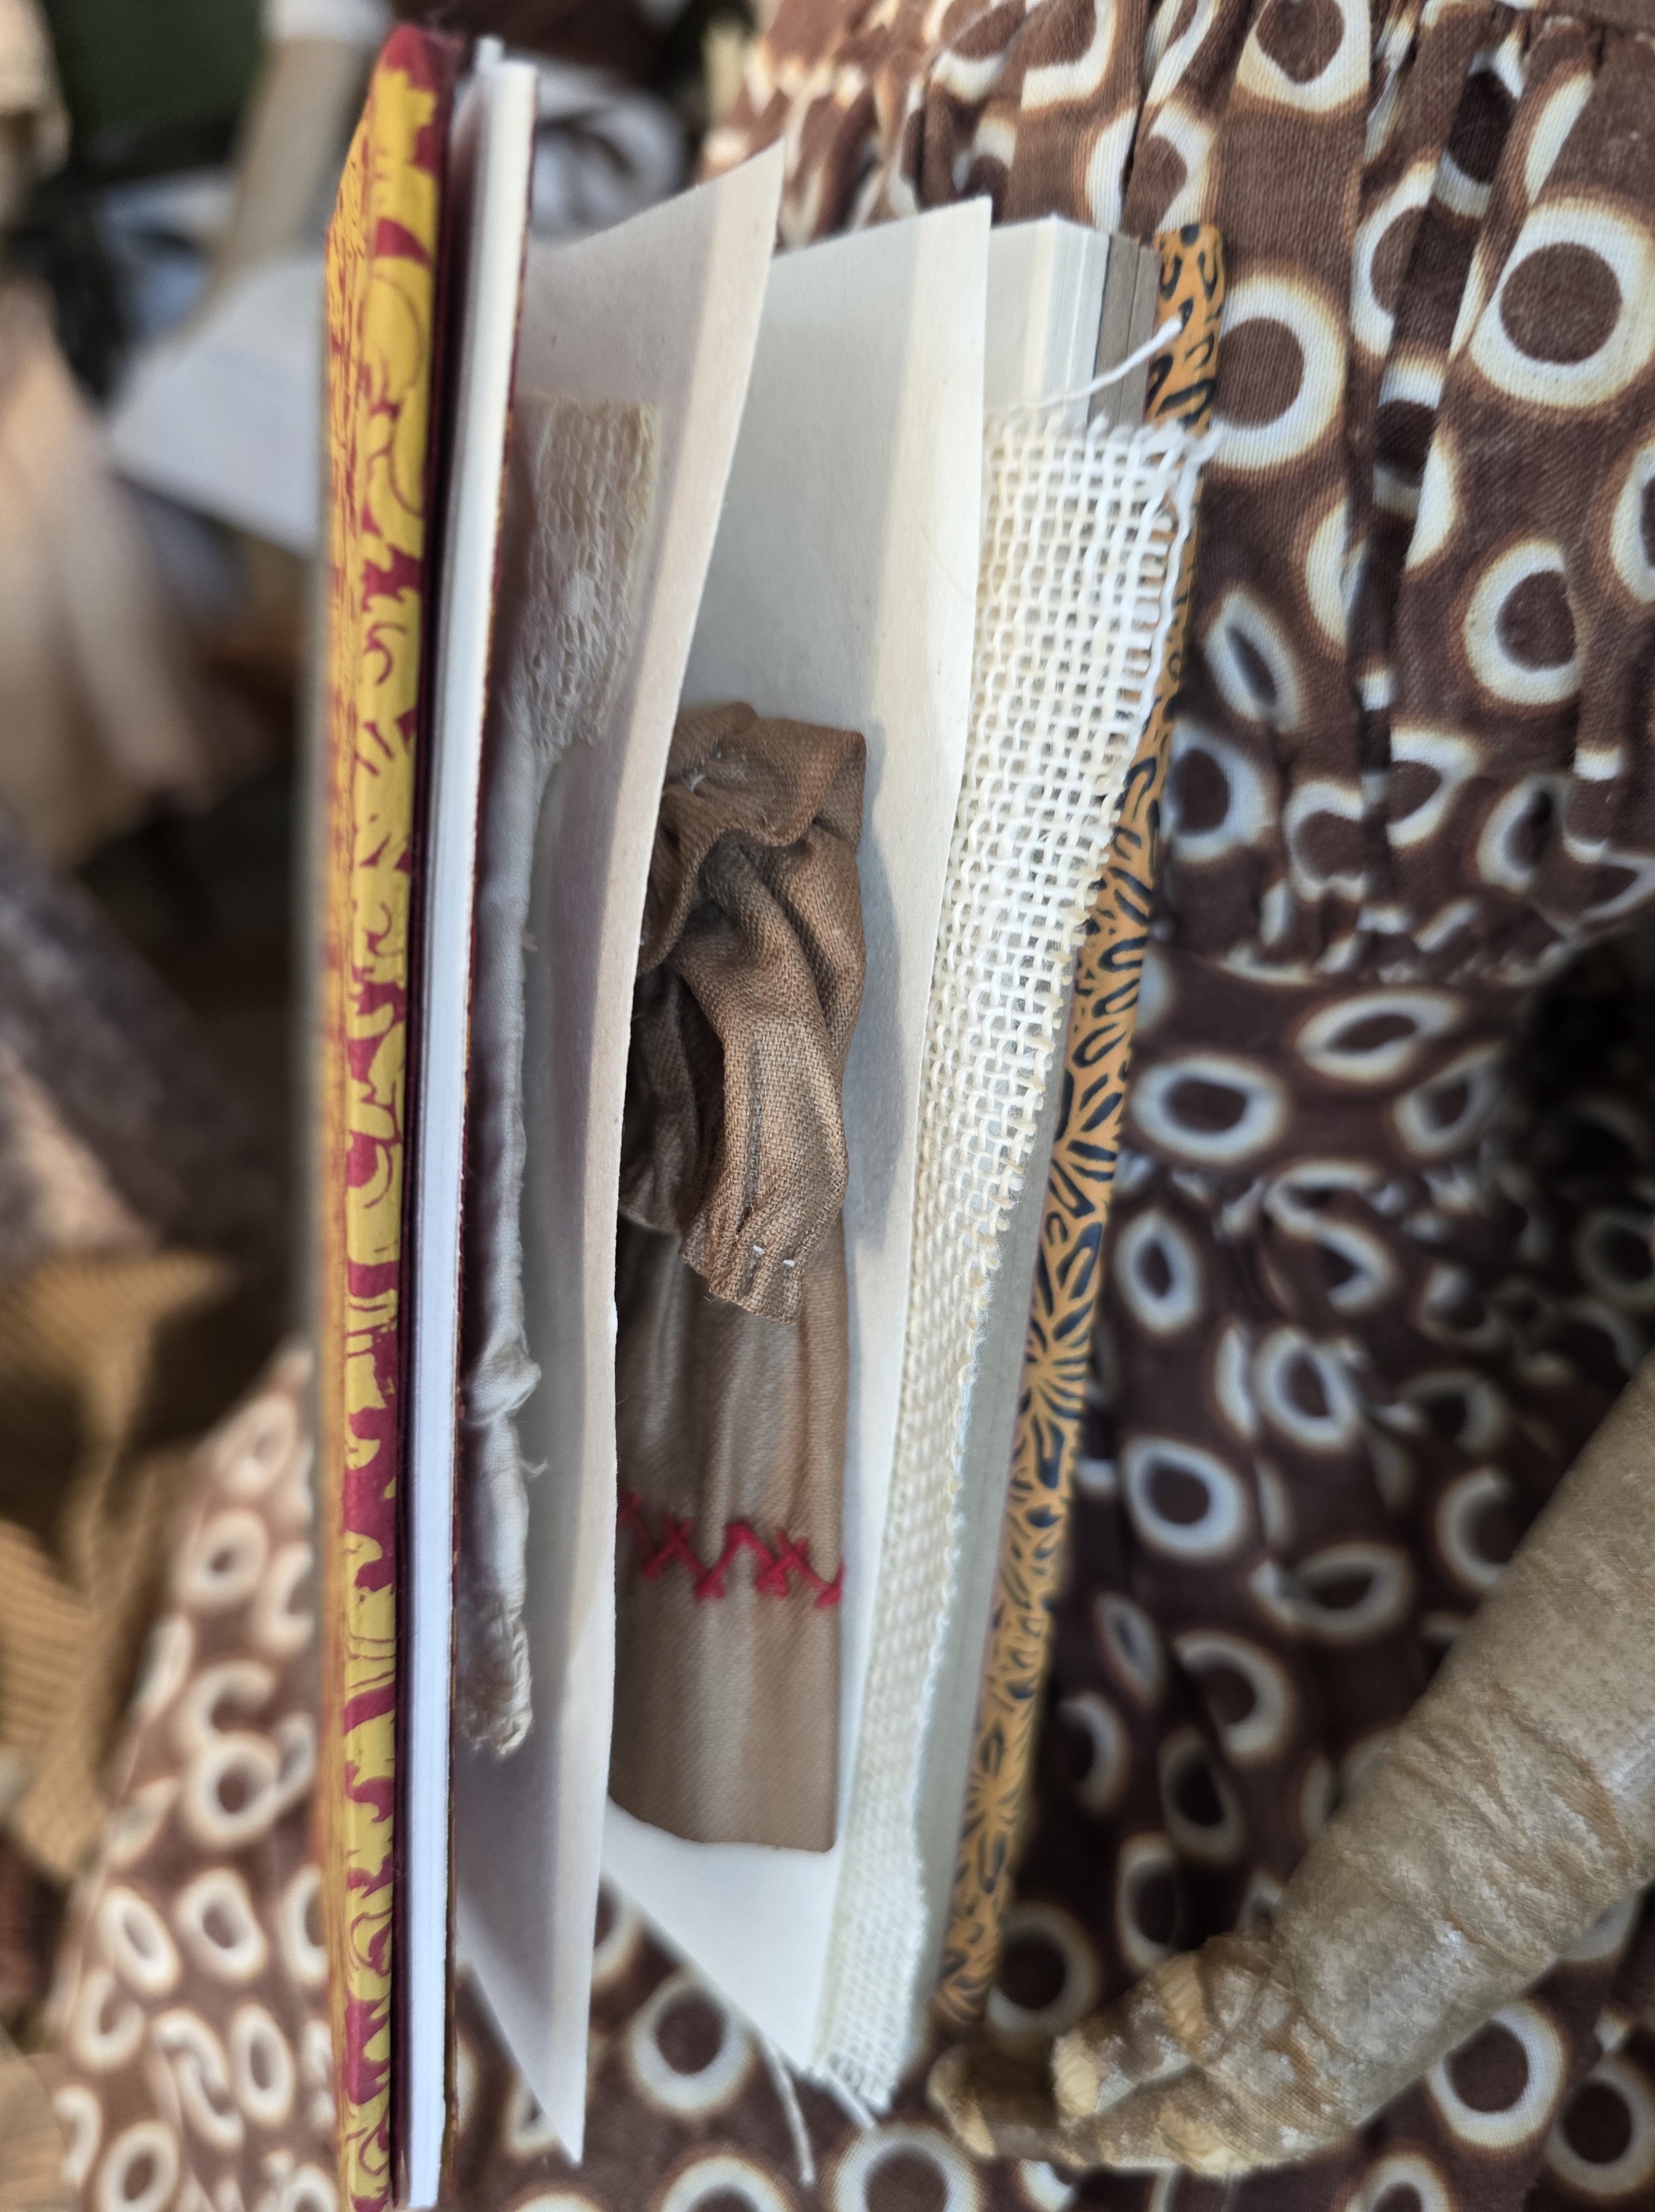
The Repurposed School Book Turned Scrap Book that Cloe and I gave my Izannah Sisters ~ This was a fortunate antique find. I love the idea of someone reusing this little book to hold their treasured clippings and colorful paper scraps!

If you fondly remember seeing or making any of Rainy Crawford’s great doll patterns, you may want to look back at some of these posts: https://izannahwalker.com/2013/06/13/a-very-busy-week/ , https://izannahwalker.com/2013/06/14/flag-day-june-14th/ , https://izannahwalker.com/2014/04/16/at-long-last-an-18th-century-doll-for-my-18th-century-home/

❤ ❤ ❤ ❤ ❤ ❤ ❤ ❤ ❤ ❤ ❤ ❤ ❤ ❤ ❤ ❤ ❤ ❤ ❤ ❤ ❤ ❤ ❤ ❤ ❤ ❤ ❤ ❤ ❤ ❤ ❤

Izannah Inspired Artist Dolls · Izannah Reproduction Doll Class · Izannah Walker Dollmaking Class · Izannah Walker Project Ideas · Izannah Walker Reproduction Doll · Studio News · Where to Shop

For Those Interested in my Master Level Izannah Walker Dollmaking Class by Mail

2/24/2024 ~ I’ve been putting together class books for two new students, and also made 2 extra copies. If you have been wanting to take the class this is a great time to get immediate shipping on the class materials and a chance to start your Izannah Walker dollmaking journey at the same time as a few other fellow students. Online support for this class in a private Facebook group is included as part of the class.

Available for immediate purchase at my website https://asweetremembrance.com/category/classes-by-mail/

Antique Izannah Walker Dolls · Doll Clothing · Information · Izannah Walker Project Ideas · See Me in Print

Using My Patterns for Select Pieces of James’ Clothing, Published in the April 2023 Issue of Antique Doll Collector Magazine ~ How to Enlarge the Pattern Pieces

The April issue of Antique Doll Collector magazine is out, which means my final installment of James’ story and the accompanying patterns are now available for you to use. ❤

Emma Blue and Sarah Jane were quite excited when this envelope arrived in yesterday’s mail from the subscription department of Antique Doll Collector magazine! The pretty quilt block stamps made it feel like the magazine had been giftwrapped!

You’ll find my article on pages 38-44 of the April issue. The patterns themselves are on pages 43 and 44. To use the patterns the first thing you will need to do is to enlarge the pattern back to 100%. The short answer to “How much do I enlarge them?” is 14.3%, which is a pretty awkward percentage that you may not be able to program into your printer. If you enlarge the patterns by 15% they will be fairly close to my original size. “Why do I have to go to the trouble of enlarging them?” Good question! I provided the patterns to ADC at full size, but due to the space considerations, and the physical size of the magazine, the graphic designer needed to shrink the patterns down to fit into the allotted space.

When you enlarge the pattern to 100% of it’s original size it should fit perfectly on an 8.5 x 11 inch piece of paper. It’s very important to remember that I made these patterns to specifically fit a 17 inch Izannah Walker boy. If you would like to use the patterns to dress a different size Izannah Walker doll, or another type of mid-nineteenth century doll, such as a papier-mache, china, parian, or rag doll you will need to completely alter the size and fit of the patterns. Always, always, always make a muslin to check the fit of any pattern you are making from antique fabric!

Now that I have given you the short answer “how much do I enlarge the pattern?” let me walk you through how to get that answer:

  1. Measure the 1 inch key that is shown on pages 43 and 44 along with the pattern. The key measures 7/8th of an inch.
  2. 7/8 x 8/7 = 1
  3. 8/7 = 1.1428571429 so the pattern needs to be 114.3% (rounded up to the nearest tenth of a percent) of the size it was printed in the magazine, another way to say that is enlarge the pattern by 14.3%
  4. To double check your work 0.875 x 1.1428571429 = 1

I’ll be posting some more tips for using these patterns in the near future. ❤

A fun tidbit. Looking through the open doorway of the main floor “Bedroom”* can you spy the stenciled walls that inspired the stenciling in the second floor chamber, that the doll’s use as their bedroom, in their own very tall house? I painted both the full size walls, and the miniature versions, using historic stencil patterns.

*(The only chamber actually called a “bedroom” in the 18th century because these tiny rooms adjoining kitchens, next to the cooking hearths, were just large enough to hold a bed and little else.)

Izannah Walker Project Ideas · Where to Shop

Directions For Making a Little Dress for my Tiny Cut & Stitch Printed Izzies

IMG_2804 (2)
How to make a dress for the doll’s little Izzy!


For everyone who requested it, here are the instructions for making a simple little dress for my Cut & Stitch printed fabric Izzies ❤
 
Little Cut & Stitch Doll Dress
 
This is a quick little dress that you can make for dolls made from my cut and stitch fabric Izzy dolls.
When I make this dress I use the selvedge edge of the fabric as the “hem” of the skirt and sleeves – make sure there is NO PRINTING on the selvedge you are using. If you don’t want to do this you will have to add extra length to accommodate a hem.
All seam allowances are ¼ inch. All seams are hand stitched.
Cut 1 – 3.5 in. x 9 in. rectangle of fabric with a selvedge along one 9 in. edge.
Cut 1 – 2.25 in. x 6.5 in. rectangle of fabric.
Cut 2 – 1.25 in. x 2.5 in. rectangles of fabric with selvedge edges along the 2.5 inch sides.
Fold the 3.5” x 9” rectangle in half with right sides together and sew the 3.5” edges together. Turn to the right side. Sew a running stitch around the top edge of the skirt, place on doll and draw up the thread to fit the doll’s waist.
Fold the 2.25” x 6.5” rectangle in half with right sides together and sew the 2.25” edges together. Turn to the right side. The seam you’ve sewn is a side seam. Fold the fabric “tube” so that the side seam is along one edge and the fold is along the opposite edge. Cut 2 “U” shaped armholes – one centered on the side seam and the other on the side fold.
Fold one 1.25” x 2.5” inch rectangle in half with right sides together and sew the 1.25” edges together. Turn to the right side. Repeat with the 2nd rectangle.
Center the sleeve seams in the bottom of the “U” shaped armholes. Stitch in place. Turn the neck edge of the bodice under ¼ inch and sew a running gathering stitch around the neckline, put bodice on doll. Draw up the thread to fit the doll’s shoulders. Sew a gathering stitch around the bottom waist edge of the bodice and draw up the thread to fit the doll’s waist. Tuck the waistline seam allowances to the inside and sew the bodice and skirt of the dress together.
* By adjusting the measurement, this same basic dress can be used to dress a Frozen Charlotte or HItty ❤
 
Izannah Inspired Artist Dolls · Izannah Walker Project Ideas · Where to Shop

Tiny Cut & Stitch Fabric Doll Panels

Cut & Stitch Fabric Doll Panels
Visit my main website A Sweet Remembrance to order.

Fun project ideas using my cut and stitch fabric doll panels ❤

I’ve always been very fond of all of the printed cut and sew dolls from the late 19th & early 20th century eras.  Here are my versions!  They are a combination of printed cloth dolls and photos of some of the antique dolls in my collection.

Most of my printed dolls are 8-1/2 inches tall.  Though there are a few exceptions.  Each doll panel that you buy includes two mirrored doll images, so that you can sew them together back to back, or use them separately with a plain fabric backing, or for applique work.  The dolls are printed on high quality 100% cotton fabric and are completely washable.  There is extra fabric surrounding each doll that will allow for a ¼ inch seam allowance.  The dolls may be sewn with right sides together, turned and stuffed, machine stitched from the front side, trimmed and stuffed, or appliqued onto other projects. They may also be cut out and used for journaling and other multi-media projects.  Add bits of fabric, lace, crepe paper and Dresden trims to create doll clothing.

ORDER HERE ❤ https://asweetremembrance.com/2018/08/24/cut-and-stitch-fabric-doll-panels/

Some project ideas include:

– Sew back to back for Christmas ornaments, so the “front” side is always on view.

– String together into a banner to hang across mirrors, windows or mantles.

– Hang individually from cupboard doors or chandeliers.

– Make into a mobile.

– Stuff with lavender and use as drawer and closet sachets for your finest linens and clothing.

– Fill with cedar shavings and place among your doll and bear collection to repel moths.

– Special party favors for your doll club meetings and events.

– Make into a special doll’s doll for your favorite plaything.

– Baby toys.

– Add a squeaker inside to make a fun dog toy or fill with catnip for your kitten to play with.

– Applique’ onto quilt blocks, pincushions, curtains, aprons, pockets, baby bibs and clothing, tote bags, t-shirts and more.

Priced individually or discounted if ordered in groups.

FABRIC PANELS WILL LEAVE MY STUDIO IN APPROXIMATELY 7 – 10 DAYS. THEY ARE SHIPPED VIA FIRST CLASS MAIL, so please allow adequate time for them to arrive. Thank you ❤

Doll Clothing · Izannah Walker Project Ideas

Happy 200th Birthday Izannah Walker – Part 4 – Directions For Making a Classic Izannah Walker Dress

Here is a birthday present from me to all of you! Directions for making a classic mid- 19th century dress for your Izannah Walker doll. I based the directions on several antique children’s dresses in my collection. I hope you enjoy making this dress for your dolls ❤ Or even better, make a larger version for a special child in your life ❤ ❤ ❤

These instructions are for your own personal use, they are copy righted by Paula Walton A Sweet Remembrance 2012 and are not to be reproduced or sold in any form.

dress instructions 1 www.izannahwalker.com

First a  bit of historical background.  Izannah Walker lived and worked in a time when paper patterns, as we know them, were just coming into being.  In 1863 Ebenezer Butterick a tailor from Massachusetts  began making graduated and marked patterns out of paper.  Folded by his wife and family and packed in boxes of 10 each, he sold these patterns to tailors and seamstresses throughout New England. These patterns proved to be very popular, possibly due to the fact that Butterick hired a staff of door-to-door traveling salesmen.  Prior to this time, garments were cut without a pattern as such.  There were books of diagrams available for professional seamstresses that illustrated how to cut the latest fashions.  Periodicals, such as Godey’s Lady’s Book also provided color plates of the latest fashions, along with diagrams and brief instructions.

Simple basic garments, such as this dress and other children’s clothing, along with shirts, under wear, etc. were routinely sewn at home without the use of any pattern, as it was common knowledge how to make these basic necessities.

The following instructions are written following this tradition and are meant to be custom fitted to your doll.  You can also use these same instructions to make full size children’s dresses by simply enlarging the widths and lengths.

*** Sewing should be done by machine, unless specifically noted.

dress instructions 2 www.izannahwalker.com

Step 1. Cutting out the skirt.  Measure from the waist of your doll down to the point where you want the bottom of the hem (This can be to the tops of her feet, or higher.  If dressing your doll as an adult or young woman the skirts should be longer than if you are dressing the doll as a young child.).

Add 1/4 -1/2 inch (your choice – just remember how much you have allowed) seam allowance for the top edge, if you plan to make a gathered skirt.  If you will be cartridge pleating, also known as gauging, your skirt you need to allow at least an inch to fold down at the top edge (or up to 1 – 1/2 inches).

Next determine how deep a hem you wish to make.  If you are using antique fabric you may be very limited by the amount of fabric you have on hand to make your dress.  Ideally I like to have at least a 2 inch hem for doll’s dresses, 3 inches is even better.  When making a child’s dress you should have a hem depth that measures from 3-4 inches.  Add 1/4 inch allowance to turn under on the top edge of the hem.

If you want to have growth tucks in your skirt, as shown in the sample dress above, add 1 inch per tuck for 1/2 inch tucks, or 1 – 1/2 inches per tuck for 3/4 inch tucks.  For a child’s dress add 2 inches per tuck for 1 inch tucks.

Total all of your measurements.  Your figures should look something like this:

skirt length – 7 inches

top seam allowance (gathered skirt) – 1/2 inch

hem – 2 – 1/2 inches

hem edge turn under allowance – 1/4 inch

two 1/2 inch growth tucks @ 1 inch each – 2 inches

total = 12 – 1/4 inches

To figure out the width of your skirt consider the width of your fabric and availability of yardage.  Antique fabrics are narrow in width usually 24 – 36 inches.  I generally cut my doll skirts the width of the fabric.  If I am piecing together fabric to make up the width, then I try to come up with at least 20 inches.  If I am gathering the skirt I don’t make it any wider than 36 inches.    When cartridge pleating it’s a good idea to have a width of at least 26 inches and no wider than 38. Children’s skirts obviously will require at least two fabric widths and should measure from 38-50 inches. Now it’s finally time to carefully measure and cut out the rectangle that you will be using to make your skirt. Yeah! We’ve made it through Step 1 !!!

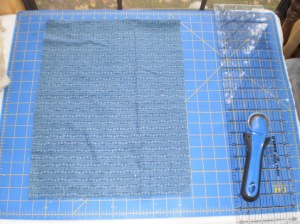
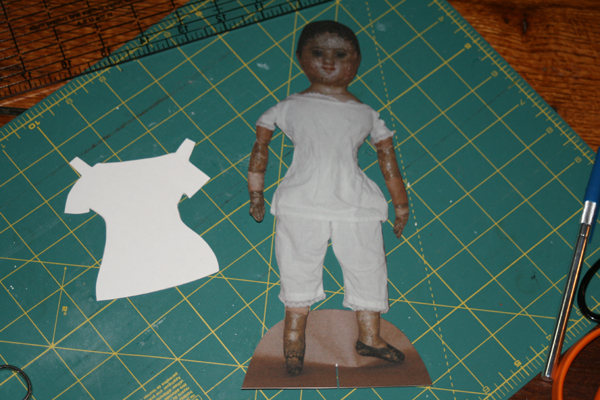
Step 2. Cutting out the bodice, sleeves, neck, sleeve and waist bands.

dress instructions 3 www.izannahwalker.com

Measure the distance between the point on your doll where you want the top of the waistband to be and the point where you would like the neckline.  I find that the measurement is usually about 3 inches.  Add two 1/4 inch seam allowances, one for the top edge and another for the bottom edge (if you feel more comfortable sewing with a 1/2 inch seam allowance you may increase the bottom allowance to 1/2 inch – the top seam allowance has to be 1/4 inch).  To determine how wide, from side to side,your bodice needs to be, measure around the widest point of your doll’s shoulders and multiply that measurement by 2.  This will be the minimum width, you may add on a bit more if you like particularly full bodices.

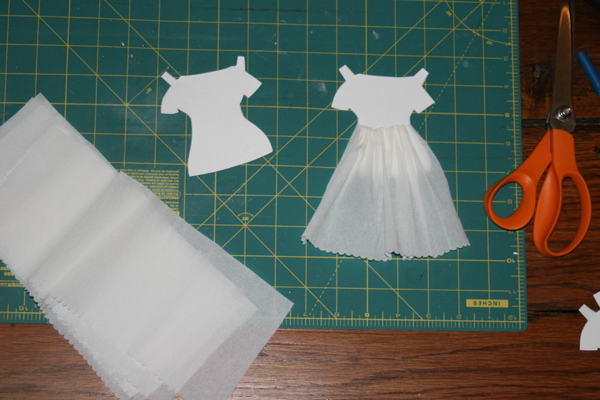
To cut out the sleeves, measure from the neckline, down the arm to the length you would like the sleeves.   The width of each sleeve is calculated by measuring from the neckline, down under the arm and back up to the neckline, then adding on enough to bring the fabric up over the shoulder and add in extra fullness for the gathers.  The strip of fabric that I cut for the sleeves of the sample dress, above, was greater from top to bottom than the strip for the bodice.

Neck and sleeve bands are 1 inch by the total shoulder measurement of the doll (at the widest point), plus the circumference of the doll’s upper arm x 2, plus at least 2 inches for seam allowances and finishing.

The waistband is 1-1/4 inch for 1/4 waist seam allowances or 1 – 3/4 inches for 1/2 inch waist seam allowances by twice the doll’s waist measurement, plus an extra 1 – 1/2 inch for seam allowances and finishing.

Double check your measurements and addition, then cut out your fabric.

Step 3. Constructing the skirt. 

Sew the center back seam of the skirt, leaving 3-4 inches open at the top edge.  Turn the raw edges of the center back skirt opening under a scant 1/4 twice and sew down.  Sew a double row of gathering threads around the top edge.  Press the back seam to one side: turn up the raw bottom edge 1/4 inch and press.  Decide on the placement of your growth tuck or tucks (if you are incorporating them in your dress).  Measure for the first tuck, fold the skirt at that point and pin in place.  Stitch around the skirt either 1/2 inch or 3/4 of an inch away from the folded edge (remember that you had to choose between 1/2 inch and 3/4 inch tucks when you cut out your skirt). Press the tuck down. Make the second tuck in the same manner. Turn up the hem and stitch in place, being careful not to catch the tucks in the hem.

Step 4. Making the bodice. 

Take the strip of fabric that you cut for the bodice, fold it in half at the center front, then fold it in half a second time to determine where the arm holes will be. Cut “U” shaped armholes on the second fold, through all thicknesses, starting at the neckline edge and going about half way down to the waist edge.

You can check exactly how far you need to go by measuring the fabric strip up against the shoulder of your doll. The arm hole should be deep enough to allow the sewn on arm to move freely.

Turn under the center back edges of the bodice a scant 1/4 inch to the wrong side of the fabric. Press in place. Turn under again 1/2 inch towards the back side. Stitch in place to hem.

Next take the strip of fabric that you cut for the sleeves. If you haven’t already done so, cut it in half, so that you have two equal parts – one for each sleeve. Sew the short ends of the sleeve together to form a tube. Repeat for the second sleeve.

Sew two rows of gathering threads around the bottom edge of each sleeve.

dress instructions 8 www.izannahwalker.com

dress instructions 9 www.izannahwalker.com

Sew one sleeve to the bodice, matching the sleeve seam to the center of the bottom rounded part of the “U”. Repeat with the the second sleeve. The top of the sleeve goes up past the neckline edge of the bodice. Not all of the sleeve is sewn to the armhole!!!

dress instructions 10 www.izannahwalker.com

Sew two rows of gathering threads along the neckline edge, including the tops of the sleeves.

dress instructions 11 www.izannahwalker.com

Sew two rows of gathering threads along the waist edge of the bodice.

Step 5. The waistband.

dress instructions 12 www.izannahwalker.com

Cut the strip for the waistband in half, so that you have two pieces of equal length.  Mark the center of the bodice waist edge and the center of one of your waistbands.

Draw up the gathering threads on the waist edge of the bodice to the exact measurement of your dolls waist and tie off. Adjust the gathers so that you have more fullness in the center front, less under the arms and more in the back. Leave an area of less full gathers 1/2 inch or so to either side of the center back opening.

Pin the center front of the bodice to the center front of the waistband. The waistband should extend 3/8th of an inch beyond the bodice on either side. Stitch the waistband to the bodice.

Mark the center front of the skirt waist edge. Draw up the gathering threads on the skirt to the exact waist measurement of the doll’s waist and tie off. Adjust gathers evenly. Pin the center front of the waistband to the center front of the skirt. Sew waistband/bodice to skirt (remembering that the center back edges of the waistband will extend beyond the skirt 3/8ths of an inch).

Turn the ends of the waistband to the inside, so that they are even with the hemmed center back edges of the bodice and skirt. Take your waistband lining and press the short ends under 3/8ths of an inch to the wrong side of the fabric and press under 1/4 inch along each long edge. Pin in place on the inside of the waistband of the dress, making sure the lining coves all of the raw edges and seams. Hand-stitch in place, leaving the center back edges open. Make a row of stitching 1/4 inch away from the seam lines along each long edge of the waistband (this is like topstitching). Run lengths of 1/8th inch wide cotton tape through the casings formed by this stitching. The tape should be long enough to tie into bows.

dress instructions 16 www.izannahwalker.com
I lined this waistband in a lighter color fabric, which allows you to see the stitching better.

Step 6.  Neck and sleeve bands.

dress instructions 15 www.izannahwalker.com

Try the dress on your doll over her chemise.

Mark the center front of the bodice neck edge.  Draw up the gathering threads at the neckline, so that the back of the dress meets and overlaps a scant 1/8th of an inch.  Tie off the threads. Adjust gathers.

Draw up the gathering threads on each sleeve until they fit snugly, but not too tight around the doll’s arms.  Tie off the gathering threads.  Adjust the gathers.

dress instructions 13 www.izannahwalker.com

dress instructions 14 www.izannahwalker.com

Measure and cut a length of neckband the length of the gathered neckline plus 3/4 of an inch (3/8ths of an inch for finishing each side).  Press under a scant 1/4 inch one long edge of the neckband.  Mark the center of the neckband.  Pin the center of the unturned edge of the neckband to the center front of the bodice neckline.  Sew neckband to bodice, the neckband will extend 3/8th of an inch beyond the bodice on each side of the center back of the bodice.  Turn the 3/8th inch finishing allowance in and finger press in place.  Turn the pressed under edge of the neck band to the back side of the dress.  Hand stitch in place, leaving the ends of the neckband open.  Run a piece of 1/8th inch cotton tape through the casing formed by the neck band.  The cotton tape should be long enough to tie into a bow.

Measure and cut two armbands the length of the  bottom gathered edge of the sleeves plus 1/2 inch for seam allowances (1/4 inch seams).  Turn under one long edge of each sleeve band a scant 1/4 inch towards the back side of the fabric.  Stitch the narrow edges of the sleeve bands together.  Hand-stitch each sleeve band, along the unpressed edge, to the the gathered lower edge of the sleeves.  Turn the pressed under edge up to the back side of the sleeve so that it covers the gathered edge and hand-stitch in place to form 1/4 inch finished sleeve bands.

Hints.

-I like to wash and hang dry my finished dresses, so that the gathers fall into place and dry.

-If you wish to fasten the back of your dress with buttons, rather than ties, make sure that you add on enough of an allowance for the neck band and waistband to overlap at least 1/2  an inch.

-You can make several other sleeve styles for this dress to vary it’s appearance.

dress instructions 17 www.izannahwalker.com

-To see a selection of appropriate fabrics check out these two blog posts.

My Current Stock of Antique Fabrics

Selecting Appropriate Fabric for Your Doll’s Dress

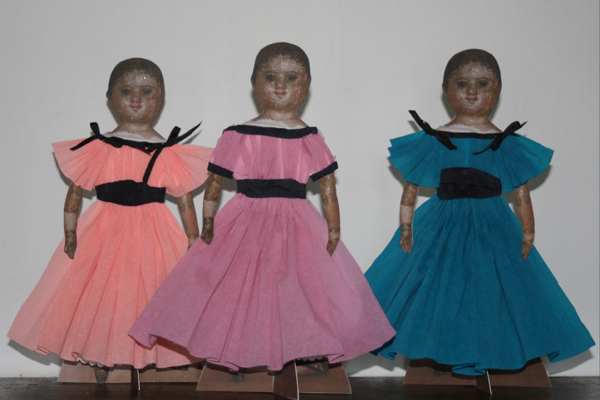
Don’t let the length of these instructions put you off!  This is actually a simple dress 🙂  When I make this style of dress I don’t even jot down measurements or calculations.  I just measure and cut as I go.  After you make a few you will find them easy to do!

Antique Izannah Walker Dolls · Celebrations · Izannah Inspired Artist Dolls · Izannah Walker Project Ideas · Izannah Walker Reproduction Doll

Remember to Write to Absent Friends ~ Izannah Walker Birthday Greetings Project ~ There is still time to send in your Birthday Messages & Photos

Remember Absent Friends
When this you see, remember me… ❤

You still have time to email me your Birthday Greetings! Send them to paula@asweetremembrance.com. Everyone who sends is a Izannah Walker 200th Birthday Message and photo will be entered in a drawing to win a special birthday present of Izannah Walker themed goodies ❤

As I’m sure almost all of you reading this know, September 25th will mark the 200th anniversary of the day Izannah Walker was born. As a fun way to celebrate the occasion I would like to invite you all to email me a short birthday message along with a photograph of your Izannah Walker doll, whether it is an antique original, a reproduction doll that I have made for you, or a doll that you have made yourself in tribute to Izannah’s dolls!

remember absent friends
Birthday messages… ❤

I’m posting this early so that everyone who is interested in participating will have plenty of time to coax their dolls into posing for photos. Please send your photo and birthday greeting to paula@asweetremembrance.com no later than September 18th. I will post all of the photos and their accompanying messages here on my Izananh Walker Journal as part of my annual Izannah Walker birthday celebration.

remember absent friends
Isabeau hopes that some of her dear friends will send birthday greetings to celebrate Izannah Walker’s 200th birthday.

My dolls and I are  very much looking forward to hearing from you and getting a chance to see what some of our absent friends have been up to lately. ❤ ❤ ❤

Remember to write to absent friends <3
Remember to write to absent friends ❤

Antique Doll Furniture · Antique Izannah Walker Dolls · Celebrations · Izannah Reproduction Doll Class · Izannah Walker Project Ideas · Izannah Walker Reproduction Doll · Stray Comments

Valentine’s Day Tea Party XOXO

Welcome to our Valentine's Day Tea Party!  Would you care for a cup of violet tea and a mace shortbread cookie?
“Welcome to our Valentine’s Day Tea Party! I’ve poured you a cup of violet tea.  I hope you like  mace shortbread cookies.”

We baked the cookies yesterday.
“Yesterday we baked cookies all day long.”

These are my very favorite cookies!
“These are my very favorite cookies! They smell so good.  Would you write the recipe down for me?”

If I hurry!
“If I hurry!”

"Let's pose for a family portrait while we are all together, so that we'll always be able to remember how much we enjoyed having tea and spending time together today!"
“Let’s pose for a family portrait while we are all together, so that we’ll always be able to remember  today!”

"One more!  Everybody smile and say TEA!"
“One more! Everyone smile and say TEA!”… Three little sisters join their elders in wishing you a very happy Valentine’s Day.

"Now that we've eaten and taken photos, let's make make Valentine presents."
“Now that we’ve eaten and taken photos, let’s make make Valentine presents.”

"My heart is in your hand."
“My heart is in your hand.”

"I'll keep it on my desk so that I can see it every day and think of you."
“I’ll keep it on my desk so that I can see it every day and think of you.”

"One more cup of tea?"
“One last cup of tea?”

Thank you for coming!  We hope you had fun.

– Newly made Izannah Walker reproduction dolls may be custom ordered, please see my website Paula Walton’s A Sweet Remembrance for details.

The recipe for Mace Shortbread cookies is available by clicking here.

Violet tea may be purchased from Simpson and Vail.

– Directions for the two love tokens shown, plus one more are posted on my Izannah Walker Class Member Site.  If you would like to buy or read more about the class click here.

– True Blue is busy making a Valentine for Kathy.

– Savannah is slaving away on a very special heartfelt letter to Charlotte.

– Ruthie is on her way back home to Brooklyn after visiting for a “spa day” to have the damage caused by the post office  repaired.  She says that she is ever so much better now and that she feels beautiful again.  Plus she loves her new warm flannel petticoat and can’t wait to show it off to Paula C.!

– I’m getting ready to go on a double date with my husband and our very dearest friends Joy and John…

Thank you for stopping by Valentine!

XOXO Hugs and Kisses,

Paula

Celebrations · Izannah Walker Project Ideas · Stray Comments

Sweets for the Sweet, Baking for Valentine’s Day

Bating Shortbread cookies izannahwalker.com

Today is baking day.  The air is filled with the scents of mace and nutmeg.  My kitchen is humming with activity as we prepare for our Valentine’s Day tea party!

Mace Shortbread Cookies izannahwalker.com

Mace Shortbread

3 cups flour

1-1/2 cups powdered sugar

1-1/2 cups butter

1/2 tsp. yeast

1/4 cup warm water

1 tsp. mace

1/2 tsp. nutmeg

*Proof yeast in warm water for 5 minutes.  Measure flour, powdered sugar, mace and nutmeg into a large mixing bowl.  Add slightly softened butter and mix until all of the butter is worked into the dry ingredients.  Pour proofed yeast/water into bowl and beat until thoroughly incorporated.  Cover bowl with a clean dry cloth and set in a warm place for 1 hour, then chill for 30 minutes.

embossing shortbread with izannah walker doll stamp izannahwalker.comRoll dough out on a well floured surface to a scant 1/4 inch thickness and cut out with heart shaped cookie cutters.  Emboss the cookies by stamping them with new, washed rubber stamps that have been dusted with flour.Izannah stamped cookie izannahwalker.com  If desired, lightly brush ground nutmeg into the stamped designs before baking.  Bake at 350 degrees for 8 – 10 minutes, until just starting to very lightly brown at the edges.  Cool completely before removing from cookie sheets.

Little Izzys add an extra helping of sweetness to these Valentine cookies.

* 18th century shortbread receipts call for the addition of barm (yeast).  I followed this tradition when I developed this recipe.  I love mace and decided to add it, along with nutmeg to the cookies (both spices are part of the seeds of the nutmeg tree).

Izannah Heart Shortbread cookies izannahwalker.com

Baking Valentine Cookies izanahwalker.com

You are cordially invited to join us tomorrow for tea.  We hope that you can come!

P.W. izannahwalker.com

Izannah Reproduction Doll Class · Izannah Walker Project Ideas

Making an Izannah Paper Doll

I came up with this idea when I decided to make a very special certificate for everyone who pre-ordered my Izannah Walker Reproduction Doll Making Class in 2009.  I really enjoy making these paper dolls.  They are based in part on a set of early 1900’s Dennison paper dolls that I own.

The next time you would like a quick doll-making project, gather up your paper, scissors, and glue-pot and make a flat Izzy.  Mine carries a certificate in her “book’, but yours could hold and invitation to tea, a thank you note , or simply be a lady of fashion who enjoys playing “dress up”.

Following are instructions.

Instructions:

1.  I took a photograph of one of my original Izannahs, sized the photo to fit on an 8- 1/2 x 11 inch sheet of card stock and printed it in high quality.  If you don’t have an antique Izannah, a newly-made Izannah inspired doll would work just as well.  You could also use pencils or watercolors to draw or paint an Izzy.

2.  Use rubber cement to adhere a second piece of cardstock to the back side of your printed image.  Weight down with a heavy book  until dry.

3.  Draw a pattern for the base of your paper doll.  I used two shapes that resemble half circles, one slightly larger than the other.  Cut out your pattern pieces.

4. Trace the larger pattern piece onto the bottom of your printed Izzy.  Do not draw a line over the doll’s legs.  Trace the smaller pattern piece onto an empty area of your background card stock.

5.  Using scissors and an X-ACTO knife, carefully cut out the paper doll and stand.  If you do not want to use an X-ACTO knife, you can trace both of the pattern pieces for the stand onto background cardstock, cut out the paper doll and stand entirely with scissors and then glue the doll to the larger stand piece with rubber cement.

(click on each photo to see it full size)

6.  Cut slits into both parts of the stand so that the pieces fit together and the doll can stand up.

7.  Trace a pattern for the doll’s chemise, add shoulder tabs.  Cut out pattern.  Then trace pattern onto white card stock.  Cut out.

8.  The card stock chemise is a base for making a crepe paper dress.  Using  your imagination, crepe paper, ribbons and buttons, fashion a dress by cutting out a skirt, bodice and sleeves, then glue them directly onto the card stock.  Tip: Pinking shears or scissors with scallop blades make a nice finish for the bottom of crepe paper petticoats and skirts. *In Early American Life magazine, Christmas issue 2005, on page 34 there is an inspiring photograph that shows a bevy of paper dolls dressed in their finest crepe paper frocks.

9.  Sign and date your paper Izannah.

10. Fold down shoulder tabs.  Place dress on your paper doll.

11. Sit back and admire your accomplishment!  Smile!  Enjoy!

There is still time to pre-order my Izannah class, and it remains on sale, 10% off, through January 1.  All pre-orders come with a paper doll just like the ones pictured here and a vintage Izannah Walker post card (while supplies last). Class information here.