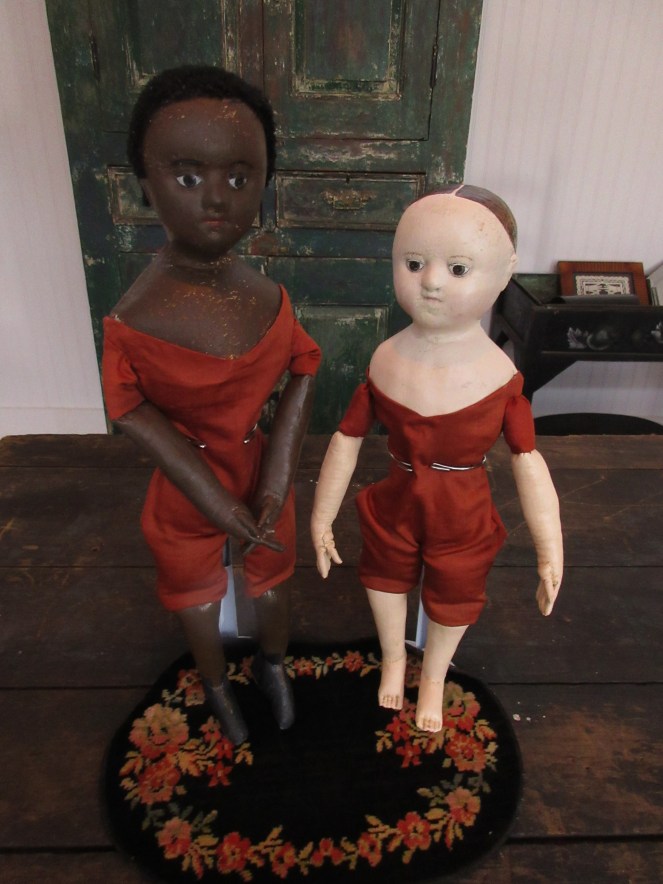
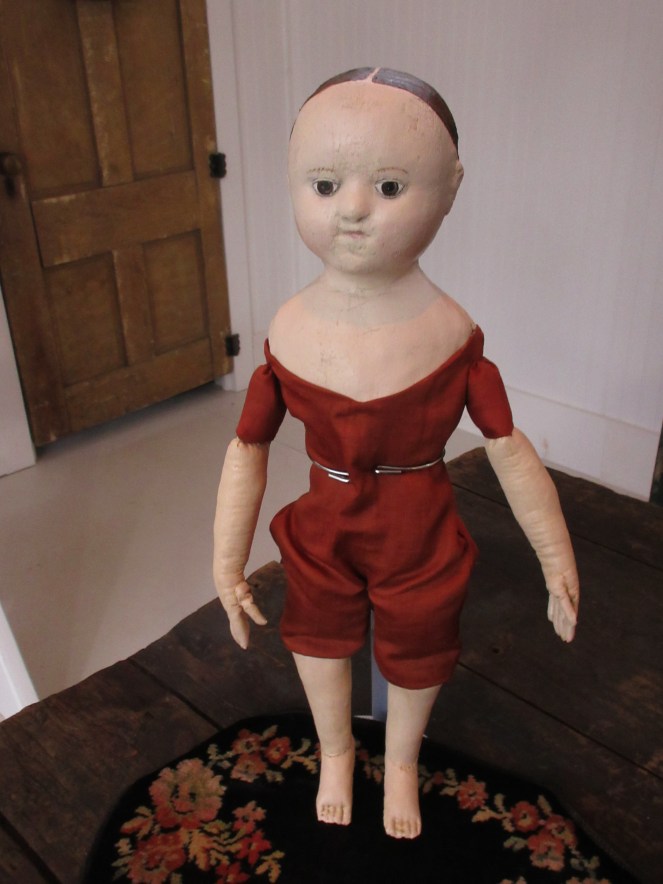
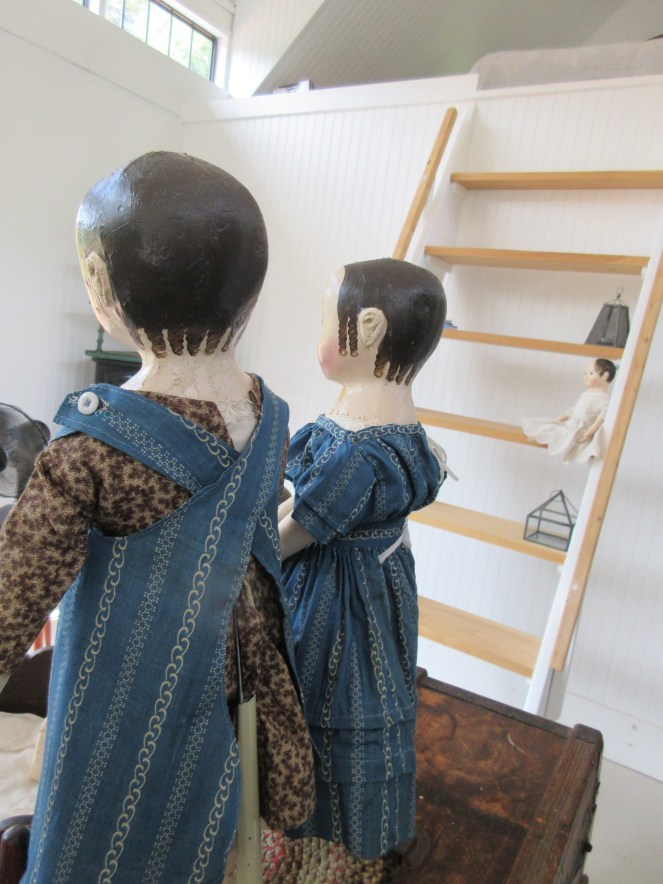
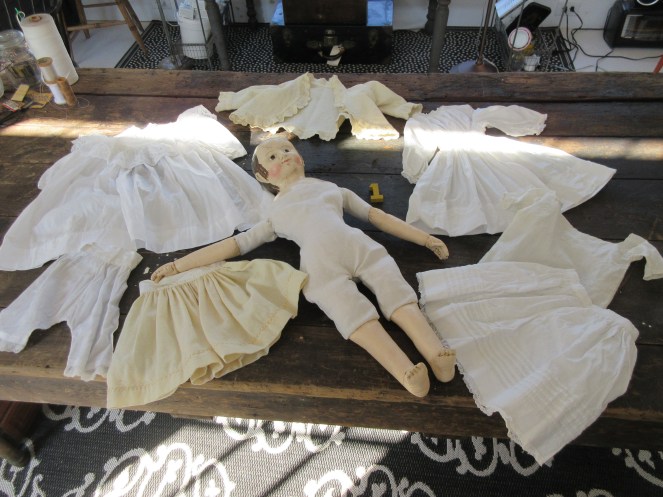
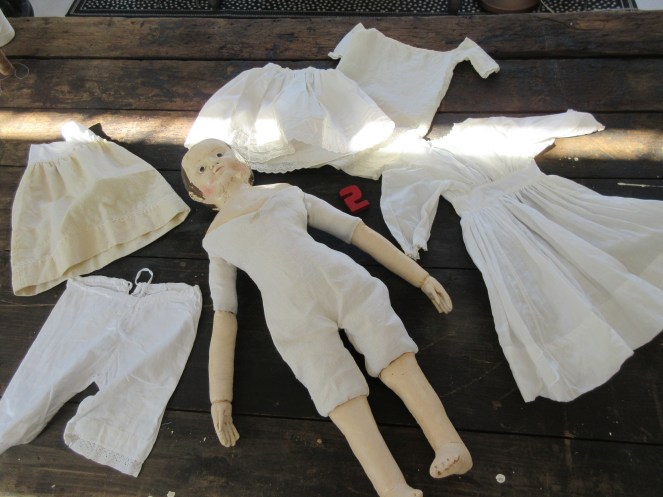
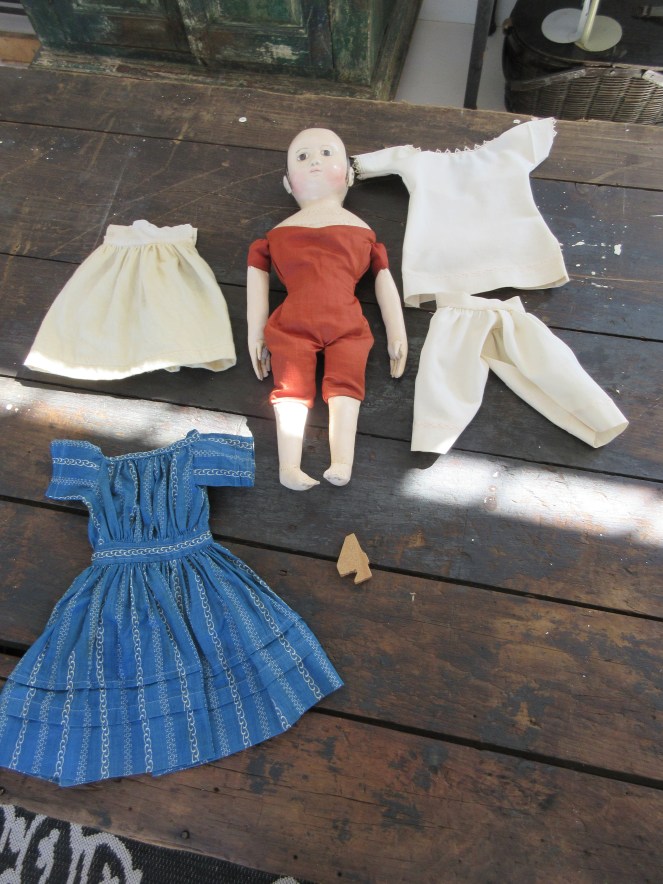
These are my 2nd release of 200th Birthday dolls. Both Ismay (left) and Anna (right) are being offered undressed for all of you seamstresses who would like the pleasure of creating their wardrobes ❤
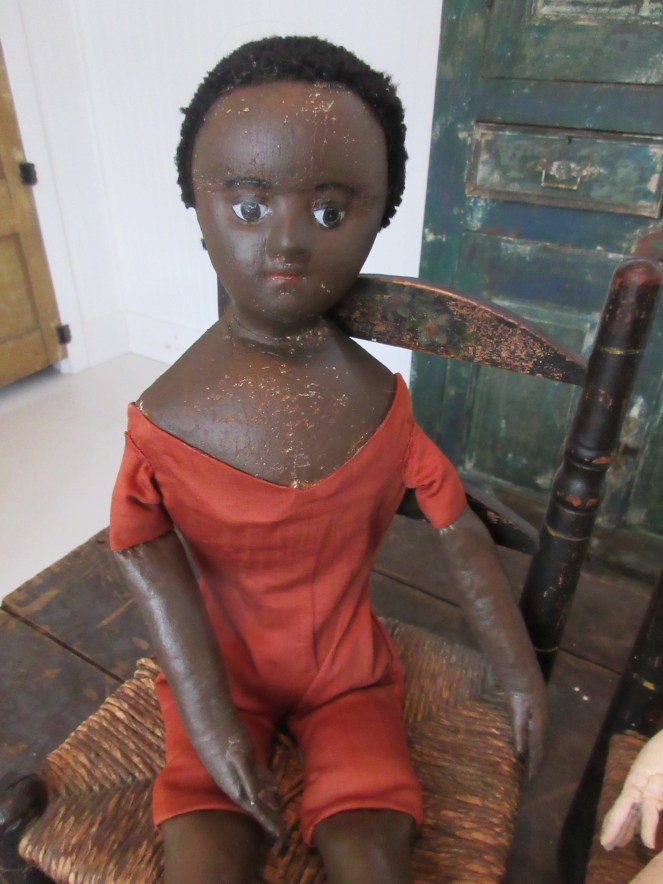
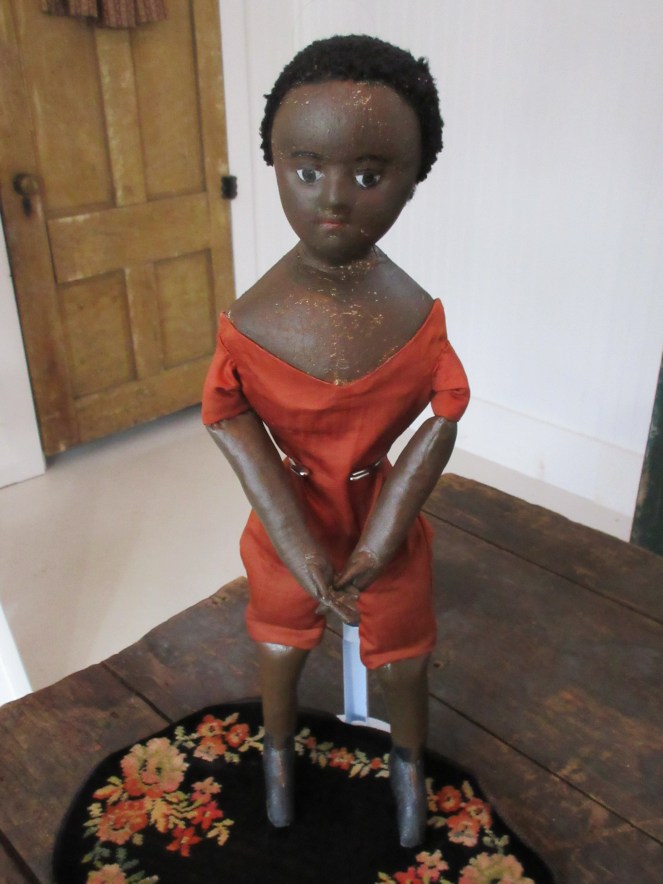
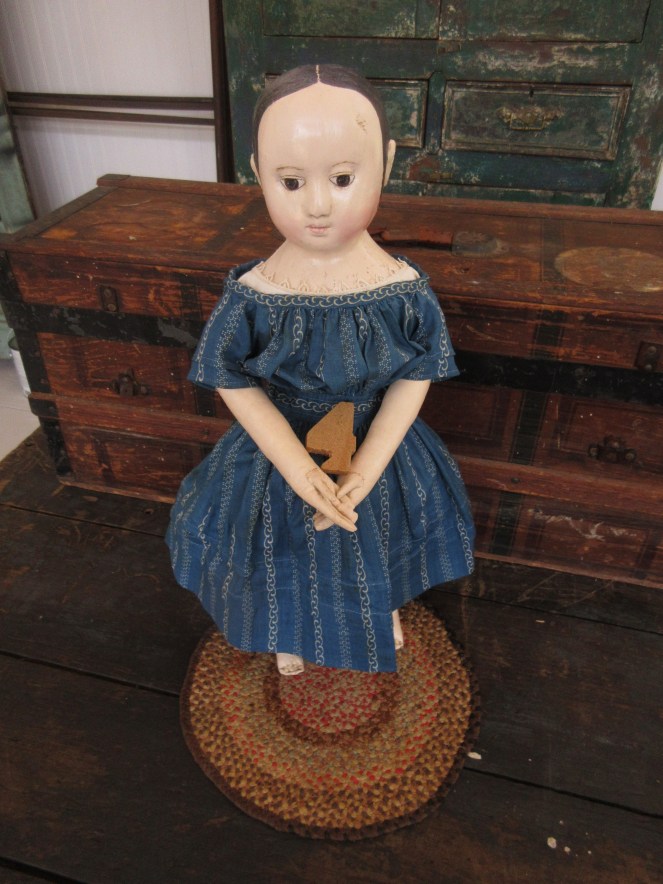
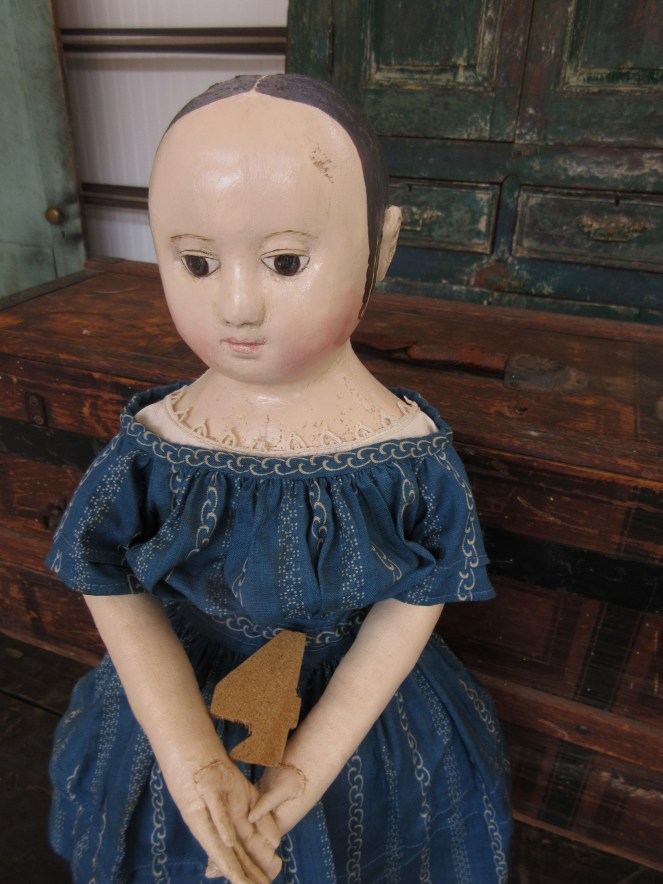
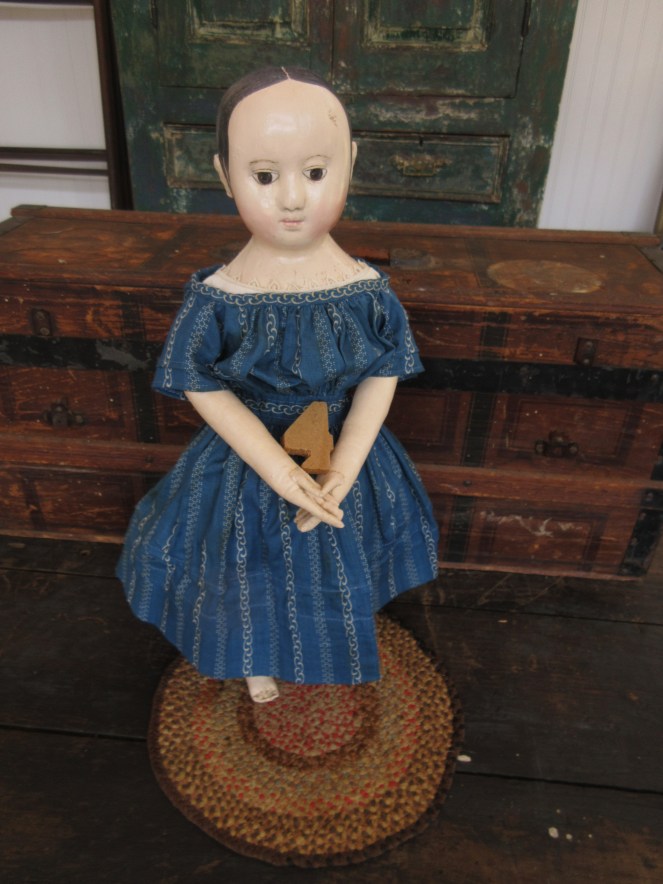
Welcome to Saturday night in my studio! This is the final installment in my Izannah Walker 200th Birthday celebration. Tonight I’m offering two undressed dolls, an 18.5 inch tall black Ismay and a 16 inch tall Anna (yes I DID say 17 inches in the video, because they are usually 17 inches, but she looked a bit petite, so I measured and she is 16 inches tall). For this milestone birthday observance, the dolls I introduced on Monday featured antique clothing. Since tonight’s dolls do not have any clothing, my birthday treat on these dolls is a $200.00 discount if they are purchase this weekend. This special birthday pricing expires at midnight (Eastern Time) tomorrow night, October 1st.
Dolls are sold on a first come basis. Dolls will be sold to the first person sending an email request to purchase each doll to paula@asweetremembrance.com . If for any reason the sale falls through, then the next person in line will be contacted. Payment by Paypal, credit card, personal check or lay-away.
Do you remember the instructions that I posted on Monday for making a classic mid-19th century dress for your Izannah Walker doll? I posted them, in part, because I knew that I would be offering these two dolls especially for all of the dress makers among you. ❤ Creating wardrobes for these dolls is such fun! Searching for just the right fabric, buttons and trims can become rather addictive. Both dolls will come with a copy of my Izannah Walker Doll Clothes Pattern.
This is also an excellent way to budget your doll expenses. You can bring one of these dolls home right now to enjoy, then slowly add a wardrobe for her. If you don’t wish to create a wardrobe for your doll, you can have fun shopping for her at my “Third Thursdays”, where I have both dolls and doll clothing for sale. ❤
Ismay – $1000.00 – Special Birthday Pricing! $800.00 – You have one custom option on this doll, I can paint a stripe of any color you request at the top edge of her boots.
AnnaAnna7curls
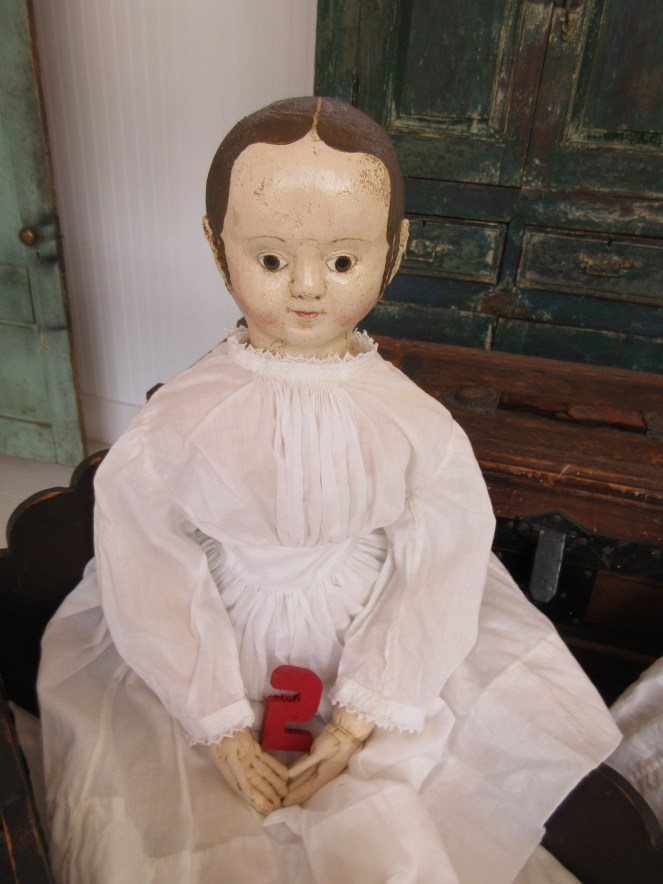
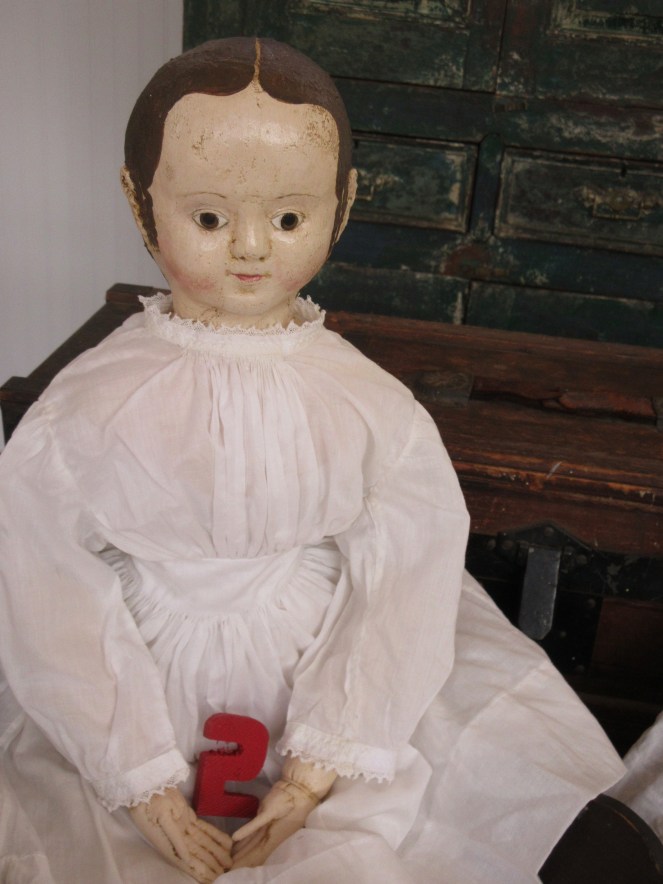
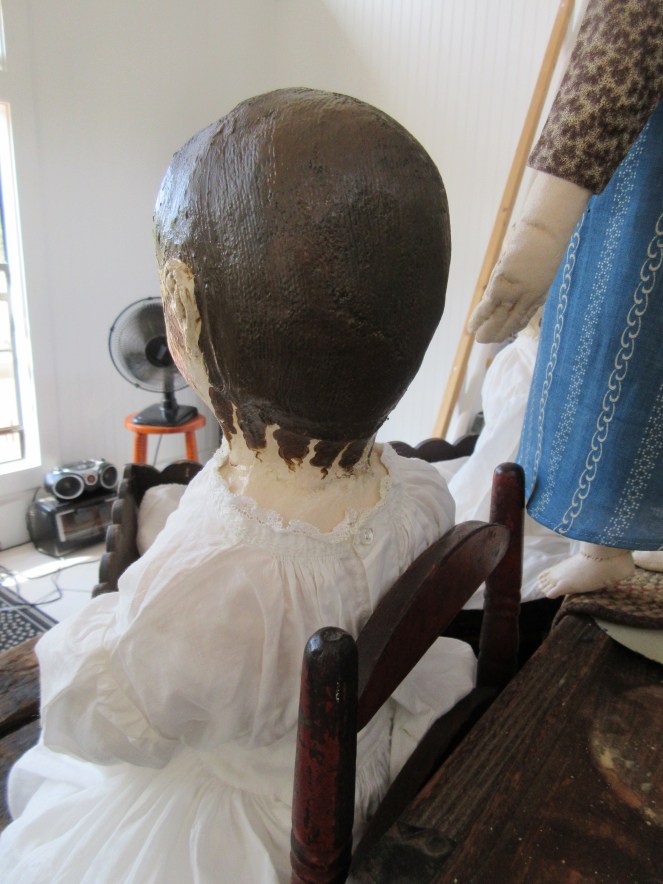
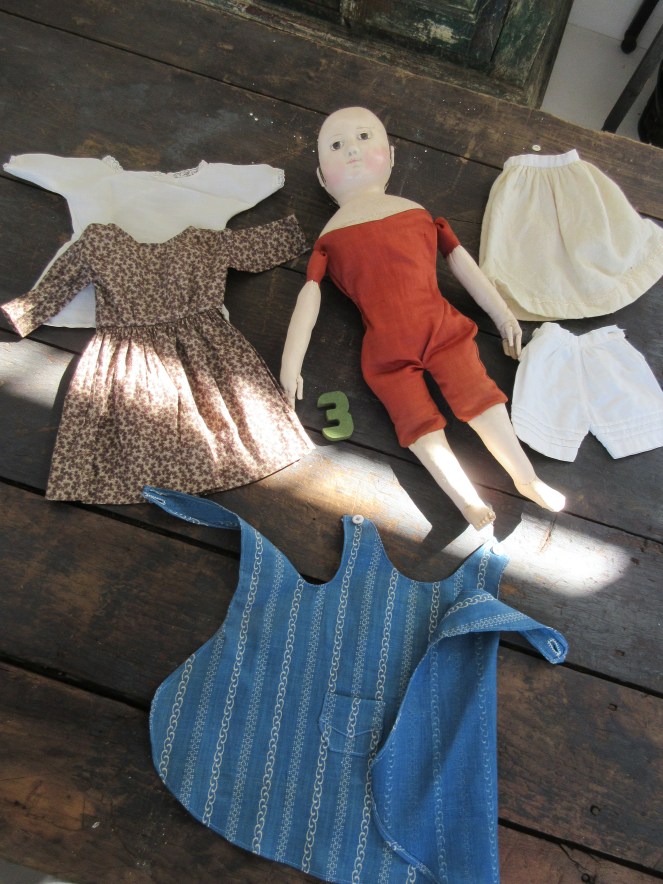
Anna – $1050 – Special Birthday Pricing! $850.00 – Your custom option on this doll is her hairline. I was going to just paint feathery wisps around her face, but I decided to wait and give anyone buying her this weekend the chance to choose between wisps around her face or curls in front of her ears. If you decide on curls you may also choose a wavy, straight or winged hairline. At the moment she only has one coat of paint on her hair. Once the 2nd coat is added her hair will be darker and will not be transparent.
Thank you for coming to visit! Ismay and Anna are very pleased to have made your acquaintance. ❤
special edition Izannah Walker 200th Birthday Dolls
In honor of Izannah Walker’s 200th birthday I have made an armful of very special reproduction dolls. Four of the dolls debuted yesterday during my birthday festivities. Two of the four have found new homes ❤ Dolls #2 & #4 are still available and are listed for sale on my website. Please click here if you wish to purchase.
On Saturday evening September 30th at 8:00 p.m. eastern time I will be posting the last of my special edition 200th birthday dolls. I hope you will be able to come back and join me here as the dolls and I bid a fond farewell to this milestone week!
All of my special edition 18 inch and under dolls have russet autumn hued antique glazed cotton second skins. The 22.5 inch dolls have antique natural linen second skins.
Doll #2 SOLD
Special Edition 200th Birthday Doll #2 SOLDSpecial Edition 200th Birthday Doll #2 SOLDSpecial Edition 200th Birthday Doll #2 SOLD
SOLD “Early Izannah” – A 22.5 inch tall reproduction of a pre-1855 Izannah Walker doll. This amazing doll has a natural antique linen “second skin”, bare feet, three ringlet curls in front of each ear and nine at the nape of her neck. She is dressed in antique pantelettes, an antique wool petticoat, an antique cotton petticoat, a chemise, and an antique child’s dress that I altered to fit. Her paint surface and modeling are true to the original doll from which her mold was made. She also comes with white silk stockings and handmade leather shoes. You may choose your shoe color. I will email you after purchase to discuss your color options. She is Doll # 2 made especially in honor of Izannah Walker’s 200th birthday.
“Hannah” SOLD– An 18 inch tall reproduction of a pre-1860 Izannah Walker doll. A very sweet doll made from the mold of my original antique Izannah Walker doll, Hannah. She has a lovely russet colored antique glazed cotton “second skin”, two ringlets in front of each ear and nine across the nape of her neck. She is dressed in a chemise, pantelettes, antique wool petticoat, and dress made of an antique cotton print. She also comes with white silk stockings and handmade leather shoes. . You may choose your shoe color. I will email you after purchase to discuss your color options. She is Doll # 4 made especially in honor of Izannah Walker’s 200th birthday.
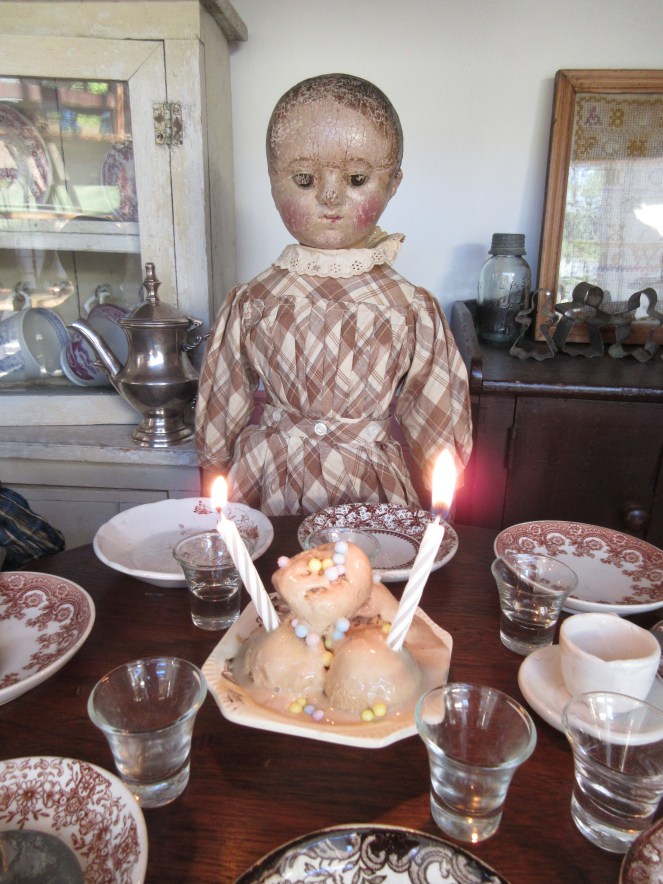
It has been a very eventful day here, as the dolls and I have celebrated Izannah Walker’s 200th birthday. We’ve enjoyed each other’s company, tried a few new things (not all of which have worked perfectly 🙂 ), met new friends, and eaten ice cream!!!
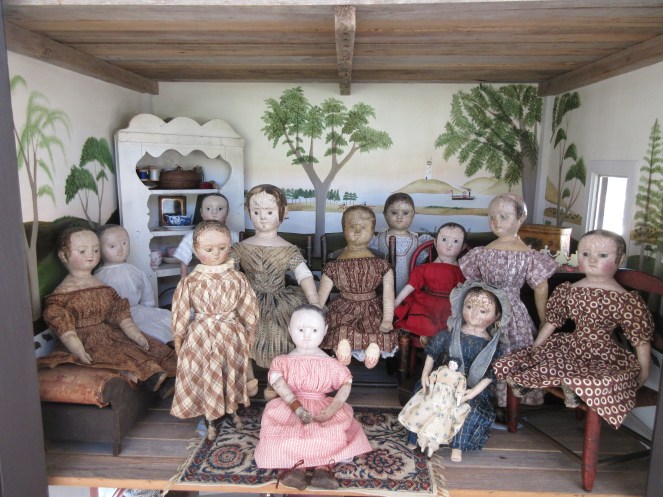
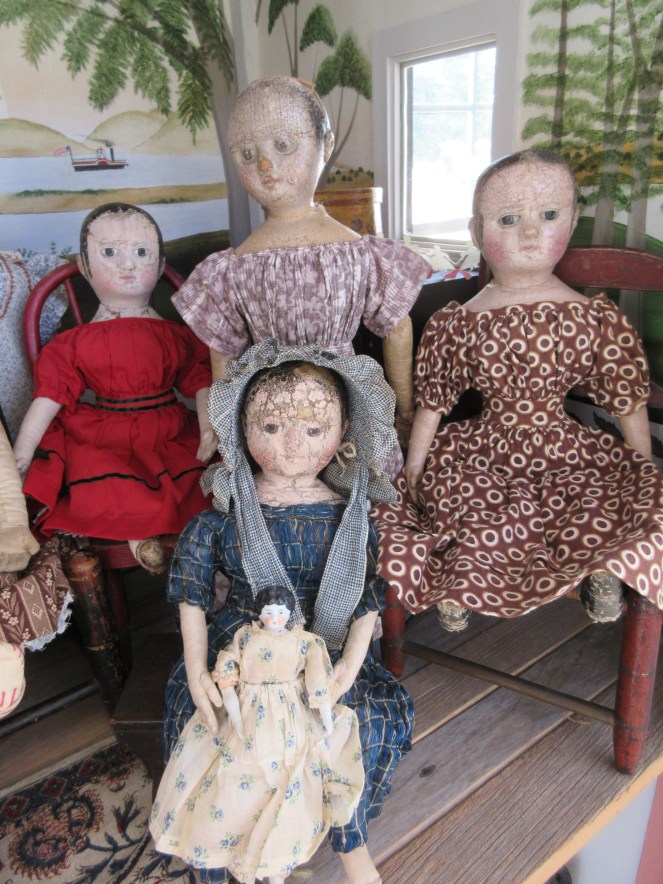
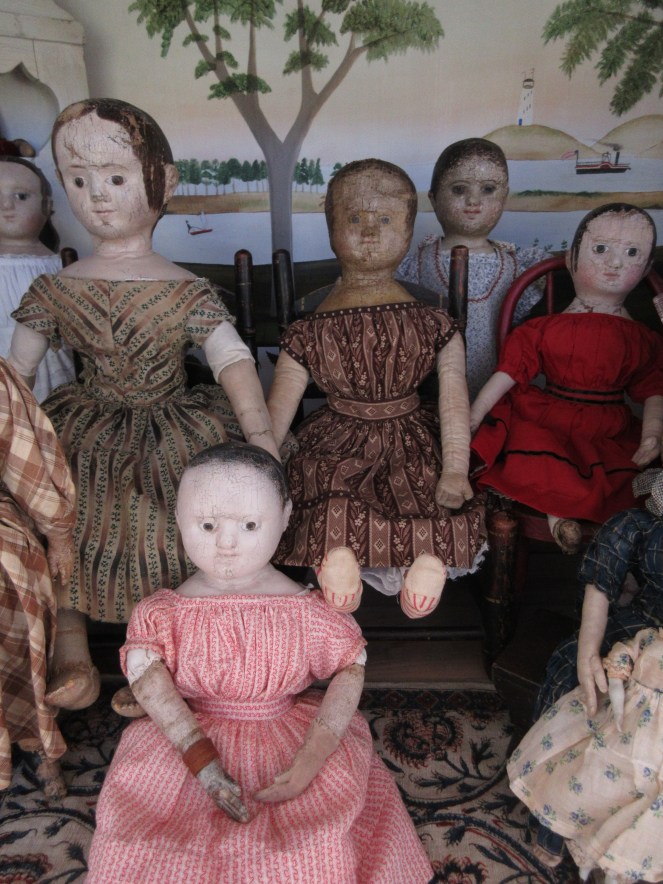
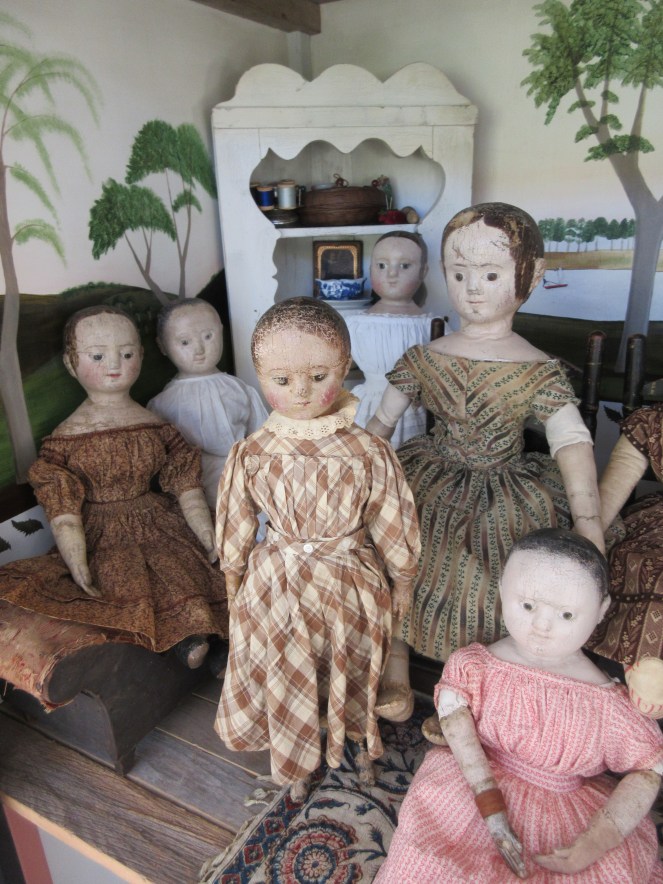
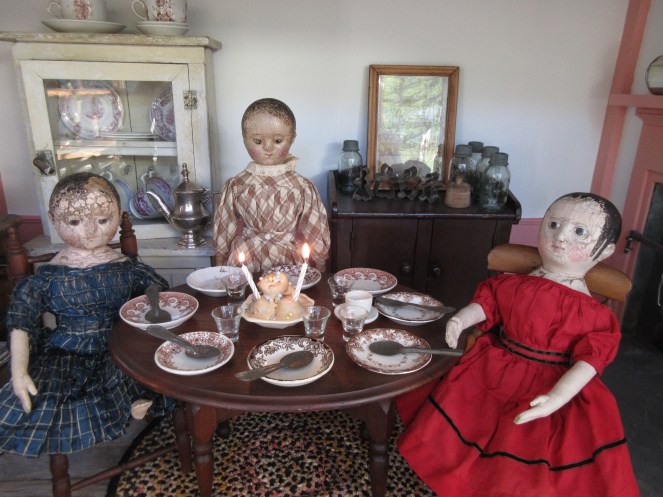
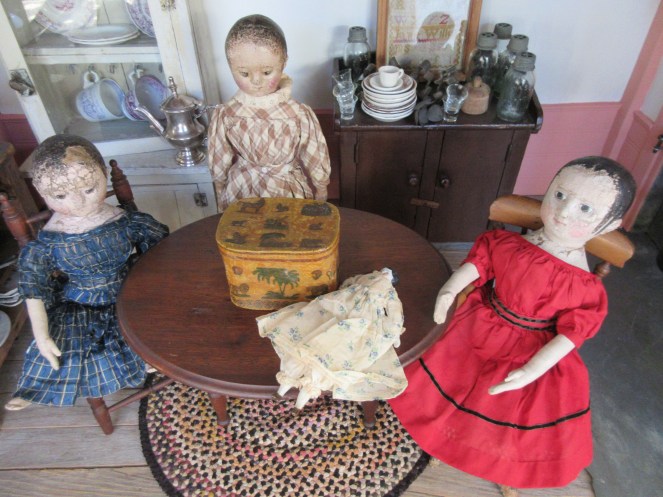
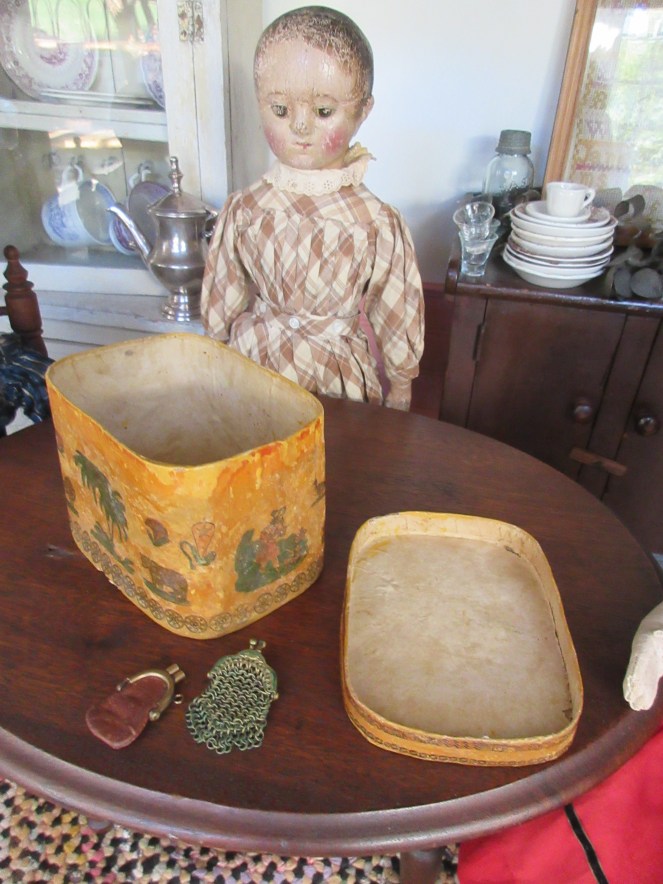
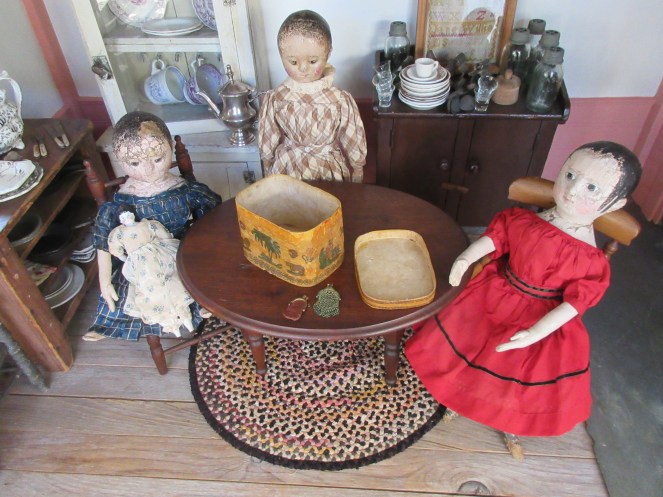
A dozen demure little Izannah Walker dolls, gathered in their parlor to mark the 200th anniversary of their creator birth.Lily, Ismay, Isabeau and little IzzybelleWe were thrilled to have such wonderful friends come spend the day with us ❤The dolls had a lovely afternoon chatting, reminiscing, and playing games.The smallest girls were in charge of scooping out the ice cream and making sure everyone got their fair share ❤Make a wish! ❤Now that the ice cream has been eaten it is time for presents!The dolls received a wonderful decoupaged band box to keep their treasures in…… the lovely china doll was a gift from their dearest friend Peggy ❤
… and what was my present on this wonderful day? Why the very best present of all! I got to spend the day with you and a dozen little dolls that bring me a deep sense of contentment, quite joy, and continuing wonder! Even better is the fact that tomorrow, and the next day, and the next… I get to get up and spend the day studying, restoring, conserving, and reproducing these tiny pieces of history. I am very thankful for all of the interesting people I have met thus far during my Izannah journey and the wonderful friends I have made. Being a doll maker is a continuing adventure… and I can’t think of a better gift than that! ❤
Here is a birthday present from me to all of you! Directions for making a classic mid- 19th century dress for your Izannah Walker doll. I based the directions on several antique children’s dresses in my collection. I hope you enjoy making this dress for your dolls ❤ Or even better, make a larger version for a special child in your life ❤ ❤ ❤
These instructions are for your own personal use, they are copy righted by Paula Walton A Sweet Remembrance 2012 and are not to be reproduced or sold in any form.
First a bit of historical background. Izannah Walker lived and worked in a time when paper patterns, as we know them, were just coming into being. In 1863 Ebenezer Butterick a tailor from Massachusetts began making graduated and marked patterns out of paper. Folded by his wife and family and packed in boxes of 10 each, he sold these patterns to tailors and seamstresses throughout New England. These patterns proved to be very popular, possibly due to the fact that Butterick hired a staff of door-to-door traveling salesmen. Prior to this time, garments were cut without a pattern as such. There were books of diagrams available for professional seamstresses that illustrated how to cut the latest fashions. Periodicals, such as Godey’s Lady’s Book also provided color plates of the latest fashions, along with diagrams and brief instructions.
Simple basic garments, such as this dress and other children’s clothing, along with shirts, under wear, etc. were routinely sewn at home without the use of any pattern, as it was common knowledge how to make these basic necessities.
The following instructions are written following this tradition and are meant to be custom fitted to your doll. You can also use these same instructions to make full size children’s dresses by simply enlarging the widths and lengths.
*** Sewing should be done by machine, unless specifically noted.
Step 1.Cutting out the skirt. Measure from the waist of your doll down to the point where you want the bottom of the hem (This can be to the tops of her feet, or higher. If dressing your doll as an adult or young woman the skirts should be longer than if you are dressing the doll as a young child.).
Add 1/4 -1/2 inch (your choice – just remember how much you have allowed) seam allowance for the top edge, if you plan to make a gathered skirt. If you will be cartridge pleating, also known as gauging, your skirt you need to allow at least an inch to fold down at the top edge (or up to 1 – 1/2 inches).
Next determine how deep a hem you wish to make. If you are using antique fabric you may be very limited by the amount of fabric you have on hand to make your dress. Ideally I like to have at least a 2 inch hem for doll’s dresses, 3 inches is even better. When making a child’s dress you should have a hem depth that measures from 3-4 inches. Add 1/4 inch allowance to turn under on the top edge of the hem.
If you want to have growth tucks in your skirt, as shown in the sample dress above, add 1 inch per tuck for 1/2 inch tucks, or 1 – 1/2 inches per tuck for 3/4 inch tucks. For a child’s dress add 2 inches per tuck for 1 inch tucks.
Total all of your measurements. Your figures should look something like this:
skirt length – 7 inches
top seam allowance (gathered skirt) – 1/2 inch
hem – 2 – 1/2 inches
hem edge turn under allowance – 1/4 inch
two 1/2 inch growth tucks @ 1 inch each – 2 inches
total = 12 – 1/4 inches
To figure out the width of your skirt consider the width of your fabric and availability of yardage. Antique fabrics are narrow in width usually 24 – 36 inches. I generally cut my doll skirts the width of the fabric. If I am piecing together fabric to make up the width, then I try to come up with at least 20 inches. If I am gathering the skirt I don’t make it any wider than 36 inches. When cartridge pleating it’s a good idea to have a width of at least 26 inches and no wider than 38. Children’s skirts obviously will require at least two fabric widths and should measure from 38-50 inches. Now it’s finally time to carefully measure and cut out the rectangle that you will be using to make your skirt. Yeah! We’ve made it through Step 1 !!!
Step 2. Cutting out the bodice, sleeves, neck, sleeve and waist bands.
Measure the distance between the point on your doll where you want the top of the waistband to be and the point where you would like the neckline. I find that the measurement is usually about 3 inches. Add two 1/4 inch seam allowances, one for the top edge and another for the bottom edge (if you feel more comfortable sewing with a 1/2 inch seam allowance you may increase the bottom allowance to 1/2 inch – the top seam allowance has to be 1/4 inch). To determine how wide, from side to side,your bodice needs to be, measure around the widest point of your doll’s shoulders and multiply that measurement by 2. This will be the minimum width, you may add on a bit more if you like particularly full bodices.
To cut out the sleeves, measure from the neckline, down the arm to the length you would like the sleeves. The width of each sleeve is calculated by measuring from the neckline, down under the arm and back up to the neckline, then adding on enough to bring the fabric up over the shoulder and add in extra fullness for the gathers. The strip of fabric that I cut for the sleeves of the sample dress, above, was greater from top to bottom than the strip for the bodice.
Neck and sleeve bands are 1 inch by the total shoulder measurement of the doll (at the widest point), plus the circumference of the doll’s upper arm x 2, plus at least 2 inches for seam allowances and finishing.
The waistband is 1-1/4 inch for 1/4 waist seam allowances or 1 – 3/4 inches for 1/2 inch waist seam allowances by twice the doll’s waist measurement, plus an extra 1 – 1/2 inch for seam allowances and finishing.
Double check your measurements and addition, then cut out your fabric.
Step 3. Constructing the skirt.
sewing the growth tuck
sewing growth tuck
press tuck towards the hem
completed skirt w/two growth tucks
Sew the center back seam of the skirt, leaving 3-4 inches open at the top edge. Turn the raw edges of the center back skirt opening under a scant 1/4 twice and sew down. Sew a double row of gathering threads around the top edge. Press the back seam to one side: turn up the raw bottom edge 1/4 inch and press. Decide on the placement of your growth tuck or tucks (if you are incorporating them in your dress). Measure for the first tuck, fold the skirt at that point and pin in place. Stitch around the skirt either 1/2 inch or 3/4 of an inch away from the folded edge (remember that you had to choose between 1/2 inch and 3/4 inch tucks when you cut out your skirt). Press the tuck down. Make the second tuck in the same manner. Turn up the hem and stitch in place, being careful not to catch the tucks in the hem.
Step 4. Making the bodice.
Take the strip of fabric that you cut for the bodice, fold it in half at the center front, then fold it in half a second time to determine where the arm holes will be. Cut “U” shaped armholes on the second fold, through all thicknesses, starting at the neckline edge and going about half way down to the waist edge.
You can check exactly how far you need to go by measuring the fabric strip up against the shoulder of your doll. The arm hole should be deep enough to allow the sewn on arm to move freely.
Turn under the center back edges of the bodice a scant 1/4 inch to the wrong side of the fabric. Press in place. Turn under again 1/2 inch towards the back side. Stitch in place to hem.
Next take the strip of fabric that you cut for the sleeves. If you haven’t already done so, cut it in half, so that you have two equal parts – one for each sleeve. Sew the short ends of the sleeve together to form a tube. Repeat for the second sleeve.
Sew two rows of gathering threads around the bottom edge of each sleeve.
Sew one sleeve to the bodice, matching the sleeve seam to the center of the bottom rounded part of the “U”. Repeat with the the second sleeve. The top of the sleeve goes up past the neckline edge of the bodice. Not all of the sleeve is sewn to the armhole!!!
Sew two rows of gathering threads along the neckline edge, including the tops of the sleeves.
Sew two rows of gathering threads along the waist edge of the bodice.
Step 5. The waistband.
Cut the strip for the waistband in half, so that you have two pieces of equal length. Mark the center of the bodice waist edge and the center of one of your waistbands.
Draw up the gathering threads on the waist edge of the bodice to the exact measurement of your dolls waist and tie off. Adjust the gathers so that you have more fullness in the center front, less under the arms and more in the back. Leave an area of less full gathers 1/2 inch or so to either side of the center back opening.
Pin the center front of the bodice to the center front of the waistband. The waistband should extend 3/8th of an inch beyond the bodice on either side. Stitch the waistband to the bodice.
Mark the center front of the skirt waist edge. Draw up the gathering threads on the skirt to the exact waist measurement of the doll’s waist and tie off. Adjust gathers evenly. Pin the center front of the waistband to the center front of the skirt. Sew waistband/bodice to skirt (remembering that the center back edges of the waistband will extend beyond the skirt 3/8ths of an inch).
Turn the ends of the waistband to the inside, so that they are even with the hemmed center back edges of the bodice and skirt. Take your waistband lining and press the short ends under 3/8ths of an inch to the wrong side of the fabric and press under 1/4 inch along each long edge. Pin in place on the inside of the waistband of the dress, making sure the lining coves all of the raw edges and seams. Hand-stitch in place, leaving the center back edges open. Make a row of stitching 1/4 inch away from the seam lines along each long edge of the waistband (this is like topstitching). Run lengths of 1/8th inch wide cotton tape through the casings formed by this stitching. The tape should be long enough to tie into bows.
I lined this waistband in a lighter color fabric, which allows you to see the stitching better.
Step 6. Neck and sleeve bands.
Try the dress on your doll over her chemise.
Mark the center front of the bodice neck edge. Draw up the gathering threads at the neckline, so that the back of the dress meets and overlaps a scant 1/8th of an inch. Tie off the threads. Adjust gathers.
Draw up the gathering threads on each sleeve until they fit snugly, but not too tight around the doll’s arms. Tie off the gathering threads. Adjust the gathers.
Measure and cut a length of neckband the length of the gathered neckline plus 3/4 of an inch (3/8ths of an inch for finishing each side). Press under a scant 1/4 inch one long edge of the neckband. Mark the center of the neckband. Pin the center of the unturned edge of the neckband to the center front of the bodice neckline. Sew neckband to bodice, the neckband will extend 3/8th of an inch beyond the bodice on each side of the center back of the bodice. Turn the 3/8th inch finishing allowance in and finger press in place. Turn the pressed under edge of the neck band to the back side of the dress. Hand stitch in place, leaving the ends of the neckband open. Run a piece of 1/8th inch cotton tape through the casing formed by the neck band. The cotton tape should be long enough to tie into a bow.
Measure and cut two armbands the length of the bottom gathered edge of the sleeves plus 1/2 inch for seam allowances (1/4 inch seams). Turn under one long edge of each sleeve band a scant 1/4 inch towards the back side of the fabric. Stitch the narrow edges of the sleeve bands together. Hand-stitch each sleeve band, along the unpressed edge, to the the gathered lower edge of the sleeves. Turn the pressed under edge up to the back side of the sleeve so that it covers the gathered edge and hand-stitch in place to form 1/4 inch finished sleeve bands.
Hints.
-I like to wash and hang dry my finished dresses, so that the gathers fall into place and dry.
-If you wish to fasten the back of your dress with buttons, rather than ties, make sure that you add on enough of an allowance for the neck band and waistband to overlap at least 1/2 an inch.
-You can make several other sleeve styles for this dress to vary it’s appearance.
-To see a selection of appropriate fabrics check out these two blog posts.
Don’t let the length of these instructions put you off! This is actually a simple dress 🙂 When I make this style of dress I don’t even jot down measurements or calculations. I just measure and cut as I go. After you make a few you will find them easy to do!
SOLD I have four new dolls to introduce to you today. All of them are based on some of Izannah’s earlier dolls. I’m trying something new today! I want you to feel like you have actually come to the studio to visit and enjoy the doll’s birthday party for Izannah, so the descriptions and information about the dolls are on the following videos ❤ I may sound just a bit ditsy and scatterbrained, not to mention out of breath! Please excuse me…. I’ve been sick all week…. don’t worry though I will absolutely sanitize the dolls and their accessories before packing to ship. I’d hate for anyone else to catch my cold!
All dolls sold on a first come basis. Email me at paula@asweetremembrance.com if you are interested in buying one of these dolls. Free shipping within the U.S. exact postage to other countries. Payment via Paypal, credit card, personal check , plus as always lay-away is an option.
Doll 1 – SOLD 22.5 “Early Izannah” $2225.00 Comes with bare feet, leather shoes, silk stockings, 2 antique petticoats, antique pantalettes, chemise, antique wool jacket + Birthday tote bag.
Doll 2 – SOLD 22.5 “Early Izannah” $1925.00 Comes with bare feet, leather shoes, silk stockings, 1 antique dress, 2 antique petticoats, antique pantalettes, chemise + Birthday t-shirt.
Doll 3 – SOLD “Hannah” $1475.00 Comes with bare feet, leather shoes, silk stockings, antique dress, 1 antique petticoat, antique pantaletts, chemise, pinafore apron + Birthday t-shirt.
Doll 4 – SOLD “Hannah” $1375.00 Comes with bare feet, leather shoes, silk stockings, dress, 1 antique petticoat, pantaletts, chemise, + Birthday t-shirt.
Extra Birthday Goodies
Doll 1 comes with an Izannah Tote Bag and Dolls 2, 3, & 4 come with Izannah t-shirts ❤
Antique Doll Trunk for either Doll 1 or Doll 2 – $100.00.
UPDATE!– My “New Dolls Video” won’t load on wordpress at all, so I am loading it on YouTube… However YouTube is saying that the video is only 8% loaded and that it is still going to be over an hour until it is uploaded!!!! SO – New Dolls will be posted at 2:00 Eastern Time.
I had this great? idea to do the new dolls for sale as a video…. the problem with that is that I’m having an issue with word press loading the videos… so stay tuned – I’ll get post 3 up as soon as I can fix the issue! So Sorry!!!!!
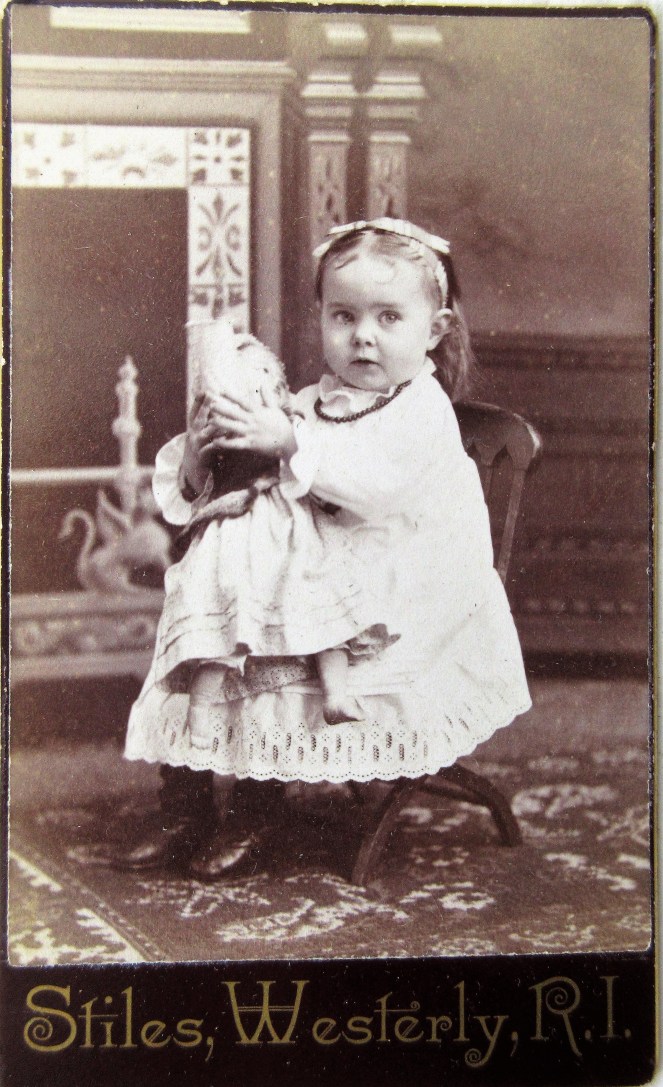
Carte de visite of Sarah Alice Langworthy age 22 months, December, 1884. Sarah was born in February, 1883 in Westerly, RI. She died in January, 1887. This is an example of a child holding an Izannah Walker doll that is much older than the child. Sarah was born 10 years after Izannah Walker received her patent. Although it is a bit difficult to make out, the doll in the photograph is a pre-patent Izannah Walker doll. Collection of Paula Walton.
I am privileged to own one period photograph of a child holding an Izannah Walker doll. It is a carte de visite of Sarah Alice Langworthy age 22 months, taken during December, 1884. Sarah was born in February of 1883 in Westerly, RI, 10 years after Izannah Walker received her patent. Sarah Alice died in January, 1887.
Fortunately the back of the carte de visite has Sarah’s name, her age, and the date written on it. That information along with the location of the photographer printed on the front of the image allowed me to search for Sarah Alice. It took me several hours of research to find the record of her birth and death… In my heart I had been hoping that I would find out that Sarah Alice had married, borne a houseful of children, and lived a long life. It would have been lovely to imagine that the doll Sarah Alice was holding so tightly in her photograph was a family doll, that might have been passed down to her own children… There is no way of knowing if the Izannah Walker doll that Sarah Alice is holding once belonged to her mother or other family member… or if it was a prop belonging to the photographer, meant to entertain children and help them sit still…
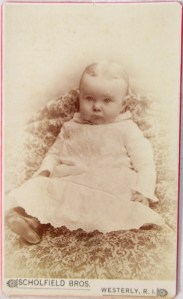
Nathan Loveland Langworthy, born September 7,1885, 8 months old.Sarah Alice Langworthy, nine months old.
In memory of Sarah Alice, Cloe and I attempted to recreate her carte de visite. We were not entirely successful, as the lure of actually playing with a doll is so much more enticing to a two year old, than merely sitting demurely in a chair. I hope Sarah Alice had many similar days filled with love, and the unconditional joy of a child playing with her favorite doll. ❤
More birthday fun coming your way at 2:00, 4:00 & 6:00 p.m. Eastern time. My New Dolls will be posted at 2:00 p.m., which is later than my previously stated time of noon… I’ve had a few technical difficulties with my video! Sorry!!!
Remember this? I invited you all to email me a short birthday message along with a photograph of your Izannah Walker doll – antique originals, reproduction dolls that I have made for you, or a doll that you have made yourself in tribute to Izannah’s dolls!
I hope you will enjoy looking through these heartfelt birthday greetings as much as I have!
Everyone who sent in a birthday message had their name put into a hat. The dolls and I shook up all the names and drew out one first place winner, who will receive a special package full of birthday goodies, and two runners up, who will be sent party favors! … and the winners are –
1st Prize – Linnie N.!
Party Favors – Tricia S. and Liz Holmes!
I added a Special Makers Award, so both Charlotte and Susie are getting prizes just because their birthday greetings took so much time and effort on their part! ❤
You may click on any photograph to enlarge it and read the birthday greetings ❤
Young girl with Izannah Walker doll. ca 1863Young girl with Izannah Walker doll by Paula Walton, ca 2017
“TIMELESS”
“Happy Birthday, Izannah Walker,” and
“Thank You, Paula Walton!”
From Mary & Pauline “Here is Miss Pauline wishing a great big birthday wish to her maker!”
Here is Miss Pauline wishing a great big birthday wish to her maker. Mary (you’ll want to click to enlarge these, Miss Pauline is a lovely original Izannah Walker doll ❤ )
Happy Birthday Izannah!
Many years separate us but you are such an inspiration to so many. Happy Birthday Izannah. Judith Jaques
Many years separate us but you are such an inspiration to so many. Happy Birthday Izannah. Judith Jaques
HAPPY 200TH BIRTHDAY IZANNAH WALKER!!!!! WE LOVE YOU!!!! LIZ HOLMES
Happy Birthday Izannah Walker 200 yrs.! Linnie N.
Happy Birthday Izannah Walker 200 yrs. Linnie N.
Izannah Walker dolls are the embodiment of home comfort and tranquility, they remember the warmth of children’s hands. Such dolls were made for the game and remember the faces of little girls from distant times. Besides dolls, I really love cats. This is my passion too. A cat is a symbol of a home. And I wanted to make a doll in the shape of a cat and with the character of Izannah Walker dolls. So my cat-doll is so important to me. It’s this doll I dedicate to Izannah Frankford Walker. I also want to say a big thank you from all my heart for your classes, for your support and help. Svetlana
This doll I dedicate to Izannah Frankford Walker. Svetlana
Happy 200th birthday Izannah Walker! What joy your dolls have brought to all of us! Billie A.
Happy 200th birthday Izannah Walker! What joy your dolls have brought to all of us! Billie A.
Happy 200th birthday Izannah Walker! What joy your dolls have brought to all of us!
Billie A.
Dear Izannah, I have your birthday cake on the table and an empty seat waiting for you to arrive at your party! Happy 200th Birthday! Judy M.
Ada , on the left , and Pearl send Birthday Greetings to Izannah, both of my wonderful dolls made by Paula Walton! Marilyn Brown
A Birthday Tale:
A Birthday Tale
A Birthday Tale:
A Birthday Tale
A Birthday Tale
A Birthday Tale
A Birthday Tale
A Birthday Tale:
A Birthday Tale:
A Birthday Tale
A Birthday Tale
A Birthday Tale:
A Birthday Tale:
A Birthday Tale:
A Birthday Tale:
A Birthday Tale:
A Birthday Tale:
A Birthday Tale:
A Birthday Tale:
A Birthday Tale
A Birthday Tale
A Birthday Tale
A Birthday Tale
A Birthday Tale:
A Birthday Tale:
A Birthday Tale
A Birthday Tale
A Birthday Tale:
A Birthday Tale
Charlotte’s Birthday Tale:
1.) Liberty has some news to share with Savannah and Annabel.
2.) Savannah seats herself on the settee while Annabel jumps up and down with excitement
3.) Liberty announces that a close relative has lost her parents in a tragic situation and must come live with them as she no longer has a home. She tells Annabel that she’s younger than her and that Annabel will have the responsibility of making their new sister at home because now Annabel will be like Savannah and herself – a big sister.
4.) Annabel ponders this over and over in her mind. No longer the little sister? I’ll be a big sister?
5.) Annabel protests this new information and asks why do things have to change? Aren’t they happy together as 3 sisters? Why a 4th.?
6.) Savannah tries to explain this to her woolly headed little sister, but gives up and sighs!
7.) Annabel runs over to her favourite chair and sobs her little heart out. Why can’t she stay the youngest? Who could Savannah and Liberty love that much. Now she’d
have share her room and clothes… She was having none of it…
8.) In walks a guest…
9.) She curtsies and says she is the relative that had sent a message ahead to announce her arrival and hopes she hasn’t interrupted their afternoon tea.
10.) Savannah and Annabel get up and curtsy.
11.) Annabel’s curiosity gets the better of her and she shyly introduces herself to the newest member of the household.
12.) Annabel couldn’t believe that this finely dressed, sweet little girl was going to live with them. She was instantly smitten with a motherly affection and wished to make newcomer feel at home. How could she have doubted Liberty’s wisdom.
13.) “What is your name”, Annabel inquired.
14.) The shy little girl whispered, “Patience”
15.) We are so glad you’re here and welcome to our home” said Annabel
16.) Annabel immediately asked Patience to sit down and join them for tea.
17.) Patience appeared to all the most modest and well bred little lady. (Annabel couldn’t wait till she and Patience would be alone, to ask Patience if she could try on her clothes.)
18.) As soon as they sat at the tea table, they noticed Patience was tired from her long journey as she soon let down her guard and slumped sleepily in her seat.
19.) To aid Patience and to help make her feel at home, Annabel immediately imitated her posture.
20.) Liberty walked into the room with a lit Birthday cake. “Make a wish, Patience. It’s your birthday and we are so happy to have you become a part of our family”.
21.) Patience looked at everyone and then stared at the cake. What to wish for? “A family to love me”, she thought to herself. ” Will I be able to stay?”
22.) After they sang – as if everyone was reading her mind, Liberty turned to Patience and said, “Welcome home, Patience. You are part of us now. We will always be four sisters now.”
23.) Patience felt like she was dreaming. Really, a forever home!
24.) She held her head up high and whispered, I’m home.
25.) Annabel looked fondly at Patience and thought about all the fun and mischief they would get into… it is going to be Great being a big sister!
26.) The End.
Happy 200th. Birthday Izannah Walker!
This is Lila Rose who is named after the real Lila pictured below. Lila was my cloth doll mentor and I purchased this IW from Lila. She came with the hand made collar and pin, extra gifts from my sweet friend. Lila Rose and I live in Mexico and she is a good traveler. We send our greetings for a fantastic birthday remembrance of Izannah.
This is Lila Rose who is named after the real Lila pictured below. Lila was my cloth doll mentor and I purchased this IW from Lila. She came with the hand made collar and pin, extra gifts from my sweet friend.
Lila Rose and I live in Mexico and she is a good traveler.
We send our greetings for a fantastic birthday remembrance of Izannah.
This is the sweet girl you made just about a year ago. As you can see, her name is Edith Ann (for my second great-grandmother who would have been of an age to have an Izannah doll). I’m so happy she’s come to live at my house in Southeastern Connecticut! The Izannah dolls have been a source of great fascination for me and I’m grateful for your efforts to continue the story! Happy Birthday, Izannah Walker!
Hi Paula, I am sending you a picture of my IW doll you made special for me. I cross stitched her name & year. I can not tell you how much I love this doll you made for me. Thank you for doing this Birthday bash. Looking forward to viewing all the pictures.
Hi Paula,
I am sending you a picture of my IW doll you made special for me. I cross stitched her name & year. I can not tell you how much I love this doll you made for me.
Thank you for doing this Birthday bash. Looking forward to viewing all the pictures.
Annabelle May is sending greetings to you Paula, and all Izannah’s wherever they may be! She is dreaming of all the girls that have been made since the birth of Izannah Walker in 1817. She is in a very contemplative mode today, she would like to give all Izannah’s and their mammon’s a big hug to celebrate the 200th anniversary of their creators birth.
Annabelle May is sending greetings to you Paula, and all Izannah’s wherever they may be!
She is dreaming of all the girls that have been made since the birth of Izannah Walker in 1817. She is in a very contemplative mode today, she would like to give all Izannah’s and their mammon’s a big hug to celebrate the 200th anniversary of their creators birth.
Dear Paula, Thank you very much for my beautiful new blue clothes. They are easy to get into, so I can dress myself, and are very comfortable, but the best thing of all is the pocket — I’ve never had a pocket before. It is ever so clever for keeping one’s prized possessions close at hand.A spring bouquet of tiny native orchids from my garden for Izannah to enjoy with her celebrations. No doubt all the little Izannahs are anticipating a wonderful day. I look forward to enjoying it with them. Susan
Dear Izannah: Happy Happy Birthday. May it be a day filled with joy, laughter and rays of sunshine. I am having trouble chosing a dress to wear . Please save a crumb of your cake for me. Oh yes, my sister Elizabeth (she is much older than me) wishes to send greetings also. With much love, Mayla
Dear Izannah: Happy Happy Birthday. May it be a day filled with joy, laughter and rays of sunshine. I am having trouble choosing a dress to wear . Please save a crumb of your cake for me. Oh yes, my sister Elizabeth (she is much older than me) wishes to send greetings also.
With much love, Mayla
Happy Birthday!
Happy Birthday!
Dear Izannah, Congratulations on the 200th anniversary! We send you hugs and love from Russia!
Dear Izannah, Congratulations on the 200th anniversary! We send you hugs and love from Russia!
200 year greetings,
from a far distant land,
to a talented lady
who made dolls by hand.
Thank you Izannah
for your iconic toy,
recreating it’s likeness,
has brought nothing but joy.
HAPPY BIRTHDAY
My sincere thanks to all of you who participated in my birthday greetings project!!! I had so much fun putting this together and I hope everyone reading this has enjoyed it to!
Come back to visit here on www.izannahwalker.com today at 10:00, 2:00 – when my latest reproduction dolls will be posted, 4:00 & 6:00 Eastern Time for the rest of today’s festivities. ❤
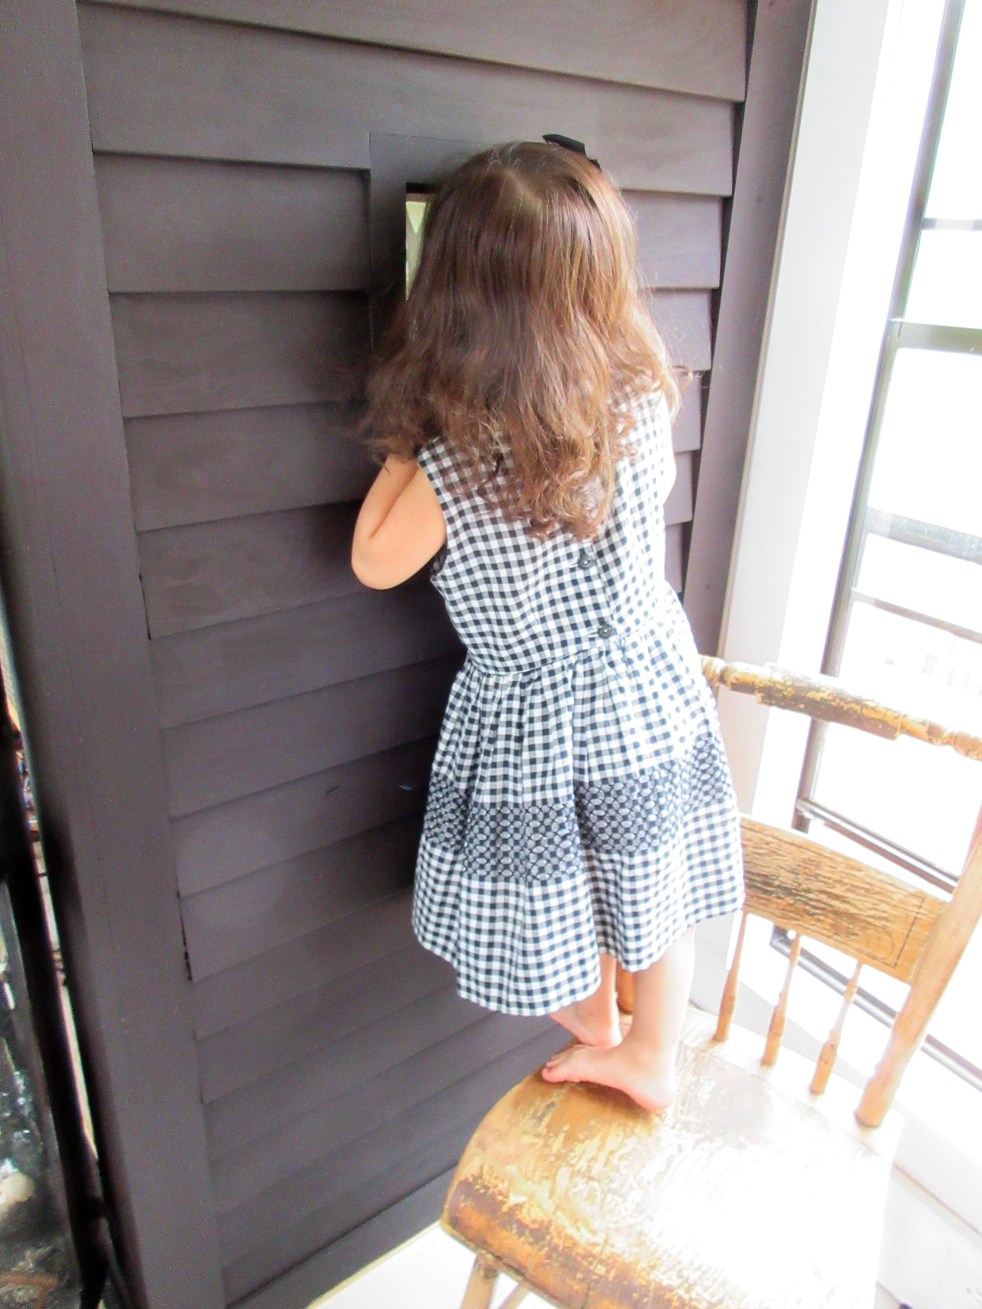
Someone just can’t wait until Monday… she’s peeking in the window to see what all the little dolls are planning for the party! Come back to visit on 9/25 and you can see just what they’ve been up to, as the dolls and I celebrate Izannah Walker’s 200th birthday!
I’ll be posting all day long on Monday, September 25th, as my dolls and I enjoy the party that the dolls have been working on ❤The first of the new dolls that I am making especially to celebrate Izannah’s legacy will be making their debut appearance at 12:00 noon, eastern time on 9/25/17, with more to follow… The first party post will be at 1:00 a.m. Monday morning!
“If only I were just a little taller, I could climb into the parlor and hear what party surprises the dolls are whispering to each other!”


 Ismay – $1000.00 – Special Birthday Pricing! $800.00 – You have one custom option on this doll, I can paint a stripe of any color you request at the top edge of her boots.
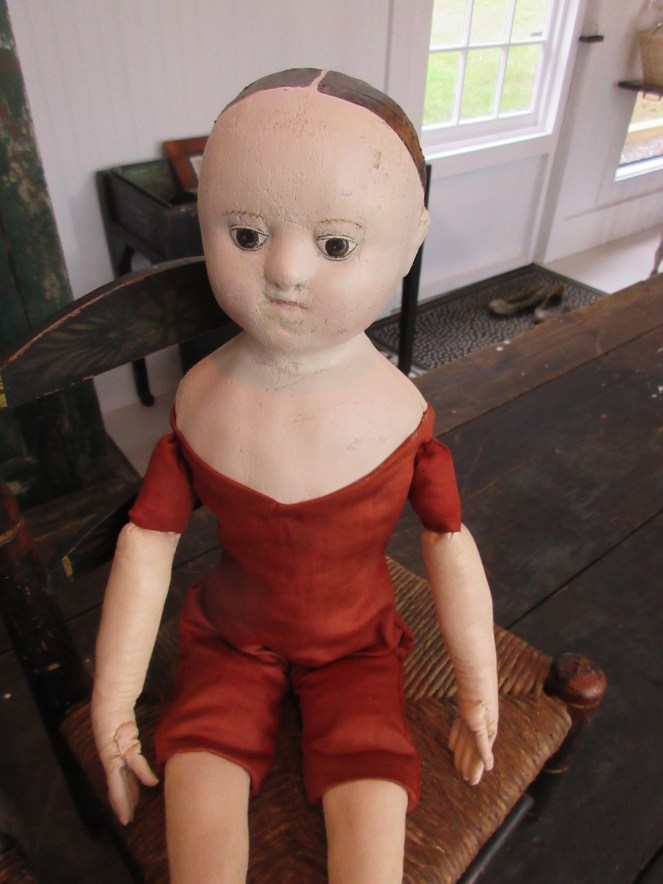


Step 2. Cutting out the bodice, sleeves, neck, sleeve and waist bands.
Measure the distance between the point on your doll where you want the top of the waistband to be and the point where you would like the neckline. I find that the measurement is usually about 3 inches. Add two 1/4 inch seam allowances, one for the top edge and another for the bottom edge (if you feel more comfortable sewing with a 1/2 inch seam allowance you may increase the bottom allowance to 1/2 inch – the top seam allowance has to be 1/4 inch). To determine how wide, from side to side,your bodice needs to be, measure around the widest point of your doll’s shoulders and multiply that measurement by 2. This will be the minimum width, you may add on a bit more if you like particularly full bodices.
To cut out the sleeves, measure from the neckline, down the arm to the length you would like the sleeves. The width of each sleeve is calculated by measuring from the neckline, down under the arm and back up to the neckline, then adding on enough to bring the fabric up over the shoulder and add in extra fullness for the gathers. The strip of fabric that I cut for the sleeves of the sample dress, above, was greater from top to bottom than the strip for the bodice.
Neck and sleeve bands are 1 inch by the total shoulder measurement of the doll (at the widest point), plus the circumference of the doll’s upper arm x 2, plus at least 2 inches for seam allowances and finishing.
The waistband is 1-1/4 inch for 1/4 waist seam allowances or 1 – 3/4 inches for 1/2 inch waist seam allowances by twice the doll’s waist measurement, plus an extra 1 – 1/2 inch for seam allowances and finishing.
Double check your measurements and addition, then cut out your fabric.
Step 3. Constructing the skirt.
Sew the center back seam of the skirt, leaving 3-4 inches open at the top edge. Turn the raw edges of the center back skirt opening under a scant 1/4 twice and sew down. Sew a double row of gathering threads around the top edge. Press the back seam to one side: turn up the raw bottom edge 1/4 inch and press. Decide on the placement of your growth tuck or tucks (if you are incorporating them in your dress). Measure for the first tuck, fold the skirt at that point and pin in place. Stitch around the skirt either 1/2 inch or 3/4 of an inch away from the folded edge (remember that you had to choose between 1/2 inch and 3/4 inch tucks when you cut out your skirt). Press the tuck down. Make the second tuck in the same manner. Turn up the hem and stitch in place, being careful not to catch the tucks in the hem.
Step 4. Making the bodice.
Take the strip of fabric that you cut for the bodice, fold it in half at the center front, then fold it in half a second time to determine where the arm holes will be. Cut “U” shaped armholes on the second fold, through all thicknesses, starting at the neckline edge and going about half way down to the waist edge.
You can check exactly how far you need to go by measuring the fabric strip up against the shoulder of your doll. The arm hole should be deep enough to allow the sewn on arm to move freely.
Turn under the center back edges of the bodice a scant 1/4 inch to the wrong side of the fabric. Press in place. Turn under again 1/2 inch towards the back side. Stitch in place to hem.
Next take the strip of fabric that you cut for the sleeves. If you haven’t already done so, cut it in half, so that you have two equal parts – one for each sleeve. Sew the short ends of the sleeve together to form a tube. Repeat for the second sleeve.
Sew two rows of gathering threads around the bottom edge of each sleeve.
Sew one sleeve to the bodice, matching the sleeve seam to the center of the bottom rounded part of the “U”. Repeat with the the second sleeve. The top of the sleeve goes up past the neckline edge of the bodice. Not all of the sleeve is sewn to the armhole!!!
Sew two rows of gathering threads along the neckline edge, including the tops of the sleeves.
Sew two rows of gathering threads along the waist edge of the bodice.
Step 5. The waistband.
Cut the strip for the waistband in half, so that you have two pieces of equal length. Mark the center of the bodice waist edge and the center of one of your waistbands.
Draw up the gathering threads on the waist edge of the bodice to the exact measurement of your dolls waist and tie off. Adjust the gathers so that you have more fullness in the center front, less under the arms and more in the back. Leave an area of less full gathers 1/2 inch or so to either side of the center back opening.
Pin the center front of the bodice to the center front of the waistband. The waistband should extend 3/8th of an inch beyond the bodice on either side. Stitch the waistband to the bodice.
Mark the center front of the skirt waist edge. Draw up the gathering threads on the skirt to the exact waist measurement of the doll’s waist and tie off. Adjust gathers evenly. Pin the center front of the waistband to the center front of the skirt. Sew waistband/bodice to skirt (remembering that the center back edges of the waistband will extend beyond the skirt 3/8ths of an inch).
Turn the ends of the waistband to the inside, so that they are even with the hemmed center back edges of the bodice and skirt. Take your waistband lining and press the short ends under 3/8ths of an inch to the wrong side of the fabric and press under 1/4 inch along each long edge. Pin in place on the inside of the waistband of the dress, making sure the lining coves all of the raw edges and seams. Hand-stitch in place, leaving the center back edges open. Make a row of stitching 1/4 inch away from the seam lines along each long edge of the waistband (this is like topstitching). Run lengths of 1/8th inch wide cotton tape through the casings formed by this stitching. The tape should be long enough to tie into bows.
Step 6. Neck and sleeve bands.
Try the dress on your doll over her chemise.
Mark the center front of the bodice neck edge. Draw up the gathering threads at the neckline, so that the back of the dress meets and overlaps a scant 1/8th of an inch. Tie off the threads. Adjust gathers.
Draw up the gathering threads on each sleeve until they fit snugly, but not too tight around the doll’s arms. Tie off the gathering threads. Adjust the gathers.
Measure and cut a length of neckband the length of the gathered neckline plus 3/4 of an inch (3/8ths of an inch for finishing each side). Press under a scant 1/4 inch one long edge of the neckband. Mark the center of the neckband. Pin the center of the unturned edge of the neckband to the center front of the bodice neckline. Sew neckband to bodice, the neckband will extend 3/8th of an inch beyond the bodice on each side of the center back of the bodice. Turn the 3/8th inch finishing allowance in and finger press in place. Turn the pressed under edge of the neck band to the back side of the dress. Hand stitch in place, leaving the ends of the neckband open. Run a piece of 1/8th inch cotton tape through the casing formed by the neck band. The cotton tape should be long enough to tie into a bow.
Measure and cut two armbands the length of the bottom gathered edge of the sleeves plus 1/2 inch for seam allowances (1/4 inch seams). Turn under one long edge of each sleeve band a scant 1/4 inch towards the back side of the fabric. Stitch the narrow edges of the sleeve bands together. Hand-stitch each sleeve band, along the unpressed edge, to the the gathered lower edge of the sleeves. Turn the pressed under edge up to the back side of the sleeve so that it covers the gathered edge and hand-stitch in place to form 1/4 inch finished sleeve bands.
Hints.
-I like to wash and hang dry my finished dresses, so that the gathers fall into place and dry.
-If you wish to fasten the back of your dress with buttons, rather than ties, make sure that you add on enough of an allowance for the neck band and waistband to overlap at least 1/2 an inch.
-You can make several other sleeve styles for this dress to vary it’s appearance.
-To see a selection of appropriate fabrics check out these two blog posts.
My Current Stock of Antique Fabrics
Selecting Appropriate Fabric for Your Doll’s Dress
Don’t let the length of these instructions put you off! This is actually a simple dress 🙂 When I make this style of dress I don’t even jot down measurements or calculations. I just measure and cut as I go. After you make a few you will find them easy to do!